How To Join & Leave Groups on Roblox - Tutorial
Introduction
Navigating the dynamic world of Roblox becomes even more engaging when you become part of various groups that resonate with your interests. Whether you are an avid gamer looking to collaborate with fellow enthusiasts or seeking a platform to showcase your innovative creations, joining groups on Roblox can be a pivotal step. This concise tutorial will guide you on how to seamlessly join and leave groups on Roblox, fostering richer gaming and community experiences. Dive in to explore a realm of opportunities waiting for you in the bustling groups of Roblox. Let's get started on your journey to becoming an active member of the global Roblox community!
Joining a Group on Roblox: A Simple Guide
Embarking on your Roblox adventure begins with a few simple steps. First, launch the Roblox application and log in to your account. Your journey to community engagement begins here.
Step 1: Navigate to the Groups Section
Find the three dots icon on the left sidebar and click to unfold a new world, the "Groups" section. This space not only displays the groups you are already a member of but also presents an exciting opportunity: creating your very own Roblox group!
Step 2: Explore More Groups
Hungry for more engagement? Click on the “More Groups” option to explore an array of groups that align with your interests. From gaming clans to builders' unions, there's something for everyone. Utilize the search bar to find groups with specific focuses or themes.
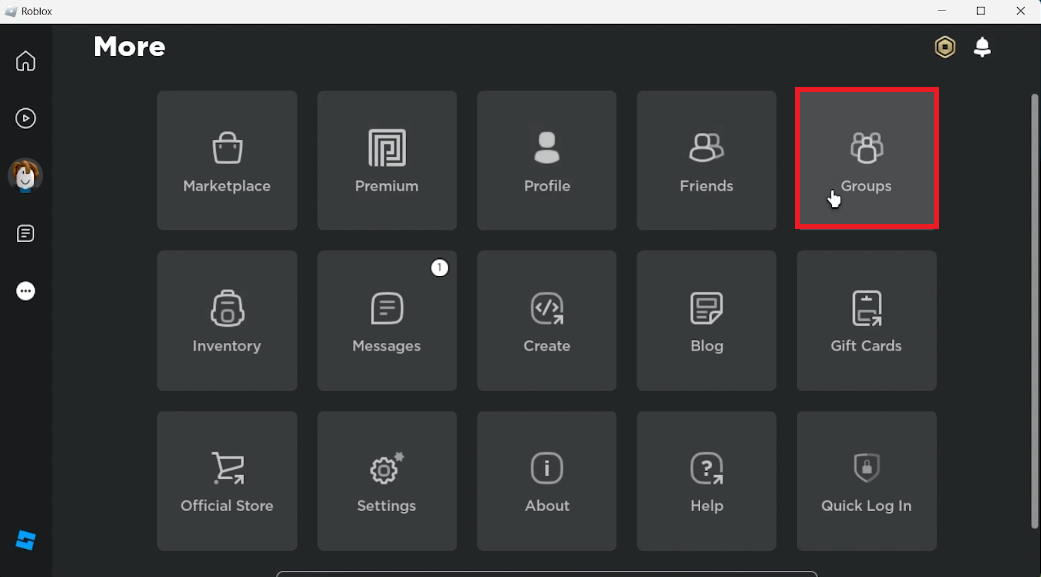
Roblox Client > More > Groups
Step 3: Joining a Group
Found a group that piques your interest? Click on it to access its information page. If you feel a connection, hit the “Join Group” button. Instant addition awaits you in public groups, while private groups require a bit of patience as your membership undergoes approval from the admin.
Join us as we delve deeper into the vibrant communities that Roblox hosts. Your gateway to a rich, interactive gaming experience is just a click away!
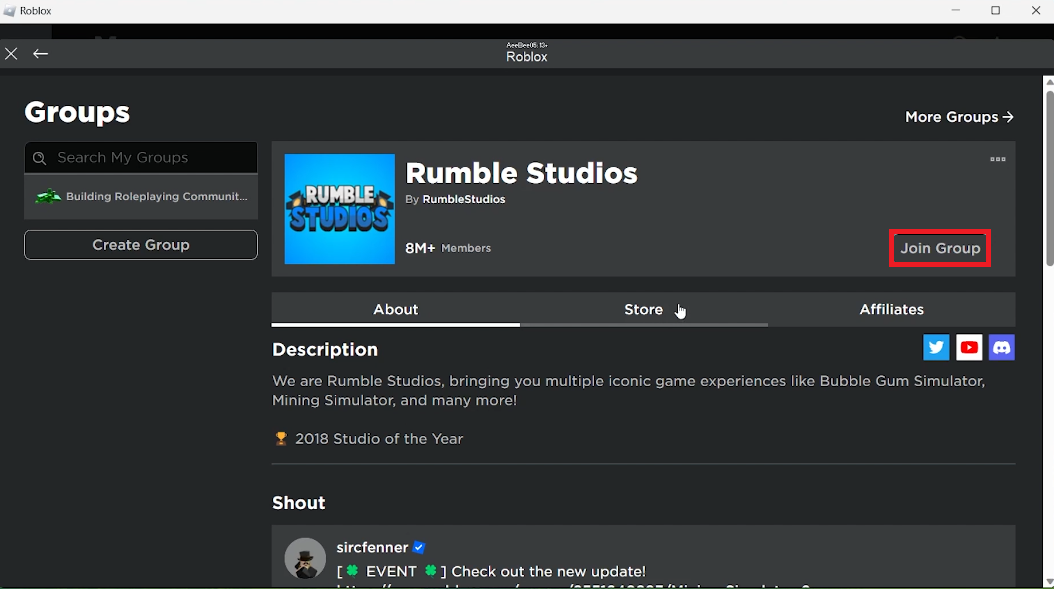
Join a Roblox group
How to Leave a Roblox Group
Sometimes, stepping away from a group is necessary to refine your Roblox experience. Here, we guide you through the effortless process to do just that:
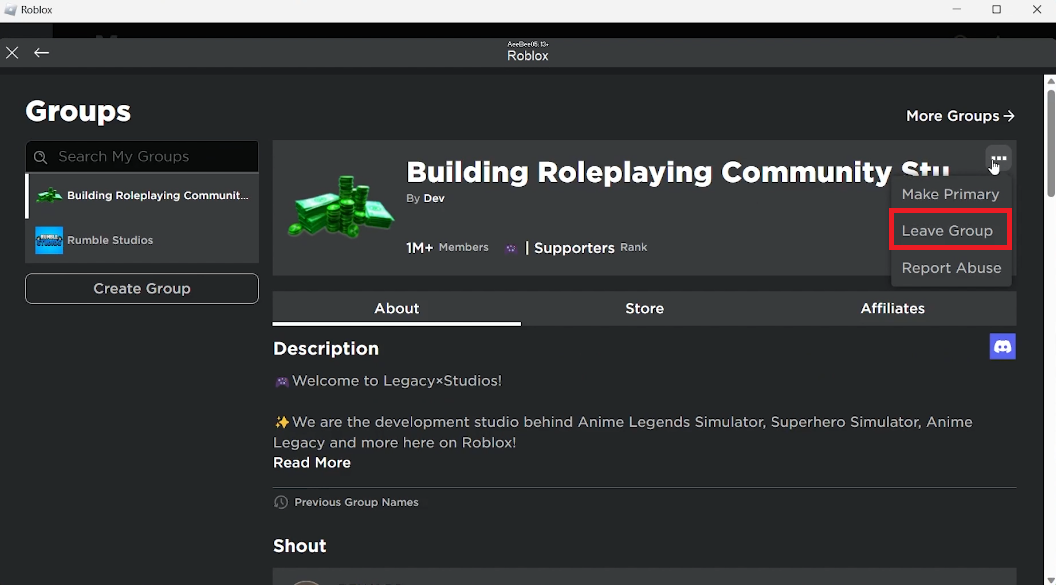
Step 1: Select Your Group
Begin by choosing the group you wish to leave from your list of joined groups. Whether it's a community that no longer aligns with your interests or a dormant group, pinpointing your choice is the first step.
Step 2: Exiting the Group
Once you've made your selection, locate the three dots icon, usually found next to the group's name. A click on this will reveal a drop-down menu brimming with options. Simply click “Leave Group” to finalize your exit.
In just two easy steps, you have successfully managed your group memberships, tailoring your Roblox journey to suit your evolving preferences.
Leave the Roblox group
-
Roblox groups are communities within the Roblox platform where users can interact, share ideas, and collaborate on projects. Joining a group can enhance your gaming experience by connecting you with like-minded individuals.
-
To find the best Roblox groups to join, utilize the search bar in the “Groups” section to explore groups based on your interests. You can filter groups by different categories to find the ones that align with your preferences.
-
Public Roblox groups are open to all users and you can join them instantly. On the other hand, private groups require admin approval for your membership request, ensuring a curated community experience.
-
Absolutely, creating your own Roblox group is an option available in the “Groups” section. This allows you to build a community around your interests and spearhead collaborative projects.
-
Managing your memberships is easy. In the “Groups” section, you can view all your joined groups, and from there, you have the option to leave any group or alter settings based on the group's permissions.