Enable Dark Mode in Roblox Studio Tutorial

Roblox Studio is a powerful platform that enables game developers to create and customize their Roblox games. However, with prolonged usage, the white user interface can cause strain on the eyes, leading to discomfort and even headaches. To counter this issue, Roblox Studio offers a "Dark Mode" feature that not only enhances the visual appeal of the platform but also reduces eye strain. This tutorial will guide you through the steps required to enable dark mode in Roblox Studio. Whether you are a seasoned developer or a novice in the field, this guide will help you optimize your experience on the platform, and make the most out of your Roblox Studio journey. So, let's dive in and learn how to enable dark mode in Roblox Studio.
Enable Dark Mode in the Roblox Studio Settings
Open up Roblox Studio and use the shortcut ALT & S to open your Studio Settings window. Alternatively, open one of your experiences and navigate to File, Studio Settings.
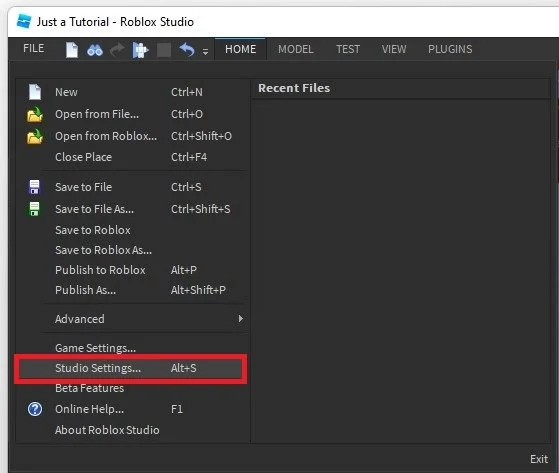
Roblox Studio > File > Studio Settings
Under Studio, scroll down, and in the General tab, change the Theme option to Dark to enable the Dark Mode. It should be set to Default if you haven’t changed it yet. Light will force the light mode on Roblox Studio, even if your operating system uses a dark theme. When closing your settings, Studio will use the selected theme.
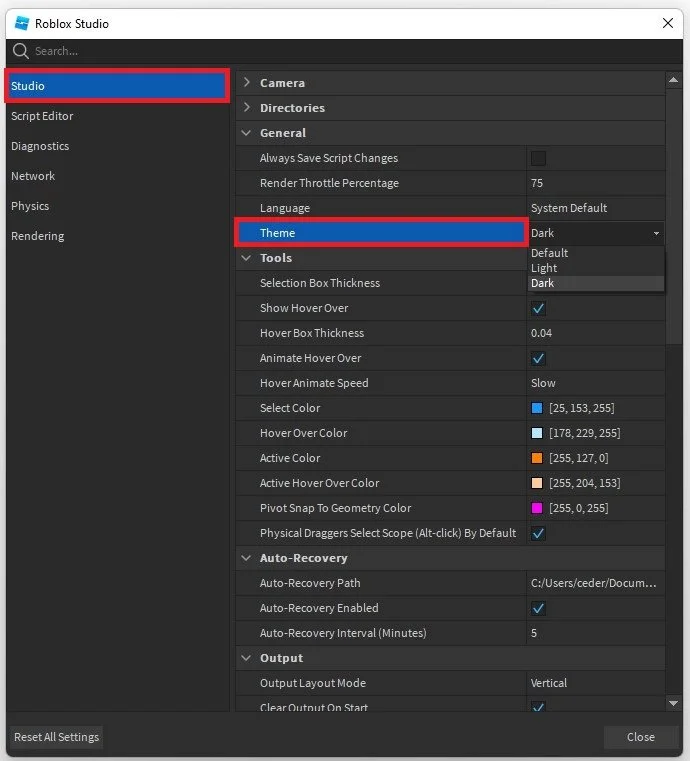
Roblox Studio > File > Studio Settings > Studio > Theme