How To Add Your Character in Roblox Studio
Roblox Studio is a popular game development platform that allows users to create and design their own games. One of the most exciting aspects of using Roblox Studio is the ability to add your own character into your game. Whether you want to create a unique avatar for yourself or design a custom character for your game, adding your character to Roblox Studio is surprisingly easy. In this article, we'll guide you through the steps to add your character in Roblox Studio, from creating your character to importing it into your game. So, whether you're a seasoned game developer or a newcomer to the platform, read on to learn how to bring your character to life in Roblox Studio.
Load your Character into Roblox Studio
Open up your experience within Roblox Studio. We will use a plugin to import your Roblox character model quickly. Ensure taht your Toolbox window is open. If this is not the case, select View in the top navigation and toggle the Toolbox window.
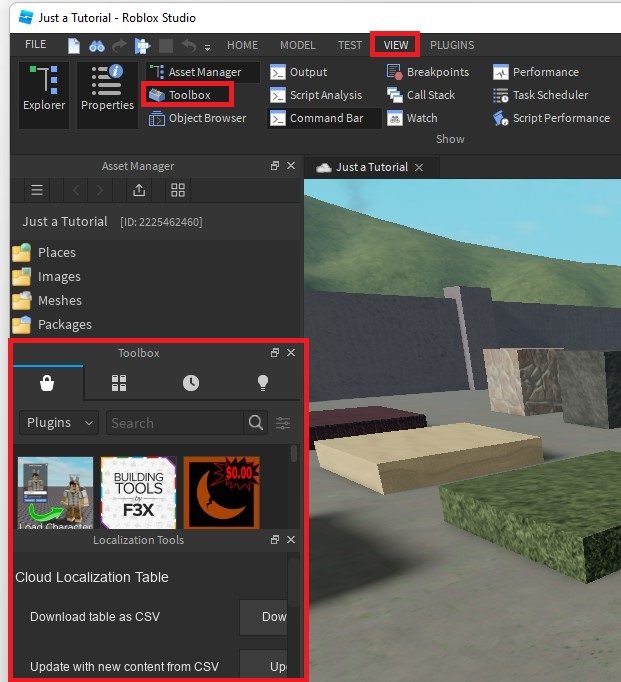
Roblox Studio > View > Toolbox
Load Character Plugin
Sort the assets by Plugins. Search for Load Character in the dialogue box. You will then be presented with some plugins in the list below. Click on the free Load Character plugin and select to install it, which should only take a few seconds to complete.
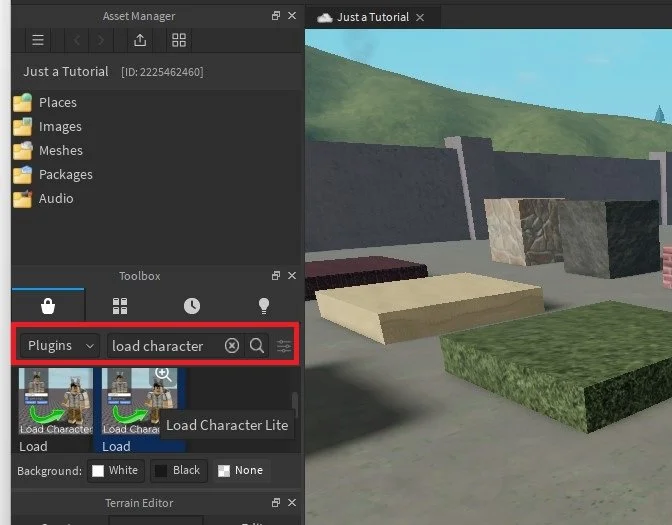
Load Character Lite plugin
Navigate to the Plugins tab in your top navigation and select the Load Character plugin. A new window will open up. Replace the AlreadyPro text with your username, and you will then be able to see your Roblox character on this window.
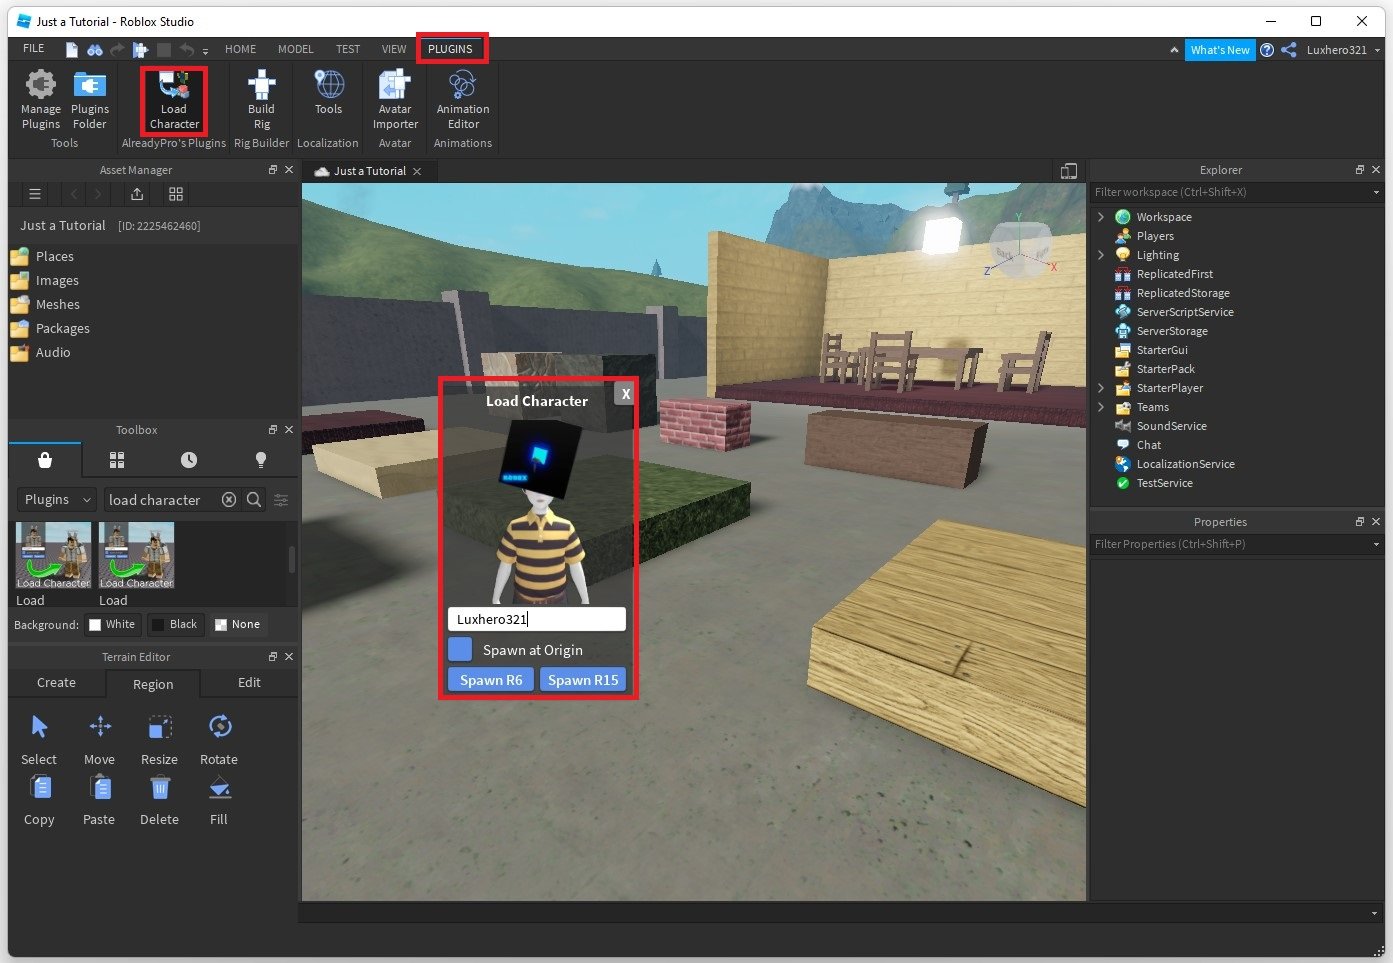
Roblox Studio > Plugins > Load Character
Spawn In, Import & Export your Character Model
Don’t check the Spawn at Origin checkbox, and below, spawn the R6 or R15 character model, depending on which one you are using. Finally, your Roblox character will be placed in your Roblox experience. You can then animate the model or change your character's scale, rotation, and other parts within Roblox Studio. You also have the option to export your model as a 3D object to alter it in other applications such as Blender.
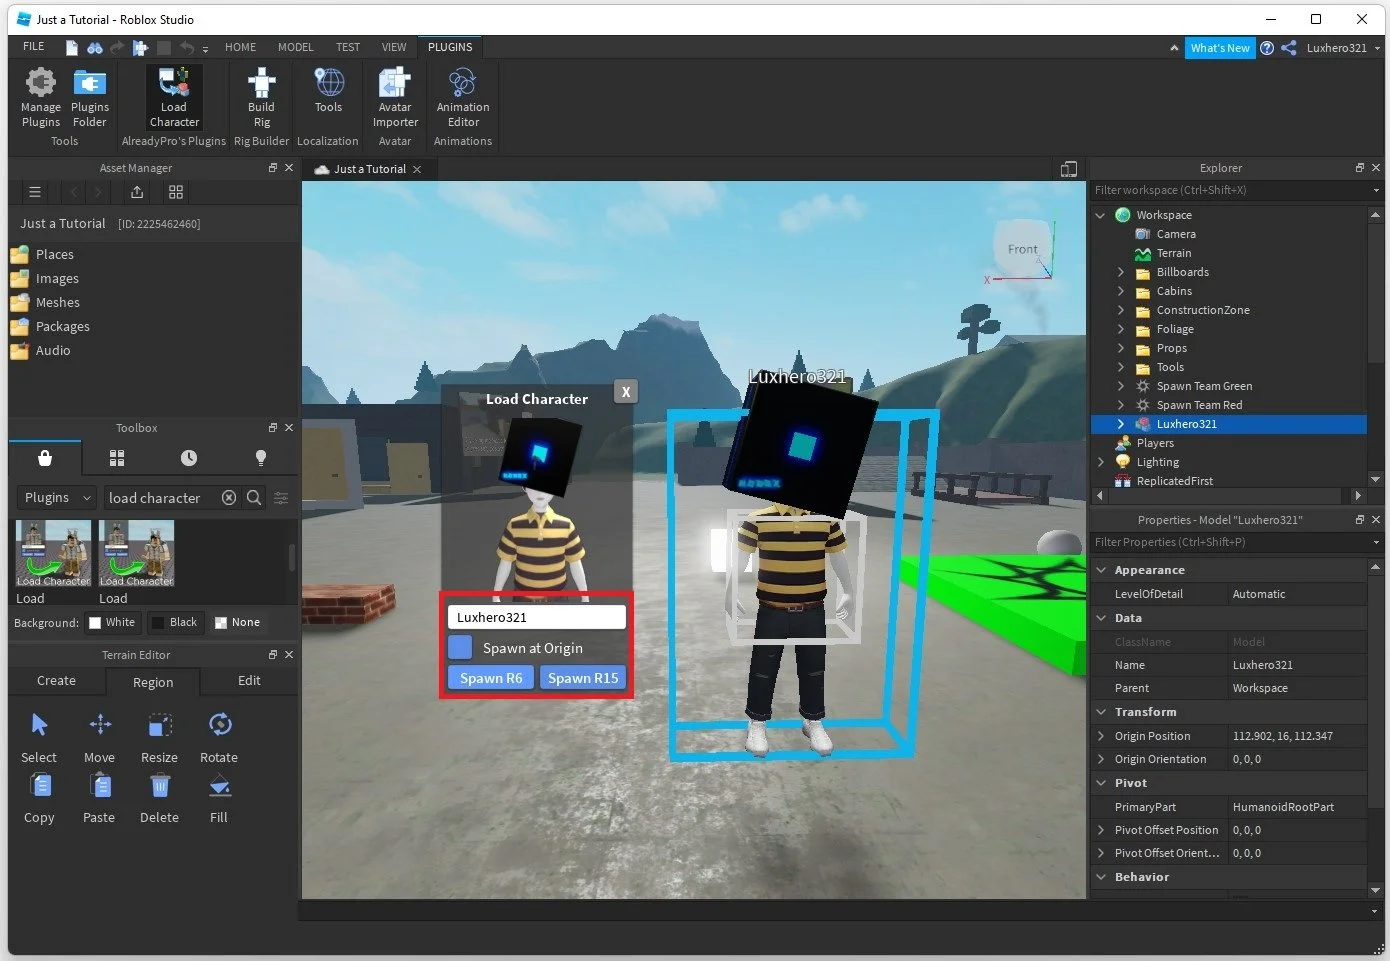
Roblox Studio - Change your Character Model
Export 3D Character Model
Ensure your Explorer window is visible. You can toggle it under the View tab.
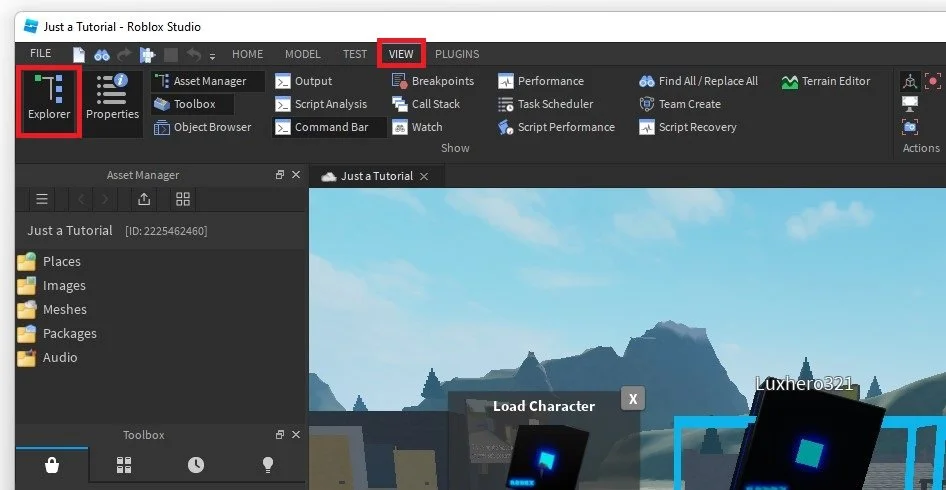
Roblox Studio > View > Explorer
Select your character model to highlight it in Explorer, and right-click the part. Lastly, click on Export Selection.
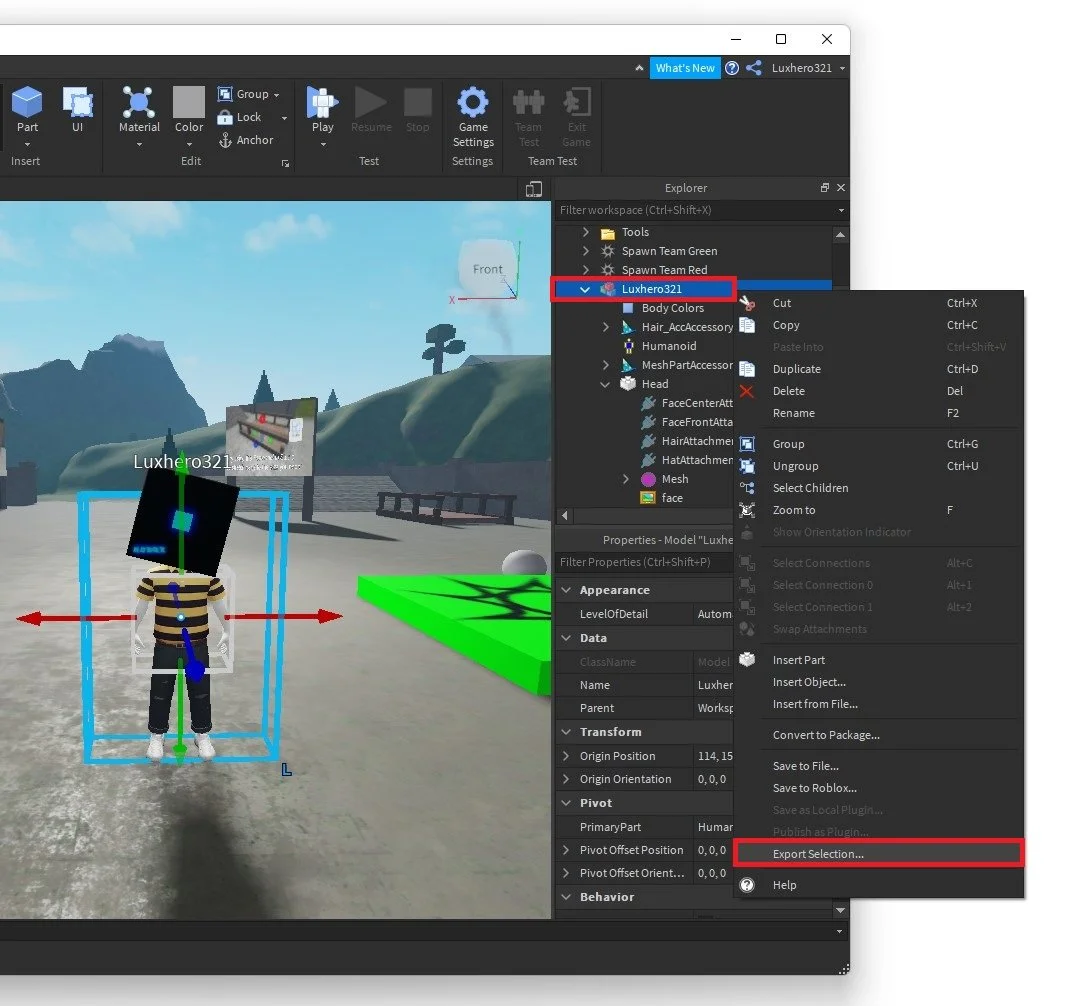
Explorer > Name > Export Selection
In your File Explorer, name the object and select a save location. Finally, this will export the 3d object file, the MTL file, and some textures, in case there are any on the model.
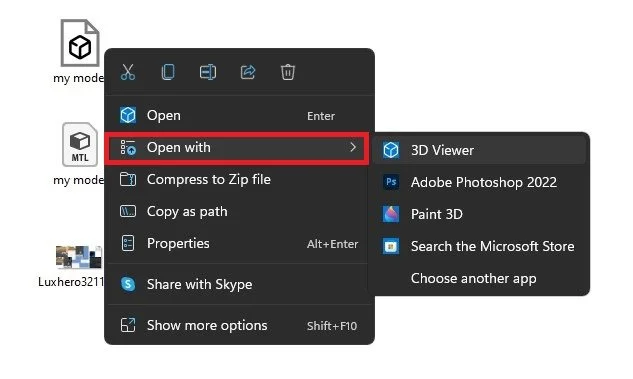
Import the file to Photoshop, Blender, or simply open it up with your Windows 3D Viewer application to quickly preview your Roblox character model.
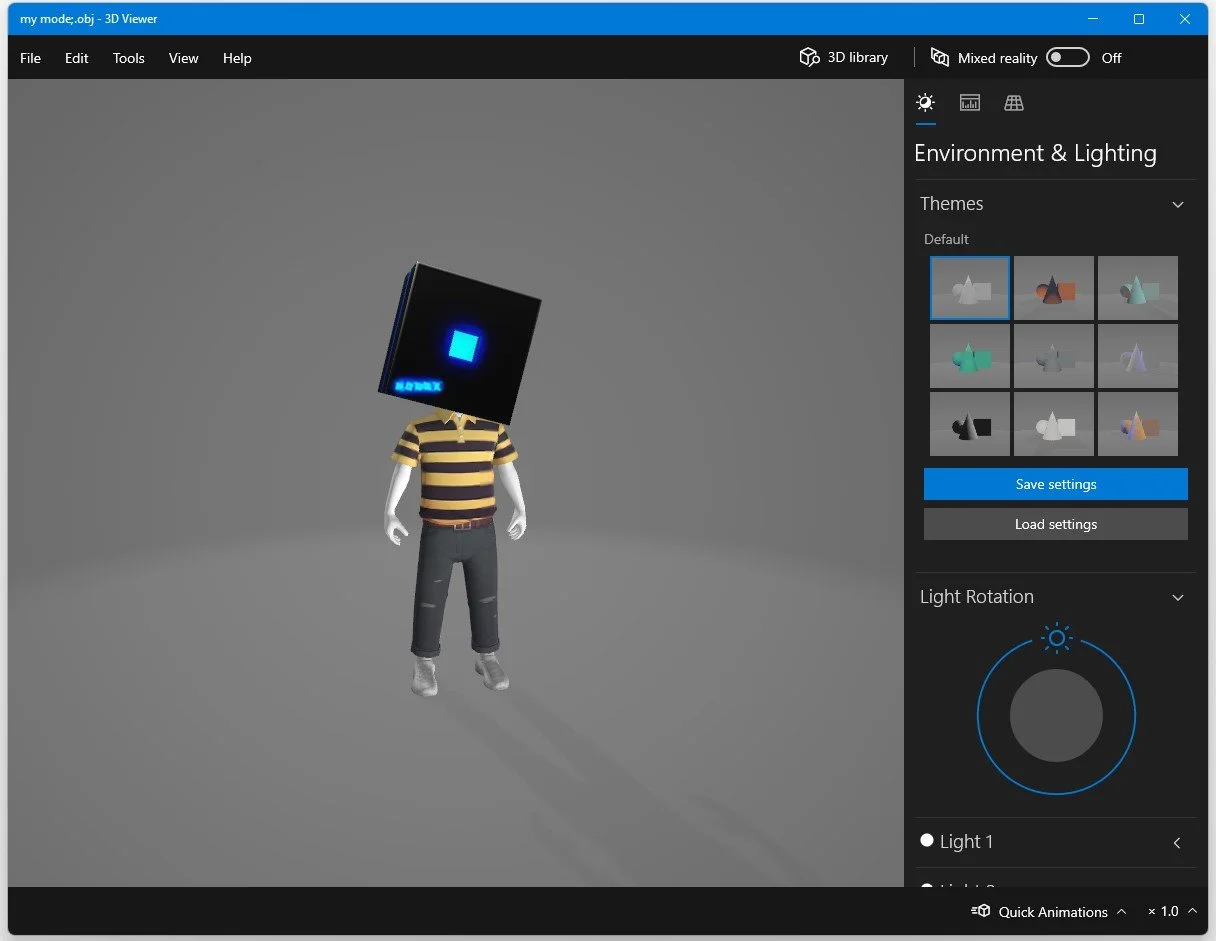
Exported Roblox Chatacter model