How To Add Text to a Part in Roblox Studio
If you're a Roblox game developer, you know that adding text to a part in Roblox Studio is an essential skill. Whether it's labeling game elements or providing in-game instructions, adding text can enhance the user experience and make your game more engaging. However, this process can be confusing for beginners, and it's easy to get lost in the interface. Fear not! In this article, we'll provide a step-by-step guide on how to add text to a part in Roblox Studio. From creating a part to adding and formatting text, we'll cover everything you need to know to make your game text pop. So let's get started!
Create & Add a Text Label
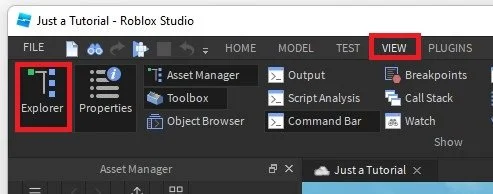
To add text to any part in Roblox Studio, ensure your Explorer window is opened. To do so, navigate to the View tab in your top navigation and select Explorer if it’s not yet selected.
Roblox Studio > View > Explorer
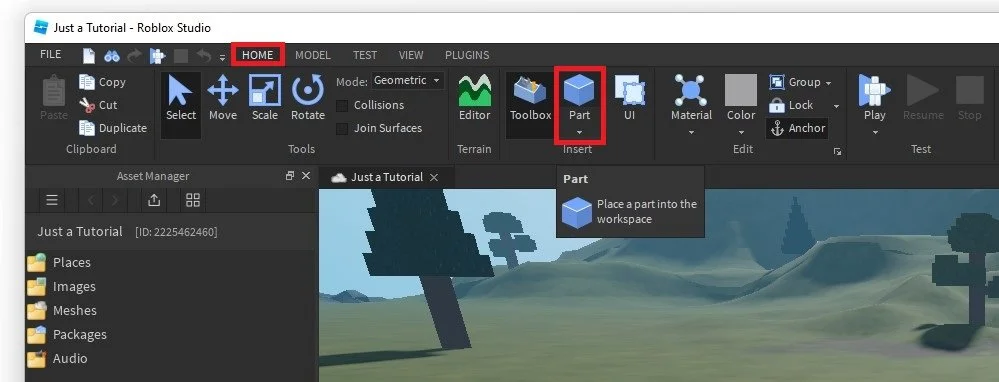
Under Home, click Part to add a new part, which will be your Sign. By default, this will be the Block part.
Home > Part
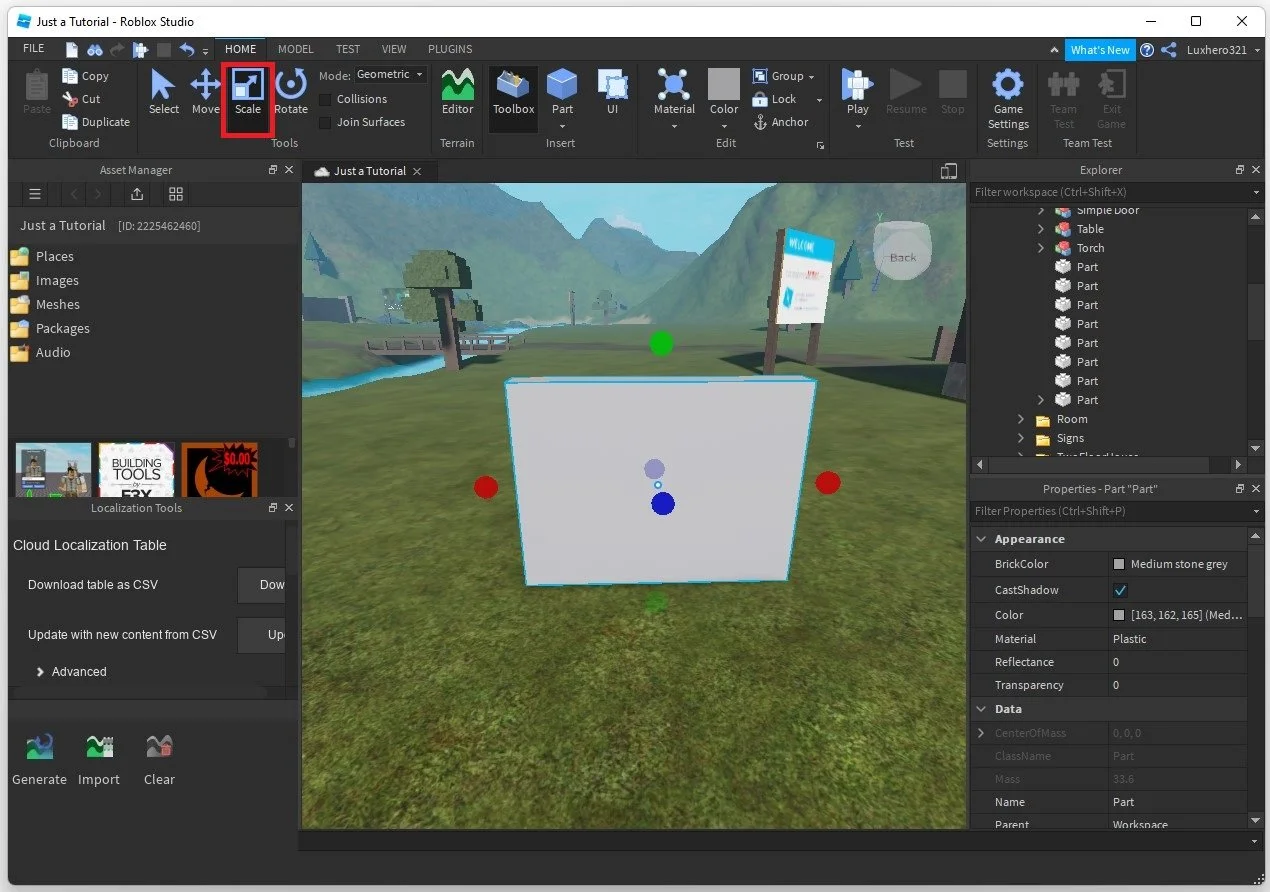
When selecting Scale, you can change the height, width and depth of your part to match your requirements. Click on Anchor to anchor your part.
Adjust the part dimensions in your Roblox experience
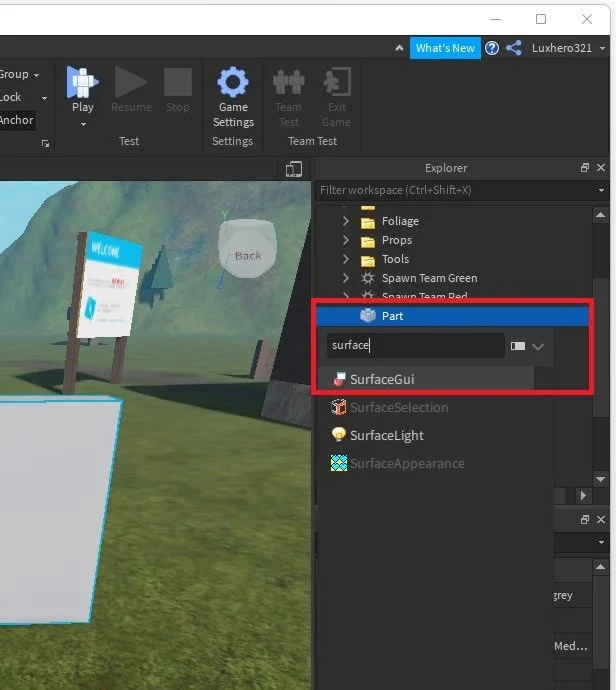
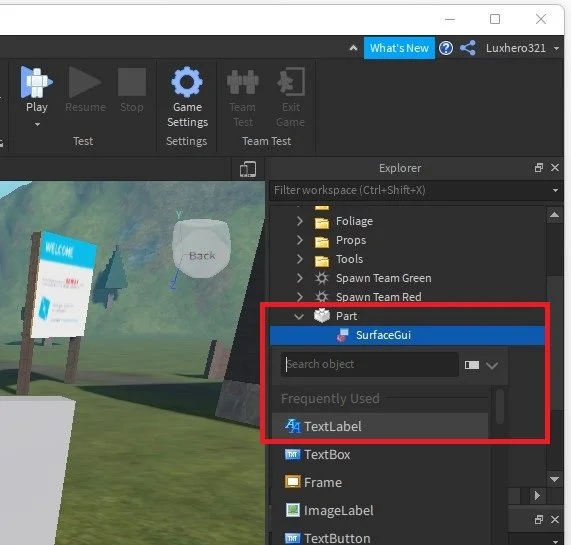
Click on the Explorer tab's + icon for your newly created part. Search for Surface to add the SurfaceGui to your part.
Explorer Window > Part > SurfaceGui
Click on the + icon for your SurfaceGui and add the TextLabel.
SurfaceGui > TextLabel
Adjust the Text Properties
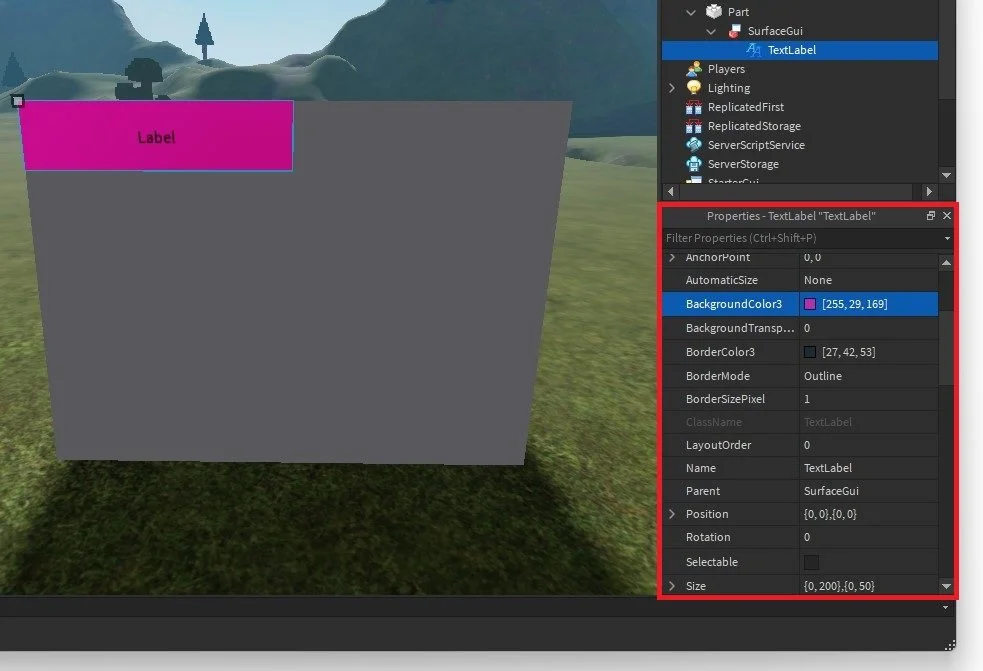
You should now see a new text on your part. When selecting the text label, its properties will open up in the Properties window, which you can also enable in the view Navigation tab.
Properties for the Text Label
Change the background color of your text label, or make it transparent, which is great for some games, depending on what you’re about to create. Below, add a colored border and change the mode and size in pixels. Under position, you can change the position of the text label within your part or even rotate it.
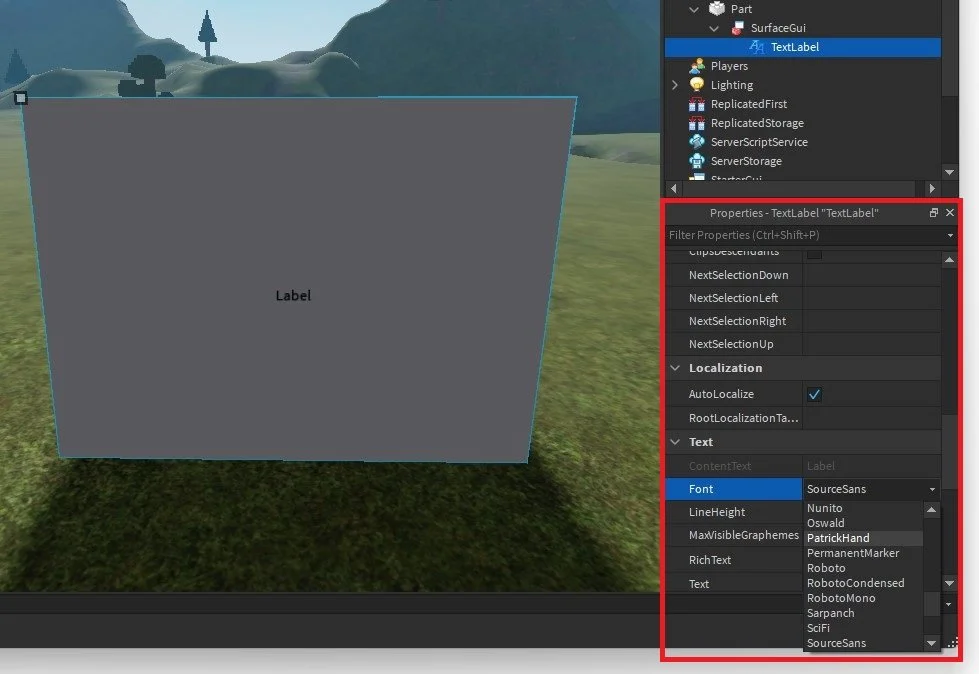
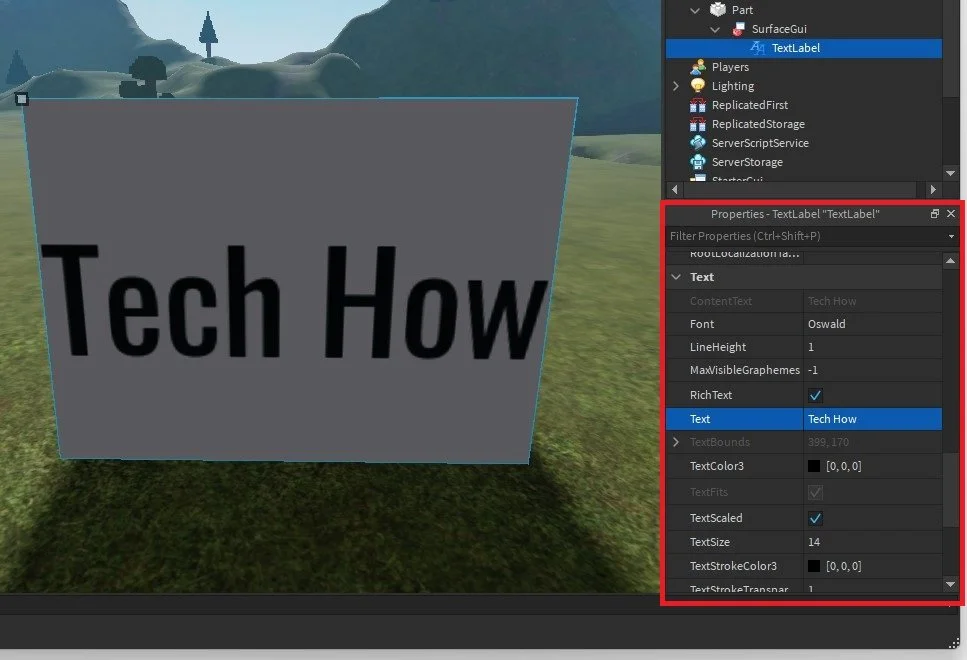
Adjust the text properties for your text label
Under Text, you can change the Font of your new text. Below, change the text color, and scale it to your part if you want to.


