How To Fix Voice Chat Not Working - Warzone 2 (PC)
Warzone 2 is an intense, action-packed game that requires communication between players to emerge victorious. Unfortunately, voice chat can sometimes fail, leaving players unable to strategize and coordinate with their team. The good news is there are a few simple steps you can take to resolve this issue and get back to dominating the battlefield. In this article, we'll dive deeply into the world of Warzone 2 voice chat and teach you how to fix it.
Call of Duty Warzone 2 Audio Settings
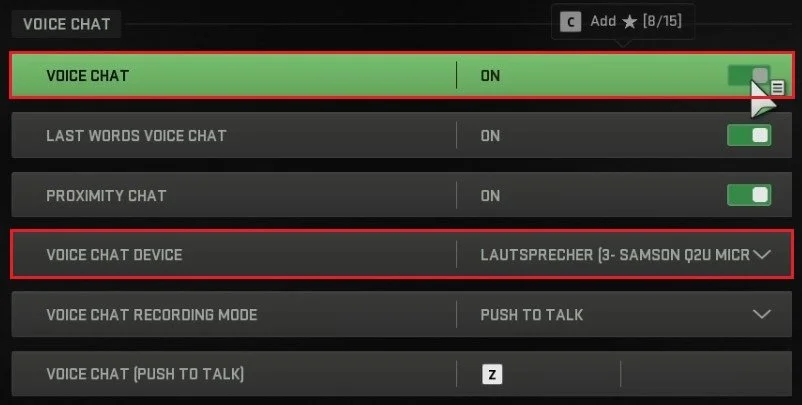
While in-game, navigate to your Audio settings. Ensure that the Voice Chat option is enabled in the Voice Chat section. The Last Words Voice Chat will allow the enemy to hear your last words through your microphone. If you want to use Proximity Chat, then make sure to enable the option below. This will allow you to hear and speak to opponents in-game if they are close to you.
Don’t set the Voice Chat Device to your default windows device, but rather to the microphone you wish to use. This might be the same device, but windows can change the priority depending on which apps are running on your PC. You should use Push To Talk and a hotkey to talk to your teammates to prevent them from hearing your background noises.
Settings > Audio > Voice Chat
Set the Voice Chat Volume to 100 or 90 if you’re using an external audio interface, and you can enable the Microphone Test option below to see if any sound is coming through. Lastly, set the Microphone Device to your default audio input device and set the Microphone Volume option to 100 as well.
Windows Sound Input Settings
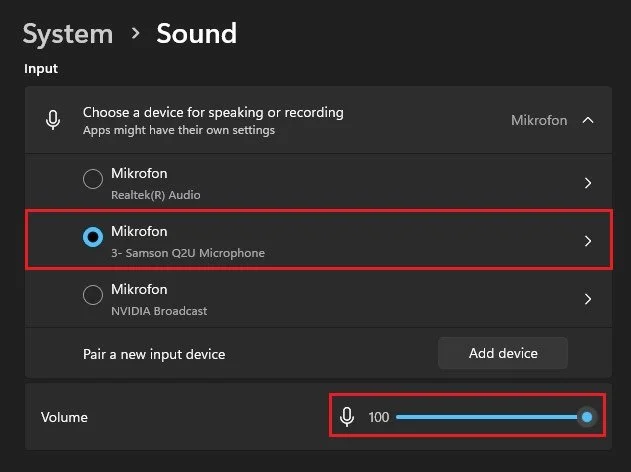
In case no sound is coming through when testing the mic, then make sure to close the game for now and open up your Windows settings. In the Sound section of your system settings, scroll down and ensure that your preferred mic appears in this list and that it’s selected. You should also increase your input volume to 100 below.
Windows Settings > System > Sound
Sound Control Panel
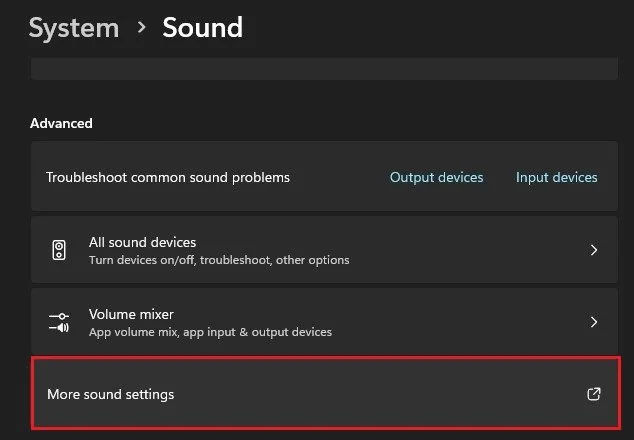
In your Advanced sound settings, click on More sound settings. Your Sound Control Panel will open up.
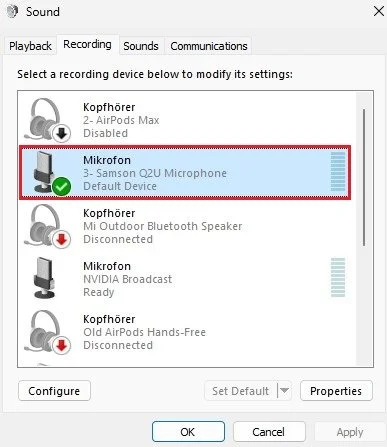
Ensure your mic is set to the default windows device in the Recording section. You can also disable all other input devices to troubleshoot any compatibility issues.
Update Audio Driver
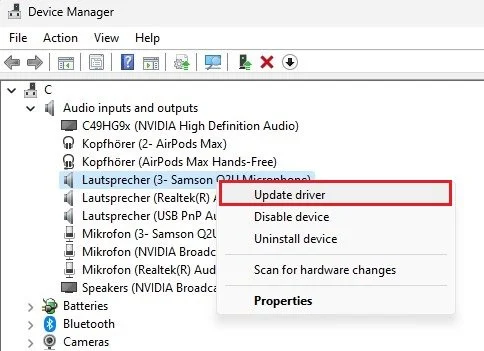
Next, make sure that your audio driver is up to date. Open up your Device Manager. On this window, expand your Audio inputs and outputs. Right-click your microphone and select Update Driver. Here, select Search automatically for drivers, which will take a few seconds to ensure that your driver is up to date.
Close Apps running on the PC
When this is done, proceed to close all other apps running on your PC, especially applications with access to your microphones, such as Discord or TeamSpeak.
Verify the Integrity of Game Files
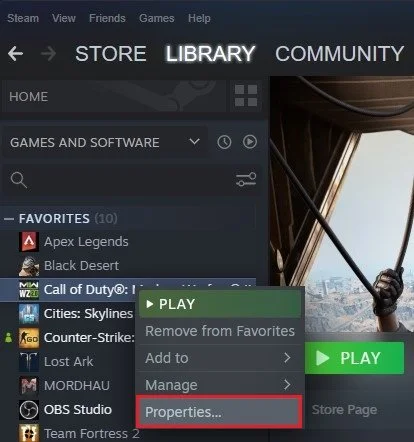
If nothing helped you out, your Warzone files might be corrupted. In your Steam library, right-click Warzone 2 and select Properties.
Steam library > Call of Duty Warzone 2 Properties
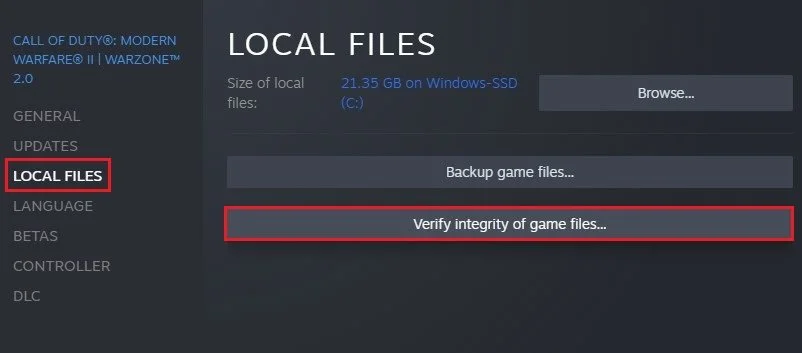
Navigate to the Local Files section and click on Verify integrity of game files. This will take a minute to redownload and replace any corrupted or missing files for Warzone 2.
Warzone 2 Properties > Local Files > Verifiy Integrity
Windows Update
Lastly, while this is loading, head back to your Windows settings. Download the latest update in the Windows Update section before restarting your PC.
Windows Settings > Windows Update
-
There can be several reasons why voice chat may not work in Warzone 2, including software compatibility issues, incorrect sound settings, and network connectivity problems.
-
To check your sound settings in Warzone 2, you'll need to access the game's audio settings and make sure everything is configured correctly. This typically involves checking your microphone and speaker volumes, as well as selecting the correct input and output devices.
-
Yes, you can use a headset with Warzone 2. In fact, using a headset is highly recommended for players who want the best possible communication experience.
-
Yes, you can test your voice chat in Warzone 2 before a match by accessing the game's audio settings and using the built-in voice test function.
-
No, you cannot yell louder to make voice chat work in Warzone 2. While shouting may help you feel better, it won't fix the issue. The best course of action is to follow the steps outlined in this article.


