How To Delete/Change your Roblox Textures - Complete Guide
Introduction
Welcome to our complete guide on altering the visual landscape of your favorite games in Roblox. In this comprehensive tutorial, we'll delve into the step-by-step process of deleting or changing Roblox textures on your Windows PC. Whether you're a seasoned Roblox player or a newcomer to this immersive platform, this easy-to-follow guide offers insightful techniques to personalize your gaming experiences. By the end of this guide, you'll have gained the know-how to manipulate your Roblox textures, opening up a world of customization, all while ensuring the changes are preserved each time you launch a new experience. Let's get started!
Securing and Replacing the Pre-Set Roblox Textures
Changing your Roblox textures begins with ensuring that Roblox isn't currently active on your device. Start by searching for Roblox in your Windows start menu and selecting "Open File Location" for the Roblox Player application.
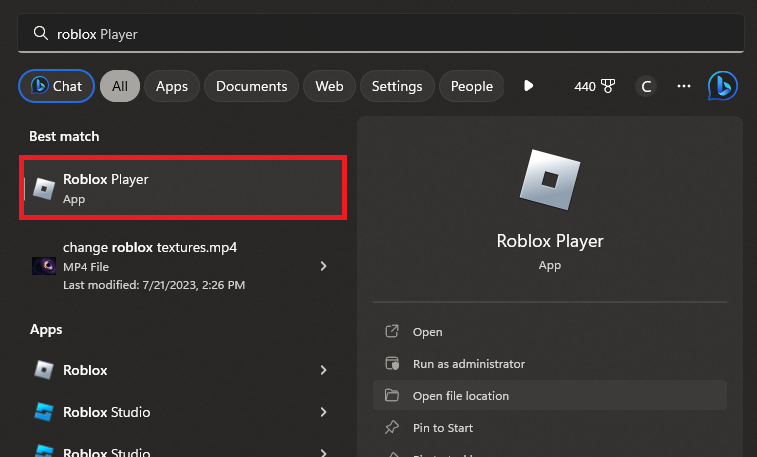
Roblox Player > Open File Location
When you right-click the Roblox Player shortcut, opt to "Open File Location" once again. This will lead you to your Roblox version files, where you will navigate to the path: "PlatformContent" > "PC" > "Textures". This section holds all of the pre-set Roblox textures.
It's crucial at this stage to create a backup of all these folders and DDS Image files. By simply highlighting everything, copying, and then pasting the contents to a separate backup folder, you ensure that the original textures can be restored if needed.
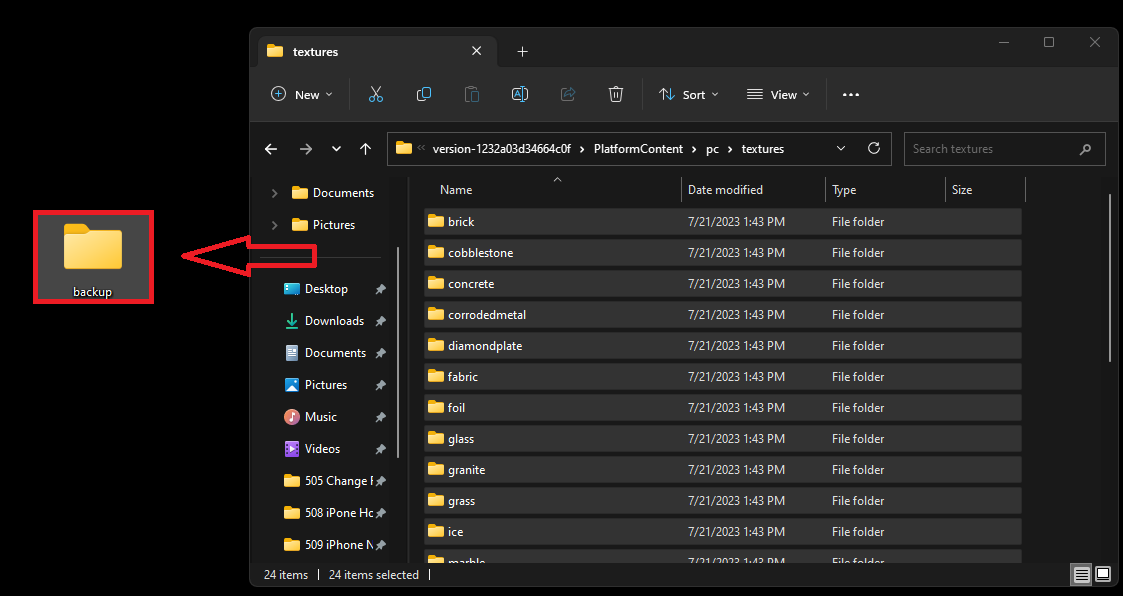
Backup your current Roblox default textures
Once you've secured your backup, go ahead and delete all the files excluding the "Glass", "Water", "Sky", and DDS files. Take note, upon removal of these files, you may observe minor issues while enjoying your Roblox gaming sessions. With this crucial first step accomplished, you're now ready to proceed with the texture modification process.
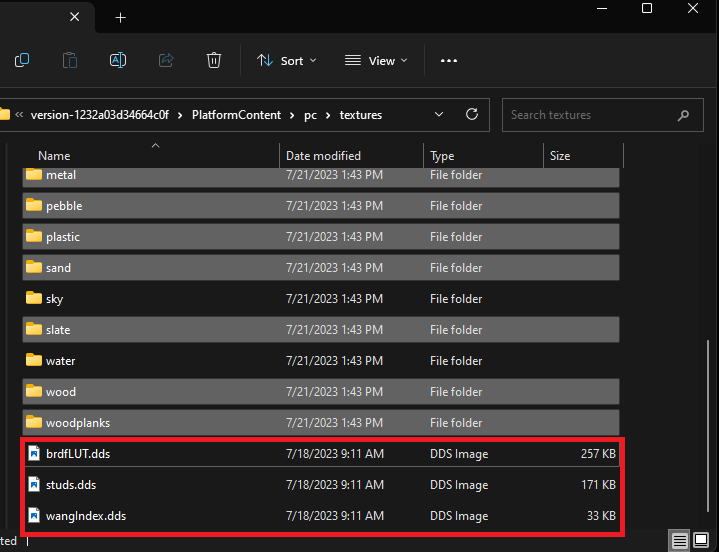
Keep crutial textures for Roblox to work
Halting the Automatic Download of Default Textures
To halt Roblox from automatically reinstating the default textures, a unique file needs to be added to your Roblox application data.
Revisit the Roblox versions folder where the Roblox Player application is located. Here, you'll create a new folder labeled "ClientSettings".
Once this is complete, open your notepad application by typing "Notepad" into your PC's search bar. Paste the command {"FFlagDebugDisableOTAMaterialTexture":"true"} into the text file, and rename the file as "ClientAppSettings".
Drag this newly created text file into your recently minted "ClientSettings" folder. Afterwards, confirm that your file extension is visible, in this instance, it should end with .txt.
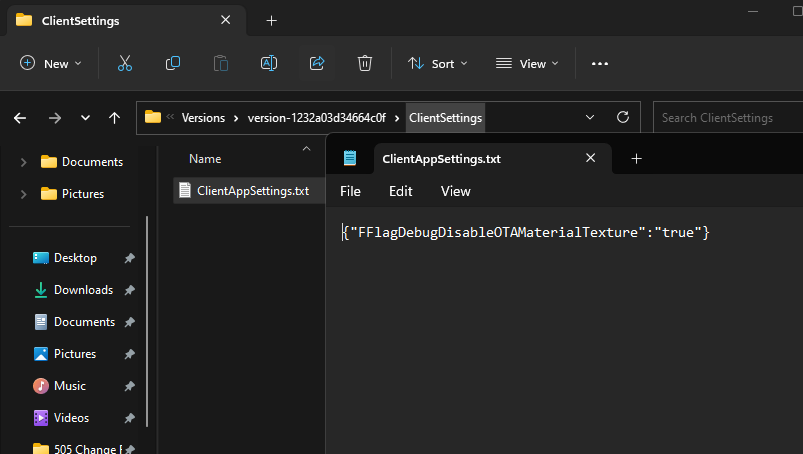
Create a “ClientSettings” folder in your Roblox app files
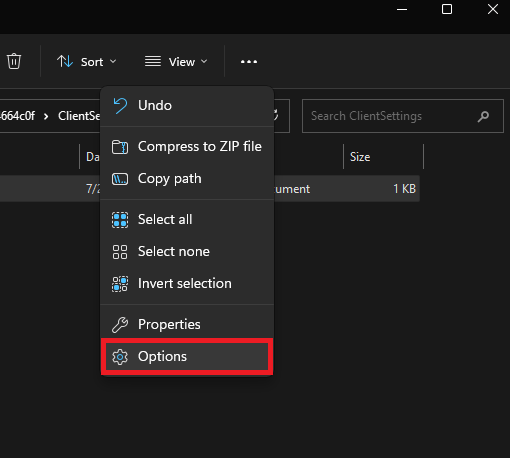
If this isn't the case, click on the burger menu icon in your file explorer to navigate to your Windows Folder Options. Under the "View" tab, uncheck the "Hide extensions for known file types" option and apply these changes.
Access your Windows folder options
This action will reveal the .txt or .jpeg file extensions for your files. This alteration can be reverted upon the completion of the upcoming steps.
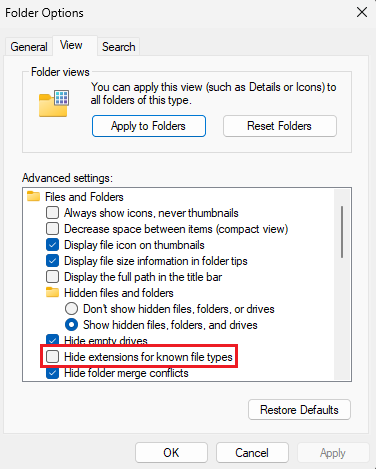
Folder Options > View > Hide extensions for know file types
Proceed to access your text file properties and replace the .txt with a .json file extension. A Windows warning message may appear, cautioning that the change could render the file unusable. You can safely disregard this alert.
This wraps up the process of deleting your current Roblox textures while ensuring the client doesn't replace them every time you initiate a new experience.
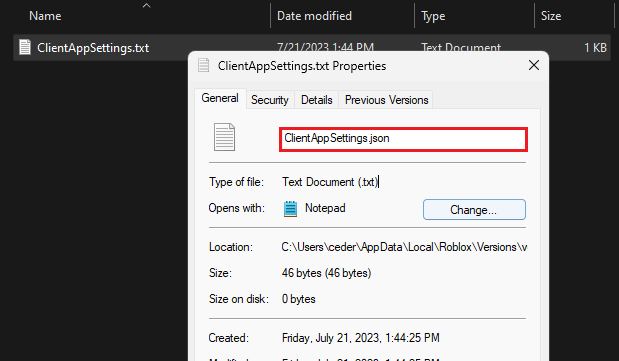
ClientAppSettings Properties > Change file extension to .json
-
Roblox textures are the visual patterns or details that make up the appearance of in-game objects. You might want to change them to personalize your gaming experience or optimize the game's performance.
-
You can back up your default Roblox textures by copying the content from the 'Textures' folder, which is located in the 'PC' > 'PlatformContent' directory within your Roblox version files. Save the copied content in a separate folder for safekeeping.
-
Deleting certain Roblox texture files might result in noticeable issues while playing the game, such as missing or distorted graphics. It's advisable to only delete the files if you are confident in what you are doing.
-
To prevent Roblox from automatically redownloading default textures, you need to create a 'ClientSettings' folder in your Roblox versions folder and add a .json file named 'ClientAppSettings' with a specific command. This instructs Roblox not to redownload default textures.
-
If you can't see the file extension, navigate to your Windows Folder Options via the burger menu icon in your file explorer. In the 'View' tab, disable the 'Hide extensions for known file types' option and apply the changes.