How To Change Wallpaper & Screen Saver on Mac OS Ventura

Mac OS Ventura is a beautifully designed operating system that provides a seamless user experience. One of the key aspects of customization is the ability to change the wallpaper and screen saver to reflect your personal style. Whether you're looking for a new look for your desktop or a way to personalize your device, this guide will show you how to change wallpaper & screen saver on Mac OS Ventura with ease.
Mac OS Dynamic Wallpapers
While using your Mac, click on the Apple icon on the top left of your screen and select System Settings. If your settings look a bit different on your device, then ensure that you’re running the latest software update.
Navigate to the Wallpaper section. Here, you can select different types of wallpapers. The Dynamic Desktop wallpaper can be set to a light or dark version. You also have the option to set this option to Dynamic. The desktop wallpaper will change depending on the time of day and location. All wallpapers in this first row have a dynamic setting, though some are required to be downloaded first.
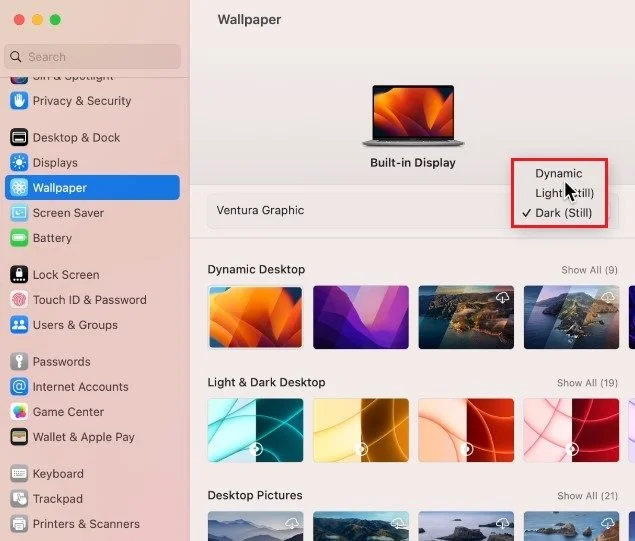
System Settings > Wallpaper > Dynamic Desktop
Light & Dark Desktop
Below, the Light & Dark Desktop wallpaper can be set to either light, dark or automatic, which, again, will set this according to the time on your Mac.
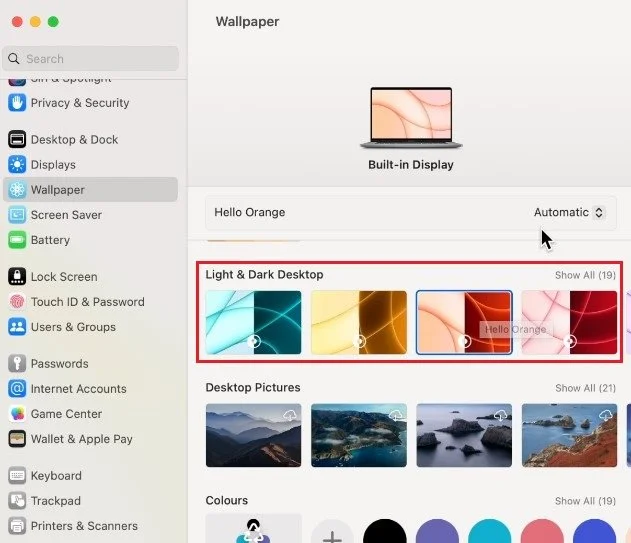
System Settings > Wallpaper > Light & Dark Desktop
Use your Own Photo as Wallpaper
Next, you can also select one of the pictures in this list. If you prefer to use one of your pictures saved on your Mac, click on Add Photo Album. Next, select your preferred album or select Photos to find all of your saved photos in this list.

System Settings > Wallpaper > Photos
Alternatively, you can right-click any image in your Finder or desktop and select Set Desktop Picture. This will change your wallpaper to the selected image without having to look for it in your settings.
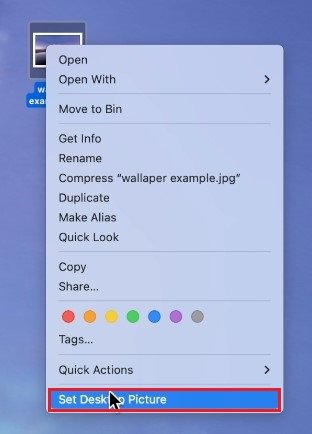
Set Desktop Picture
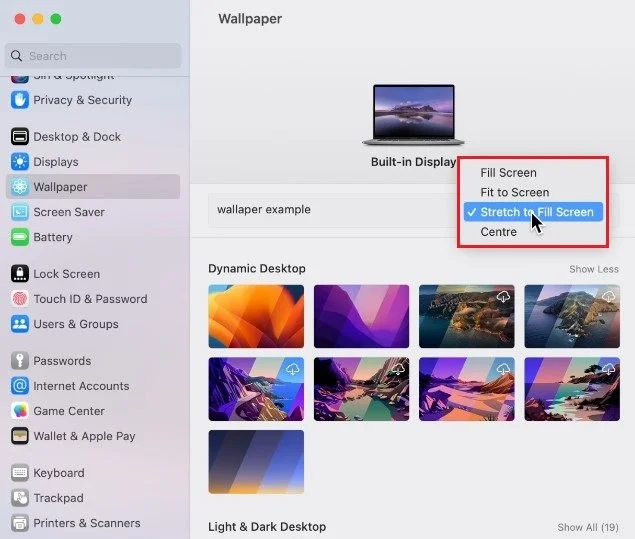
In case the picture is not centered, or stretched, then head back to your wallpaper settings and change the Fill Screen option to whatever works best for you.
Screen Saver Settings
After selecting your preferred wallpaper, navigate to the Screen Saver settings. You can preview the selected screen saver when clicking on Preview. Below, choose a screen saver. The first few will display images saved in your photos.
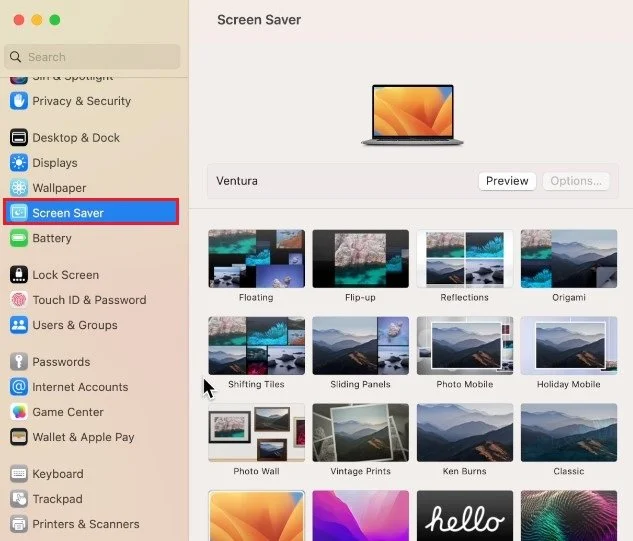
System Settings > Screen Saver
Screen Saver Message
Below, select one of the classic Apple screen savers or use Message to display a custom message when the screen saver is showing up. When clicking on Options after selecting the screen saver, you’ll have the option to change the text.
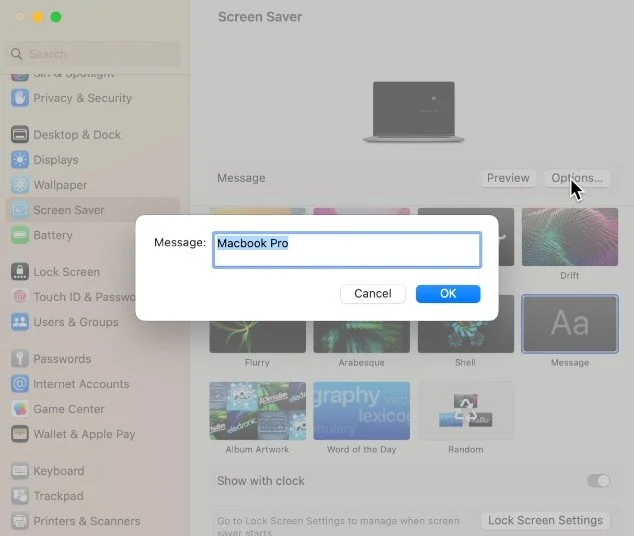
System Settings > Screen Saver > Message
Show Screen Saver with Clock
You also have the option to show a random screen saver every time it’s triggered. Enable the Show with clock option if you wish to see a digital clock on your screen saver.

System Settings > Screen Saver > Show with clock
Mac OS Appearance Settings
Lastly, head over to your Appearance settings. Here, switch between the light, dark or automatic appearance. This will come down to personal preference. Your accent color is the highlight color for native Apple applications. This will be set to multicolor by default, which enables apps to use different colors.
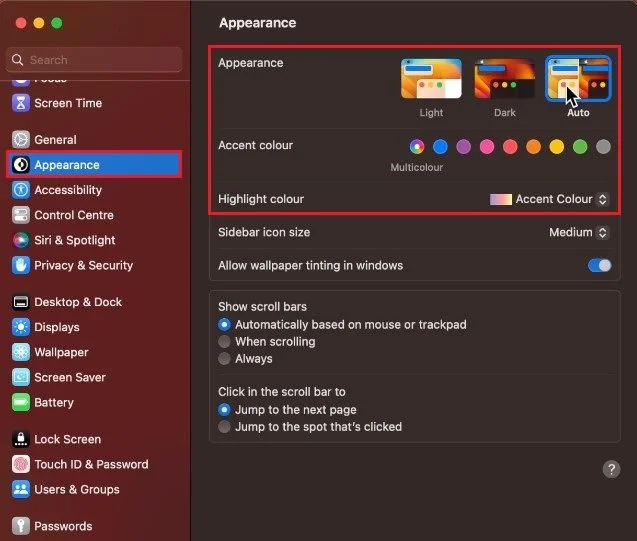
System Settings > Appearance
Below, enable or disable the Allow wallpaper tinting in the window option. This setting will allow some of your wallpaper’s colors to shine through your active window.
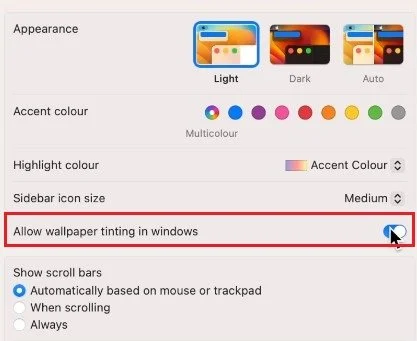
System Settings > Appearance > Wallpaper Tinting
-
Yes, you can! To use your own photos as a wallpaper or screen saver, simply go to System Preferences > Desktop & Screen Saver, then select the folder containing your desired images. You can also right-click any image on your desktop to set it as your wallpaper.
-
To set a different wallpaper for each display, you need to go to System Preferences > Desktop & Screen Saver. From there, you can select the "Arrangement" tab and choose the display you want to set the wallpaper for. Then, select the folder containing your desired image and set it as the new wallpaper.