How To Install & Setup DaVinci Resolve on Mac
DaVinci Resolve is a powerful video editing software used by professionals in the film and video industry. If you're a Mac user and looking to get started with this software, look no further! In this article, we'll take you step by step through the process of installing and setting up DaVinci Resolve on your Mac. Whether you're a beginner or an experienced editor, this guide will ensure that you have everything you need to start creating amazing videos in no time.
Download DaVinci Resolve for macOS
While using your favorite browser on your Mac, navigate to this page. This is the official download page for DaVinci Resolve on your Mac.
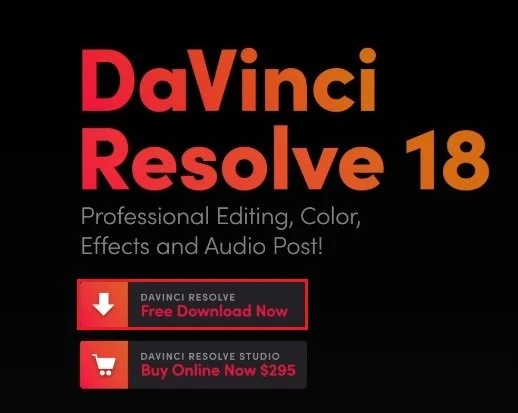
DaVinci Resolve Download Page
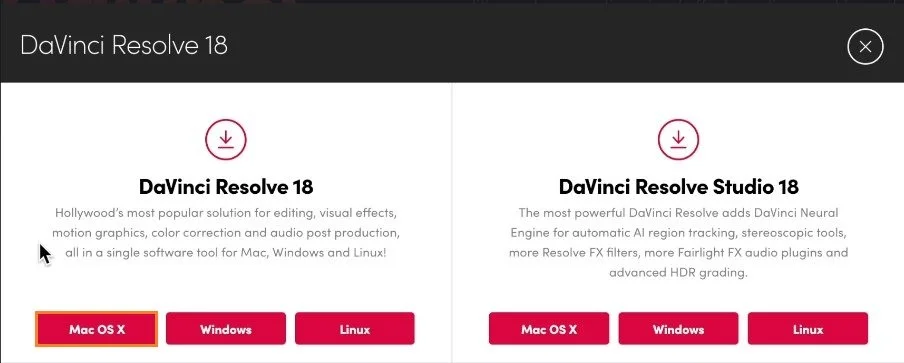
This is the official download page for DaVinci Resolve on your Mac. Click on Free Download Now, and then choose to download the DaVinci Resolve installer for Mac OS X and above. You might be required to enter your personal information to register your account before you can download the application to your Mac. Depending on your download speed and overall network connection, the 3 GB download can take a couple of minutes to an hour.
Download DaVinci Resolve for Mac OS X
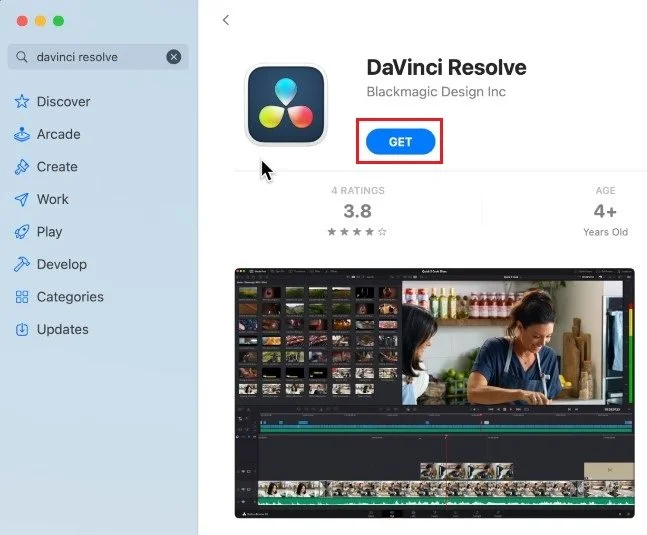
Download DaVinci Resolve from App Store
Alternatively, you can download and install the same software using your App Store application. You may be limited when using this version of DaVinci Resolve, but it will suffice for most users.
App Store > DaVinci Resolve
Install DaVici Resolve on macOS
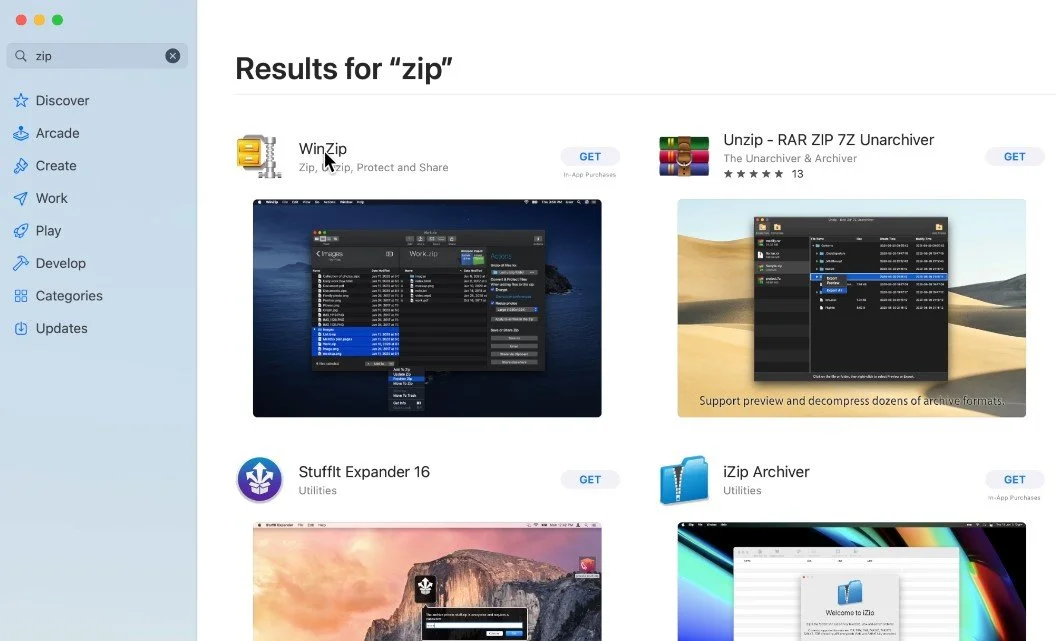
When the download is complete, locate the downloaded ZIP file and unzip it using any unarchiving software. If you cannot open this file, head back to your App Store application. Look up ZIP and download one of the free applications, such as WinZip, Unzip, or The Unarchvier, to your system.
UnZip & Install DaVinci Resolve
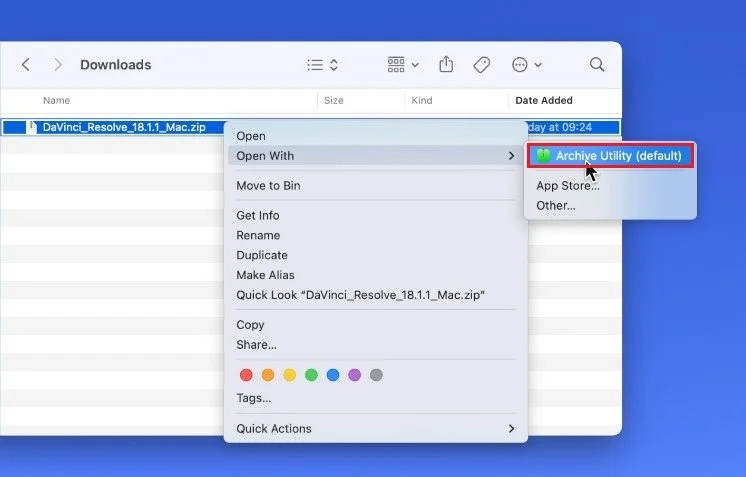
After installing the app, right-click the downloaded ZIP file and select to unzip the file to your desktop or downloads folder. This might take a minute to complete.
DaVinci Resolve > Open With > Archive Utility
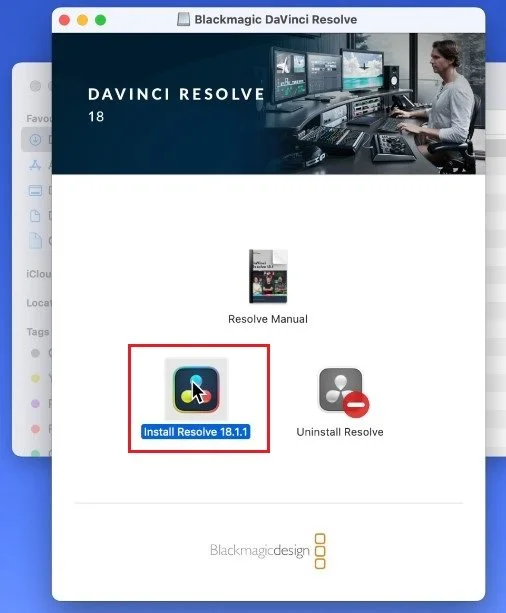
Next, double-click the .dmg file and then click on Install Resolve.
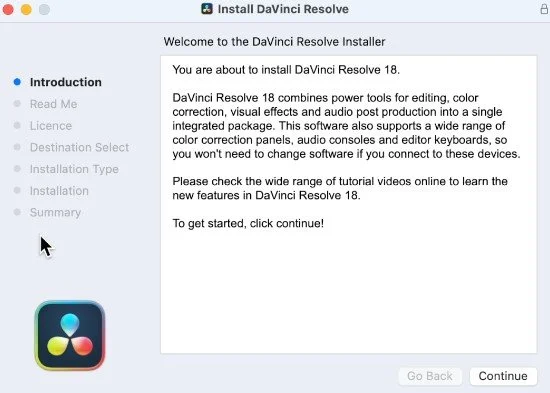
Follow the install wizard and agree to the license agreement before installing the app. After the installation, you will find the DaVinci Resolve app in your Launchpad or applications folder in your finder.
Follow DaVici Resolve Install Wizard
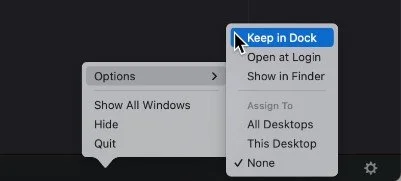
Open up DaVinci Resolve. When opening the video editor for the first time, you’ll be required to complete the quick setup or skip the step to access the software. If you want to keep the DaVinci Resolve icon in your dock, right-click the icon, and under Options, click on Keep in Dock.
keep DaVinci Resolve in Dock
DaVinci Resolve Preferences
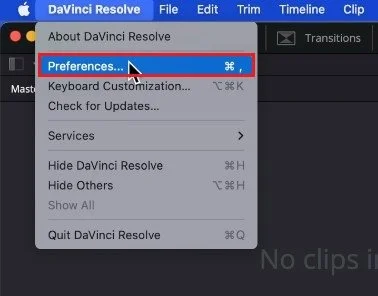
Next, click on DaVinci Resolve in your menu bar and select Preferences.
DaVinci Resolve > Preferences
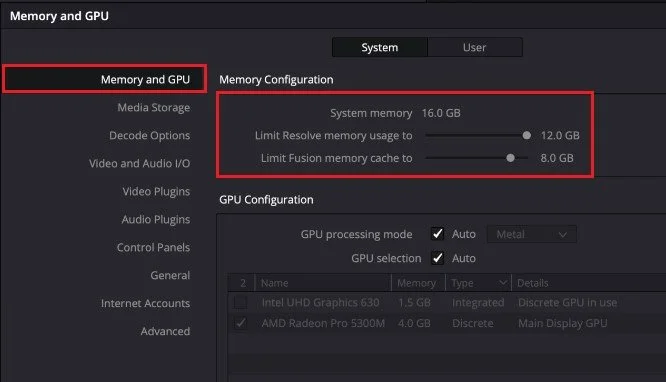
Under Memory and GPU, limit the amount of memory Resolve can use to around 70% of your installed RAM. In my case, that would be a maximum of 12GB. If you intend to use your Chrome browser while DaVinci Resolve is running or any other memory-intensive app, you might want to limit this to 50% of your system memory.
DaVinci Resolve Preferences > Memory and GPU
Change Project Settings
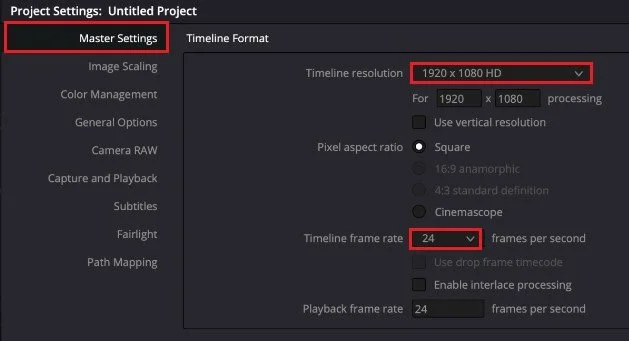
Next, under File, navigate to your Project Settings. Your Master Settings allow you to change your Timeline resolution, Aspect Ratio, Frame Rate, and so on. Set these according to the footage you intend to edit.
DaVinci Resolve Project Settings
-
DaVinci Resolve is a professional-level video editing software used for color correction, audio editing, and visual effects. It's widely used in the film and video industry by filmmakers and videographers.
-
Yes, DaVinci Resolve is free to download and use. However, some advanced features are only available in the paid version.
-
Yes, DaVinci Resolve is compatible with Mac computers and can be easily installed and set up.
-
It depends on the complexity of the projects you plan to work on. Generally, a high-performance computer with a fast processor and enough RAM is recommended. You can find the recommended hardware specifications on the Blackmagic Design website.


