Dead By Daylight - How To Change Frame Rate on PC
Dead By Daylight is a survival horror game that has become increasingly popular since its release in 2016. As a player, you are placed in the shoes of either a survivor or a killer, and your primary goal is to survive or hunt down your prey, respectively. However, as with any PC game, Dead By Daylight can suffer from performance issues hindering your experience. One of the most common issues is the frame rate, which can significantly impact gameplay. In this article, we will guide you through the steps to change the frame rate on your PC, ensuring that you have the best possible experience while playing Dead By Daylight.
Adjust the Dead by Daylight User Settings
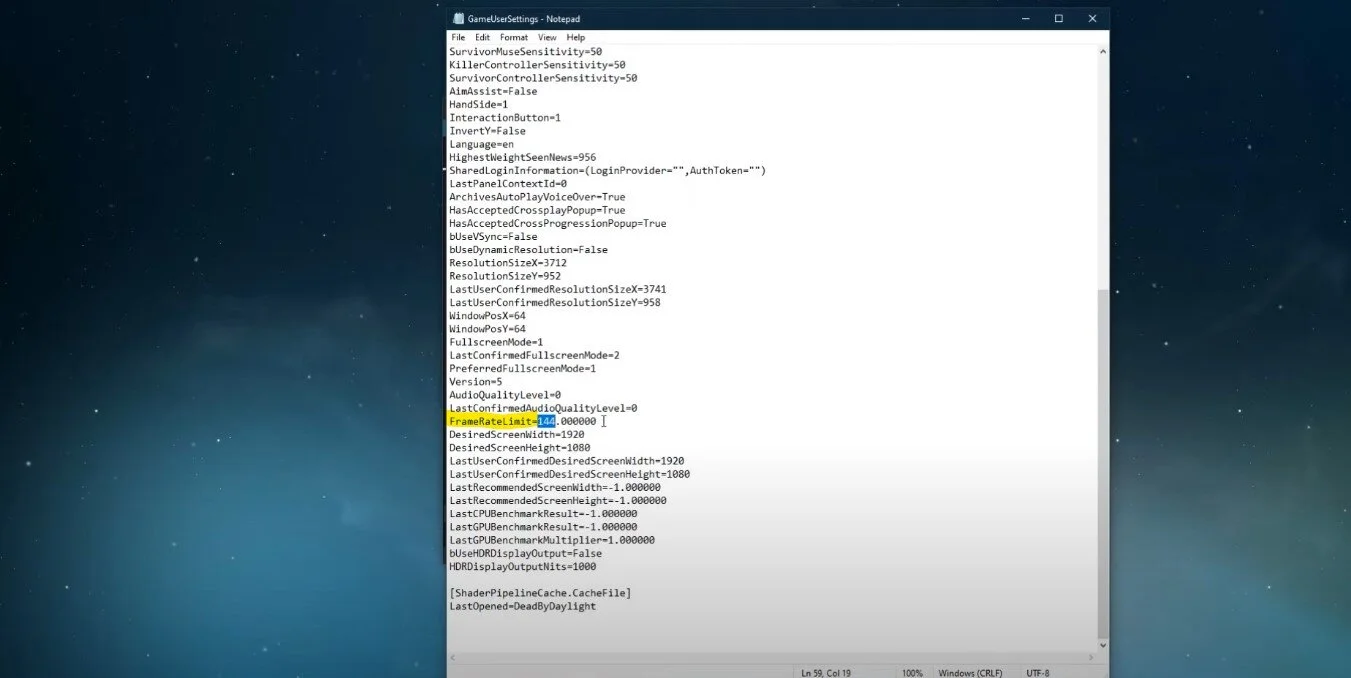
Close the game, and in your Taskbar search enter %appdata% and hit enter. Your file explorer will open up. Navigate to: AppData > Local > DeadByDaylight > Saved > Config > WindowsNoEditor. Open the GameUserSettings file with a text editor like Notepad.
AppData > Local > DeadByDaylight > Saved > Config > WindowsNoEditor
Scroll down until you find the FrameRateLimit option. eW suggest setting this value to the refresh rate of your monitor. In this case, that would be 144 FPS. If you want to uncap your frame rate, set this option to 0. Below, you can change your display resolution if you want to. After saving your changes, you can launch Dead by Daylight, and the game should run on the FPS limit you set.
Change the FrameRateLimit value
Display your FPS while playing Dead by Daylight
To display an FPS counter, we recommend using the Steam FPS overlay. Open up your Steam launcher. Select Steam in the top left corner.
Steam > Settings
In your settings, under In-Game, set the In-game FPS counter to one of the four screen corners, and when enabling the High contrast color option, the FPS counter will be displayed in a bright green color.
Steam settings > In-Game > In-Game FPS Counter


