How To Enable Private Servers on Your Own Roblox Game
Introduction
Unlocking the doors to private servers in your Roblox game not only fosters a unique gaming community but ensures a controlled and exclusive gaming environment. Whether you're aiming to create a private battleground or a serene place for serious gamers, the ability to enable private servers is like having a VIP lounge in your digital realm. Delve into our easy-to-follow guide on enabling private servers on your Roblox game, where the keys to your exclusive gaming kingdom await. From setting a price for entry to customizing your domain, each step takes you closer to a personalized gaming experience.
Setting Up Your Exclusive Roblox Realm 🛡️
Start the Journey:
Fire up your web browser and head over to roblox.com.
Ensure you're logged into your Roblox account. If not, input your credentials to proceed.
Access Your Creative Portfolio:
Click on the trio of horizontal bars located at the top-left corner, unveiling a drop-down menu.
Choose 'Profile' from the menu, leading you to a realm of your creations.
Dive into Your Creations:
Switch tabs to 'Creations,' showcasing a list of your gaming masterpieces.
Pick the game you wish to transform with a private server.
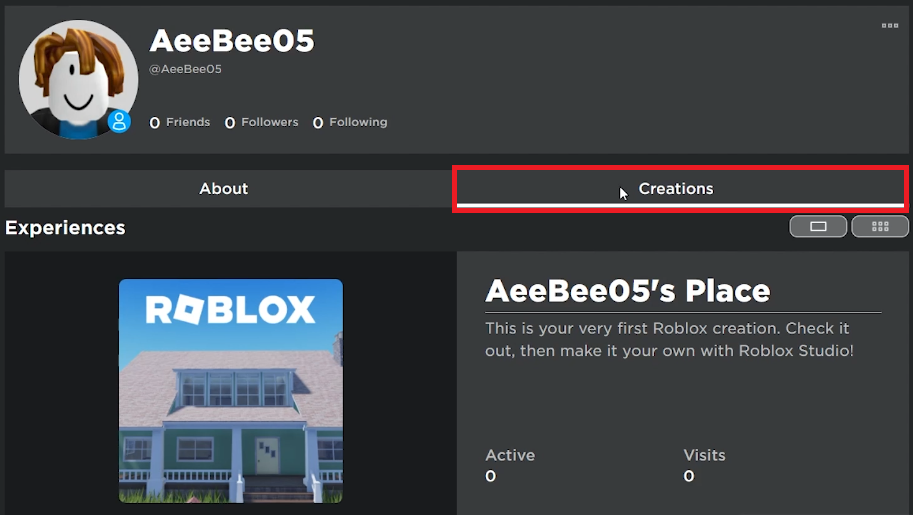
Roblox Creations
Navigate to Configuration:
On your chosen game’s page, spot the three dots icon at the upper right corner, and click.
A drop-down menu cascades, select 'Configure This Experience' to venture forward.
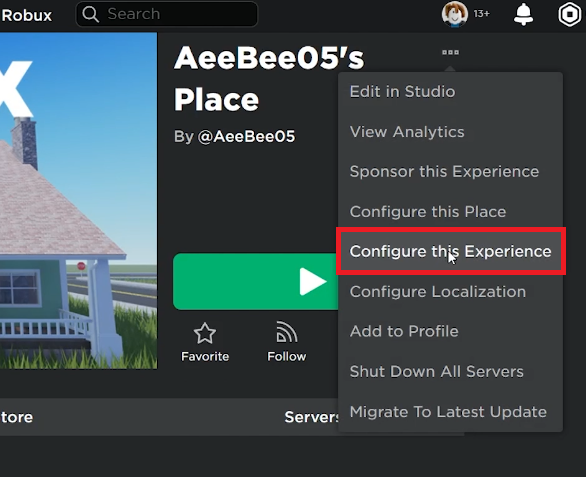
Roblox Creations > Configure this Experience
Audience Settings:
In the Configuration page, find the 'Audience' section and click on 'Access Setting.'
Enable Your Private Server:
Scroll your way down to 'Server Settings.'
Toggle on the ‘Allow Private Servers’ option. Want to monetize access? Simply toggle on 'Requires Robux' and set your desired entry fee.
Seal the Deal:
Hit the 'Save Changes' button to lock in your settings.
Journey back to your game's page on Roblox, and switch tabs to 'Servers.'
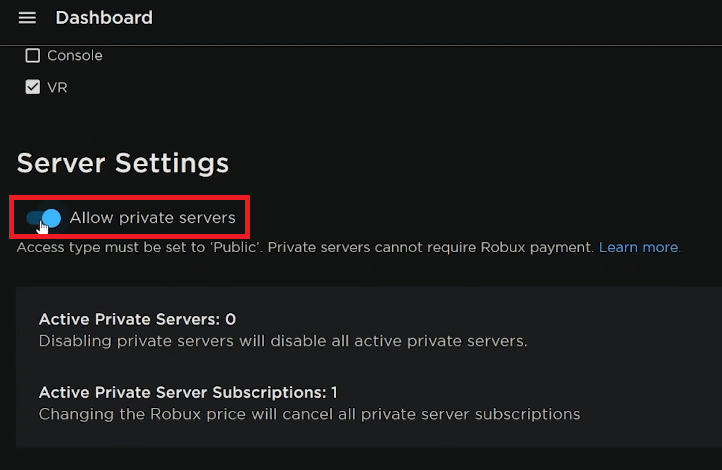
Server Settings > Allow Private Servers (Enable)
Craft Your Private Roblox Server 🎮
Initiate Server Creation:
In the 'Servers' tab, locate the 'Private Servers' section and find the inviting 'Create Private Server' option. Go ahead, click on it.
A pop-up springs to life, offering a space to christen your server with a catchy name.
Officialize Your Server:
With a name in place, click on 'Buy Now'. Fear not, it's on the house unless you opted for a paid access earlier.
Personalize Your Realm:
Click on 'Customize' to adorn your server with unique settings that resonate with your gaming ethos.
Unveil Your Private Link:
Post-customization, hit 'Generate' to obtain your exclusive Private Server link.
Share this golden ticket with friends or community members you wish to grace your private server on Roblox with.
Control at Your Fingertips:
Your dominion over the server extends to managing its settings, renewing, or disabling it anytime, all from the comfort of the 'Servers' tab on your game’s page on Roblox.
Embrace the power to tweak your server to perfection, ensuring an enriched gaming experience for your invited ensemble.
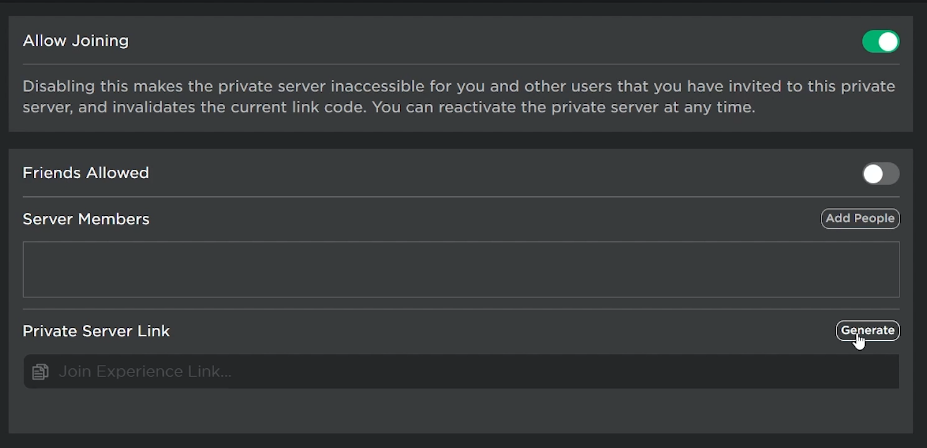
Generate a link to your private Roblox server
Secure and Enhance Your Roblox Gaming Experience with PrivadoVPN
Creating private servers in Roblox is a great way to craft a personalized gaming experience. To complement this, consider using PrivadoVPN for a secure and optimized online gaming session. PrivadoVPN offers unlimited data and device connections, essential for seamless gameplay and managing private servers. It's particularly useful for reducing ping and lag, which is crucial when hosting or joining private Roblox servers. With servers in 65 cities and streaming support, PrivadoVPN ensures that your gaming environment is not only private but also robust and reliable, enhancing every aspect of your Roblox experience.

-
To enable private servers, navigate to your game's configuration page on Roblox, access the 'Server Settings' section and toggle on the ‘Allow Private Servers’ option. Remember to save changes to apply the settings.
-
Yes, you can charge players by toggling on the 'Requires Robux' option in the 'Server Settings' section. Set your desired price for access.
-
Under the 'Private Servers' section, click 'Create Private Server', name your server, and click 'Customize' to personalize your server settings.
-
After customization, generate your Private Server link and share this link with friends or community members you wish to invite.
-
Absolutely! You can manage, renew, or disable your private server anytime from the 'Servers' tab on your game’s page on Roblox.
Affiliate Disclosure: This section includes affiliate links. By choosing PrivadoVPN through these links, you not only enhance your Roblox gaming experience but also support our site at no additional cost to you.