How To Fix Poor Network Signal on iOS 17 - iPhone Guide
Introduction
In the age of connectivity, encountering a poor network signal on your iPhone running iOS 17 can feel like hitting a digital roadblock. Whether you're dealing with sluggish internet, dropped calls, or stubborn texts refusing to send, the solution might just be a few taps away. This guide will walk you through a series of straightforward steps designed to boost your signal strength, covering everything from the basics of network selection to the nuances of carrier settings updates. Ready to jump back into the fast lane of communication? Your journey towards a stronger network signal begins here.
Manually Select Carrier
Start by launching the 'Settings' app on your iPhone. Make your way to ‘Mobile/Cellular Service’ followed by ‘Network Selection’. Switch off the ‘Automatic’ option and patiently wait as the list of available carrier options populates. Opt for your carrier manually from the list that appears. Test the waters by checking your signal strength—consider using an internet speed testing platform like Speedtest to see if there's a noticeable uptick in signal strength.
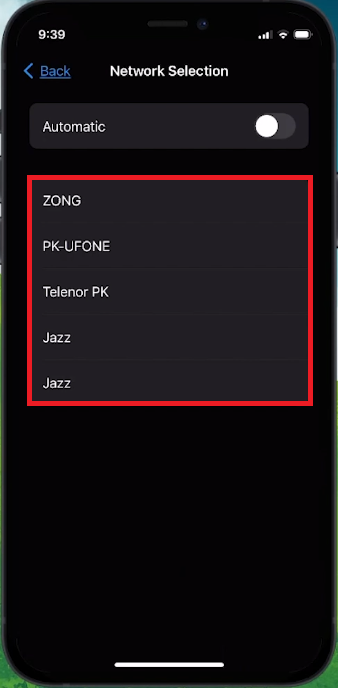
iPhone Settings > Cellular Service > Network Selection
Freshen Up with Airplane Mode
Once done, glide your finger down from the top-left corner of your screen to unveil the control center. Hit the 'Airplane Mode' switch, let it sit for about 15 seconds, and then toggle it off. This quick refresh can sometimes give your network connection the jumpstart it needs.
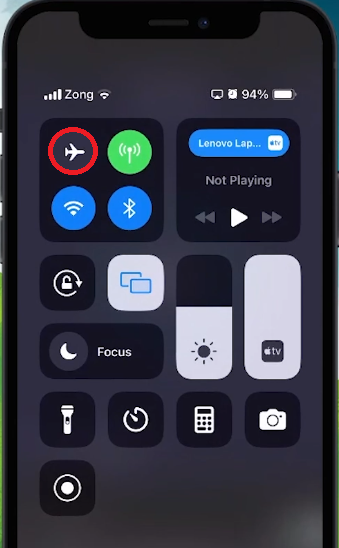
iPhone Control Centre > Airplane Mode
Wave Goodbye to Wi-Fi Assist
Circle back to your cellular service settings. Scroll your way down to ‘Wi-Fi Assist’ and flick it off. When left on, this feature might hop onto cellular data if the Wi-Fi signal is weak, which could meddle with your cellular signal strength. By toggling it off, you ensure that your phone's focus stays undivided, potentially leading to a stronger cellular signal.
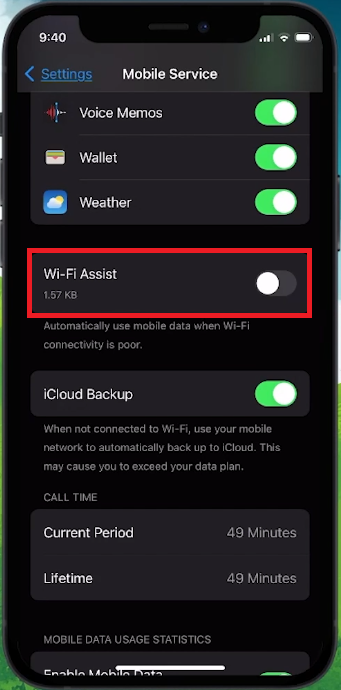
iPhone Settings > Mobile Services > Wi-Fi Assist
SIM Card Shuffle
If the signal issue sticks around, it's time to play a little SIM card shuffle. Eject your SIM card, take a breather for a minute, then pop it back in. This old-school trick might just iron out any hardware-related network hitches.
Carrier Settings Update
At times, a fresh update to your carrier settings awaits to boost your network signal. Head over to ‘Settings’ > ‘General’ > ‘About’. If there's an update lined up, a notification will gently nudge you to get it done right there.
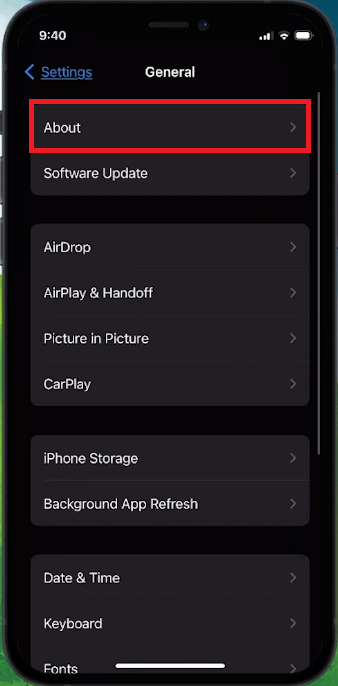
iPhone Settings > General > About
Network Settings Reset
As a last resort, mull over resetting your network settings. Venture into your main settings, tap on the “General” section, and then stroll down to “Transfer or Reset iPhone” followed by “Reset”.
Tap on “Reset Network Settings”, punch in your passcode to seal the deal. This action will rewind all network-related settings to their factory defaults—a move that often solves network woes if they were tangled up in your settings.
Bear in mind, you'll need to reacquaint your iPhone with your WiFi network post-reset as the settings will have taken a clean slate.
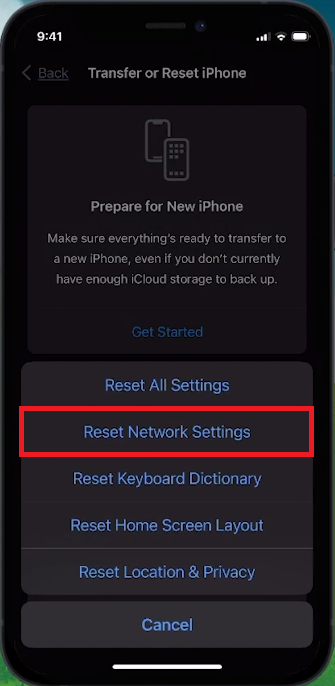
iPhone Settings > General > Transfer or Reset iPhone
Enhance Your iPhone's Connectivity with PrivadoVPN
While addressing poor network signal issues on your iPhone with iOS 17, consider PrivadoVPN for a more stable and secure internet experience. PrivadoVPN offers unlimited data and device connections, making it a great choice for iPhone users seeking consistent connectivity. It can help stabilize your internet connection, providing a more reliable and faster online experience, which is beneficial when dealing with fluctuating network signals. Whether you're streaming, browsing, or connecting with others, PrivadoVPN ensures that your internet connection is as stable and secure as possible.
-
Updating to iOS 17 might not always go smoothly. There could be settings that got changed during the update, or it could expose issues with the carrier settings. Following the steps in the article could help resolve these issues and improve your network signal.
-
To manually select a carrier on iOS 17, open 'Settings', navigate to ‘Mobile/Cellular Service’, then ‘Network Selection’. Toggle off the ‘Automatic’ option and wait for the carrier options to load. Manually select your carrier from the list.
-
Toggling Airplane Mode on and then off again essentially refreshes your network connection. This could help in improving signal strength especially if there are minor network hiccups.
-
Yes, Wi-Fi Assist could affect cellular signal strength. When enabled, it switches to cellular data if Wi-Fi is weak, which might interfere with cellular signal strength. Disabling Wi-Fi Assist in cellular settings could potentially improve cellular signal.
-
Resetting network settings reverts all network-related settings back to factory defaults. This could help in resolving any network issues if they were related to incorrect or corrupt settings on your iPhone running iOS 17.
Affiliate Disclosure: This section contains affiliate links. By using these links to opt for PrivadoVPN, you're not only enhancing your iPhone's connectivity but also supporting our website without incurring any additional cost.