How To Install Roshade for Roblox on Windows
Introduction
Enhancing your Roblox gaming experience with Roshade has never been more accessible. For those keen on boosting their visual gameplay, Roshade provides a unique way to apply shaders, making the Roblox environment even more immersive and visually appealing. Whether you're new to modding or an experienced gamer looking to add a touch of realism, installing Roshade for Roblox on your Windows PC is a straightforward process. From downloading the installer to selecting your preferred key binds, this guide will walk you through the steps to seamlessly integrate Roshade into your Roblox games. Get ready to elevate your gaming with this handy tool.
Download & Install Roshade for Roblox on Windows
If you're looking to enhance your Roblox gaming experience, follow these simple steps to download and install Roshade on your Windows PC:
Step 1: Navigate to Roshade's Download Page
Open your preferred web browser.
Visit roshade.com/download, or click on the provided link.
Step 2: Choose Your Version
Click the “Download Roshade” button in the center of the page.
Select the Lite version if you prefer, then watch a brief 6-second ad.
Step 3: Download the Installer
Once the timer runs out, a skip button will appear in the upper right corner of the screen.
Click "skip," and the Roshade installer will start downloading.
Step 4: Locate the Downloaded File
Find the downloaded file in your downloads folder.
Your browser may also assist you in locating your downloaded files.
With these steps completed, you're ready to proceed to the installation. Follow the on-screen instructions, and soon you'll have Roshade integrated into your Roblox experiences.
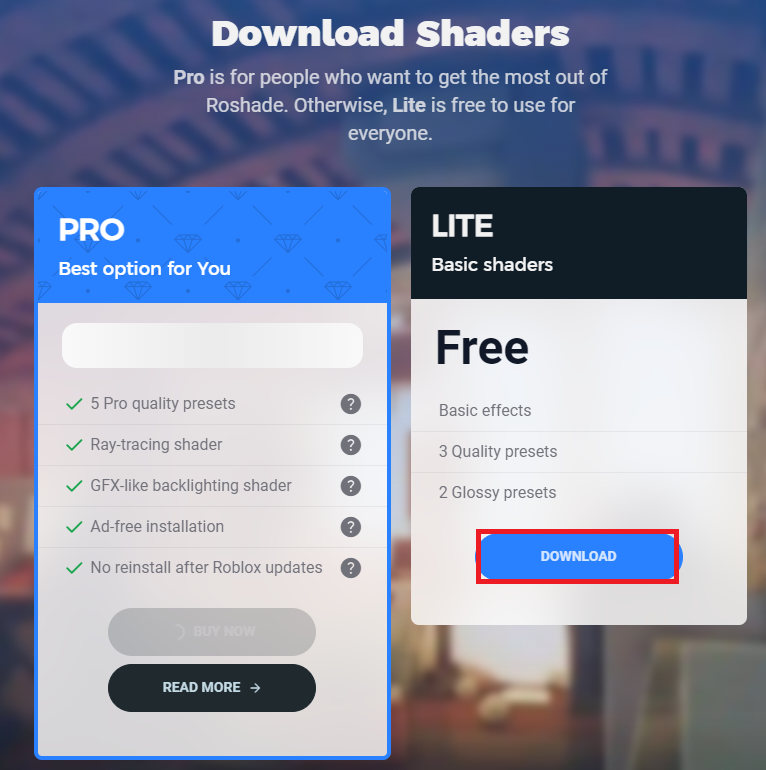
Download Roshade Lite for PC
Install & Use Roshade for Roblox on Windows
After downloading the Roshade installer, you're just a few clicks away from enhancing your Roblox experience with unique shaders. Here's a straightforward guide:
Step 1: Launch the Installer
Double-click the downloaded file to open the Roshade installer.
Click the "Install" button.
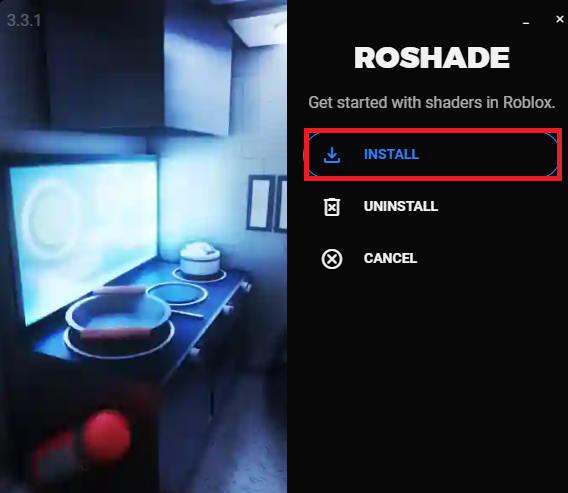
Get started with shaders in Roblox > Install
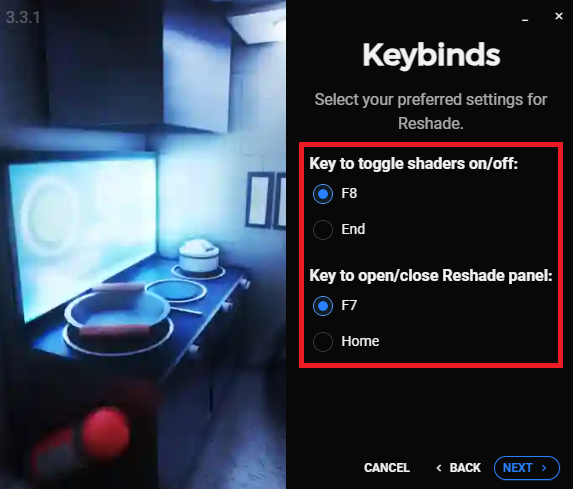
Step 2: Configure Key Bindings
You'll see 2 key binds, one for toggling shaders (default F8) and the other for opening and closing the Roshade panel (default F7).
Customize these key bindings if you prefer, and click “Next.”
Step 3: Select Presets & Install
Choose the presets you want to download.
Click the “Install” button and wait for the process to finish.
Click “Next” when the "Next" button becomes available at the lower right of the installer window.
Step 4: Launch & Play
Click the “Close & Launch” button.
You will be redirected to Roblox’s homepage, and you can start playing any Roblox game.
Shaders will automatically start in the background, adding new visual enhancements to your gaming experience.
Using Roshade in Roblox
Use the F8 key to turn shaders on and off.
Access more customization options with the Roshade panel by pressing the F7 key.
With Roshade installed, you're all set to enjoy a more visually appealing and immersive Roblox experience. Whether it's adjusting the visual settings or toggling them on and off, the power is in your hands to make Roblox look exactly how you like it!
Roshade Keybindings for Roblox
-
To download Roshade for Roblox, simply navigate to the official website at roshade.com/download, click the "Download Roshade" button, and follow the prompts.
-
By default, the key binding for toggling shaders in Roshade is F8, and for opening the Roshade panel, it's F7. You can customize these bindings during installation to your preferences.
-
Yes, Roshade for Roblox will automatically run in the background, enhancing any Roblox game you play with unique shaders.
-
Roshade offers various presets that you can download and install. These presets allow you to further customize the visual enhancements in your Roblox games.
-
Turning off shaders in Roblox with Roshade is as easy as pressing the F8 key (or your custom key binding). You can toggle them on and off at any time.