How To Disable Google Chrome Notifications on Windows PC
Introduction
Are you constantly interrupted by Google Chrome notifications on your Windows PC? Whether it's an unwelcome distraction while working or a hindrance during your leisure time, managing these notifications is crucial to a smoother online experience. In this guide, we'll walk you through a straightforward process to disable Google Chrome notifications completely or block them from specific sites. Whether you need total silence or selective filtering, we've got you covered. Follow along as we delve into the simple steps you can take to regain control over your browsing environment.
Blocking Notifications From All Websites
If you're feeling overwhelmed by constant notifications from various websites, disabling them completely in Google Chrome can lead to a more focused and enjoyable browsing experience. Here's a step-by-step guide to block all notifications:
Open Google Chrome: Launch your Google Chrome browser.
Access Settings: Click on the three dots at the upper right corner of your screen and find "Settings" in the dropdown menu. Click to open it.
Navigate to Privacy and Security: On the Settings page, locate the "Privacy and Security" tab in the left side panel.
Find Site Settings: Under "Privacy and Security," navigate to the "Site Settings" section.
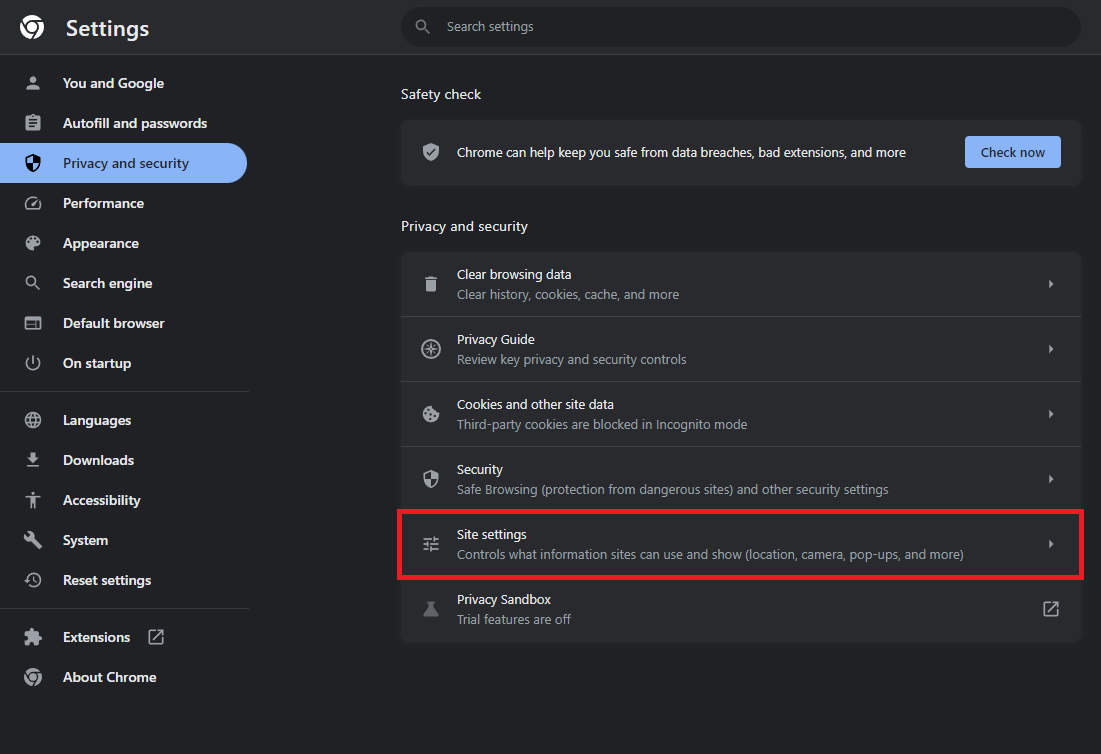
Google Chrome Settings > Privacy and Security > Site Settings
Access Notifications: Scroll down to find the "Notifications" option under "Permissions" and click on it.
Disable Notifications: Choose the "Don’t allow sites to send notifications" option under "Default behavior." This will completely disable all Google Chrome notifications.
By following these clear steps, you'll no longer receive any notifications, allowing for an uninterrupted browsing experience on your Windows PC. Whether you're working, studying, or enjoying content online, this adjustment puts you in control.
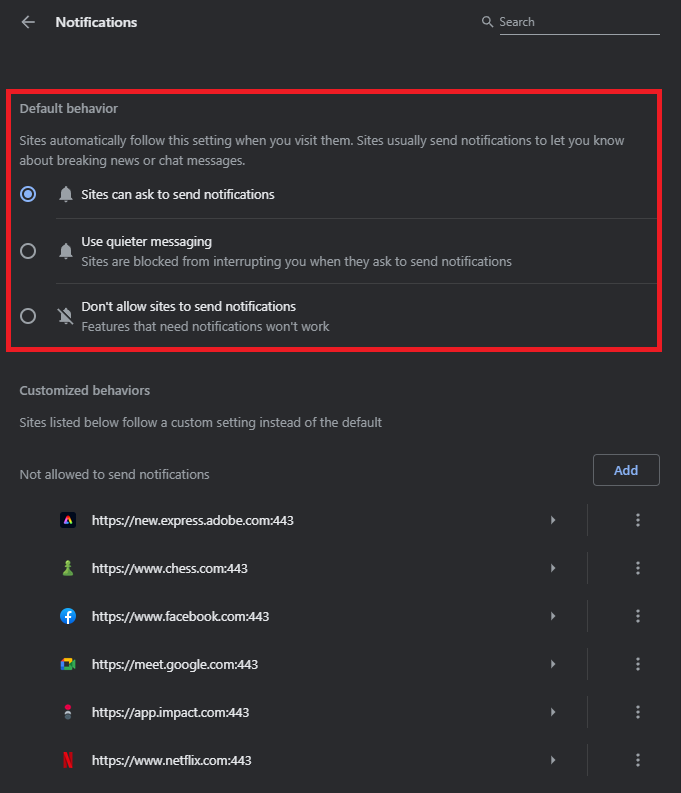
Google Chrome Settings > Privacy and Security > Site Settings > Default Behavior
Disable Notifications on Selected Websites
Maybe you don't want to block all notifications, just those from specific, intrusive websites. Google Chrome allows you to fine-tune your notification preferences on a site-by-site basis, ensuring that you maintain control over what reaches your notification center on your Windows PC. Here's how to block notifications from selected sites:
Access Customized Behaviors: In the Google Chrome settings, navigate to the “Customized behaviors” section.
Block Specific Sites: Click the first “Add” button, which allows you to enter the website's address that you wish to block. For example, if you want to block notifications from a news site that sends constant updates, you would enter the site's URL here.
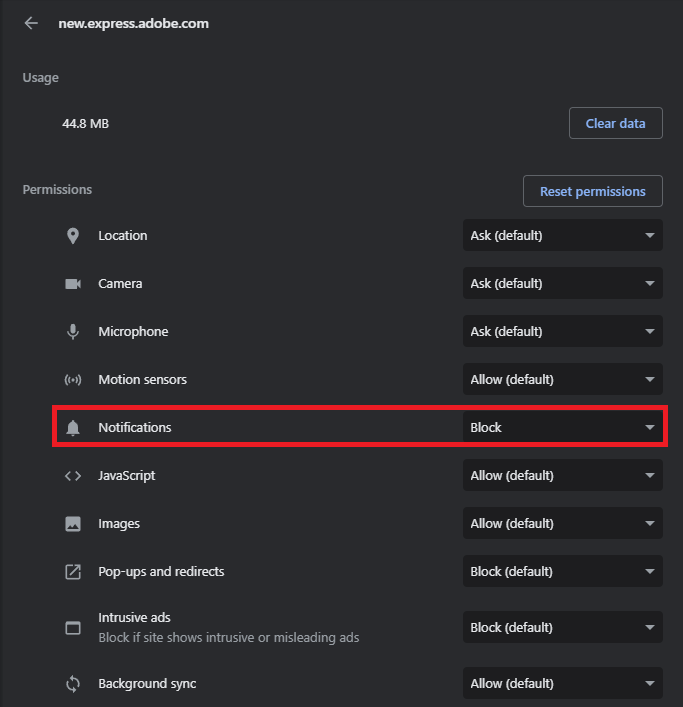
Confirm Your Selection: Follow the on-screen instructions to confirm that you want to block notifications from the selected site.
By following this straightforward process, you can create a tailored browsing experience that keeps you in control. Say goodbye to unwanted Google Chrome notifications on your Windows PC, while still keeping the lines of communication open with the sites that matter to you.
Manage Site notifications and other settings
-
To disable all notifications, go to Chrome's settings, navigate to “Privacy and Security” > “Site Settings” > “Notifications,” and select “Don’t allow sites to send notifications.”
-
Yes, under the “Customized behaviors” section in Chrome's settings, you can add specific websites to block them from sending notifications to your Windows PC.
-
Blocking notifications doesn't generally affect the performance of Chrome. It merely stops notifications from selected or all websites.
-
Absolutely! You can always revisit the “Notifications” section in the Chrome settings and adjust your preferences to enable or block notifications as you wish.
-
The steps to block notifications on Google Chrome are generally the same across different versions of Windows, providing a consistent experience.