How To Fix Chrome Search Switching to Bing or Yahoo - Tutorial

Introduction

Dealing with your Google Chrome search engine mysteriously switching to Bing or Yahoo can be puzzling and frustrating. This guide aims to restore your search preferences to normal, tackling the root causes such as unwanted extensions and the need to reset Chrome settings. Through a few straightforward steps, we'll explore how to cleanse your browser of any unsolicited changes and ensure your searches return to using Google. Perfect for anyone looking to rectify this common but annoying issue swiftly, our tutorial is designed to be easily followed, ensuring a hassle-free resolution.

Review and Remove Suspicious Chrome Extensions

To tackle the issue of your Chrome search engine unexpectedly changing to Bing or Yahoo, start by examining your browser extensions. This problem is frequently caused by unwanted or malicious extensions that may have been inadvertently installed.

  1. Access Extensions: Open Chrome, click on the three vertical dots in the upper right corner, and choose "More tools" followed by "Extensions." This will take you to a page listing all installed extensions.

  2. Identify and Remove Unwanted Extensions: Carefully review the list for any extensions that seem unfamiliar, unnecessary, or suspicious. Unwanted extensions might not only alter your search settings but also compromise your privacy and security.

  3. Remove Extensions: For any extension you wish to remove, click on the "Remove" button associated with that extension. Confirm the removal when prompted.

  4. Report Malicious Extensions: If you come across an extension that you believe is harmful, use the "Report abuse" option to notify Google. This action helps enhance browser security for you and the wider user community.

By periodically auditing your Chrome extensions and removing those that are not needed or appear suspicious, you can maintain a cleaner, safer browsing experience and ensure your search engine settings remain unchanged.

manage chrome extensions

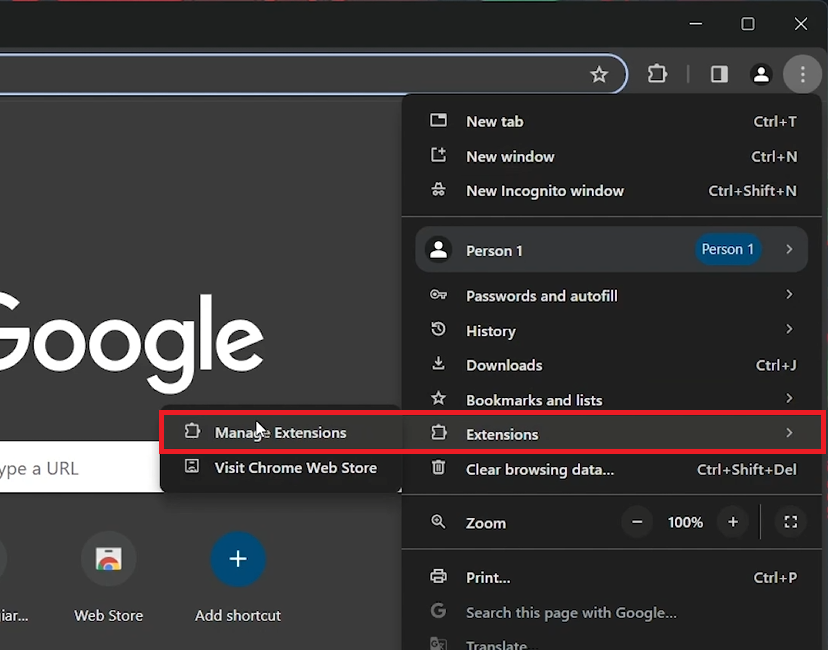
Manage Google Chrome Extensions

How to Reset Google Chrome to Default Settings

Resetting Google Chrome to its default settings is a powerful step to fix issues caused by modifications from unwanted software or extensions. This reset will restore Chrome's default settings without affecting your bookmarks, history, and saved passwords.

  1. Open Chrome Settings: Start by clicking the three vertical dots in the upper-right corner of Google Chrome, then navigate to "Settings."

  2. Find Reset Option: Within the Settings menu, scroll down to the bottom and click on "Advanced" to expand additional options. Look for the "Reset and clean up" section.

  3. Reset Chrome: Click on "Restore settings to their original defaults." You will see a dialogue box warning you about what will be reset. This includes your startup page, new tab page, search engine preferences, and disabled extensions.

  4. Confirm Reset: After reviewing the information, click on the "Reset settings" button to start the process. This action will clear temporary data, such as cookies, and disable all extensions, but your essential data like bookmarks and passwords will remain untouched.

Proceed with this reset to ensure Chrome is free from any settings changes made by previously installed extensions or software. Remember, this action is irreversible, so ensure it's the right step for your needs.

reset chrome settings

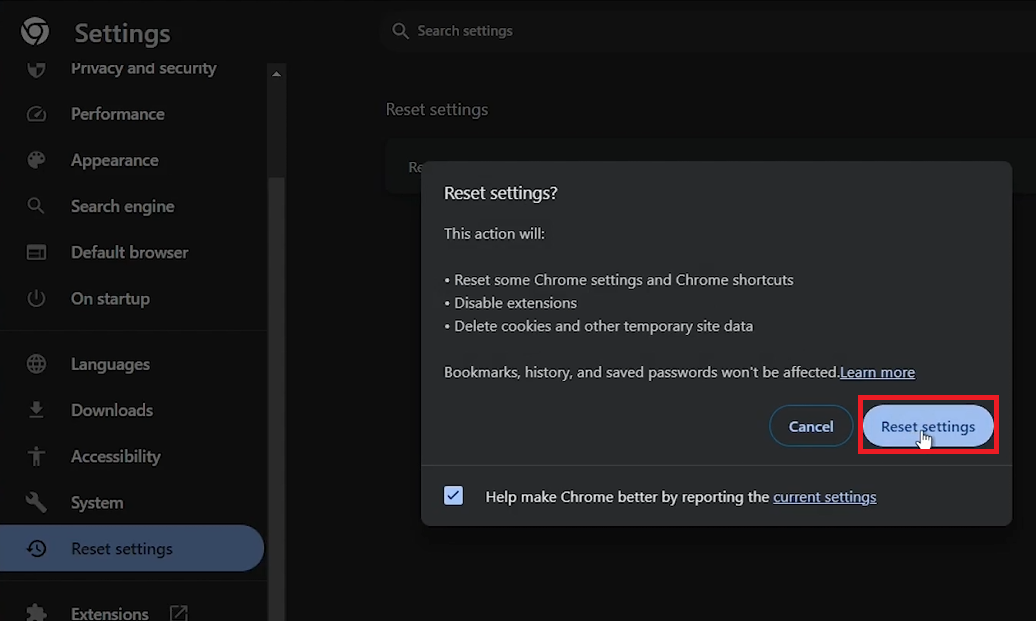
Chrome Settings > Reset Settings

Conduct a Full Antivirus Scan on Windows

For an extra layer of troubleshooting, conducting a thorough antivirus scan on your Windows PC is recommended to root out any malware or harmful programs that could be meddling with your browser settings.

  1. Access Windows Security: Begin by typing “Windows Security” into the search bar next to the Start Menu and pressing Enter. This will open the Windows Security center, which is your main hub for virus protection and threat management.

  2. Initiate a Scan: Navigate to the "Virus & threat protection" section. Here, you will find options for various types of scans. For a comprehensive check, select "Scan options."

  3. Choose Full Scan: Opt for the "Full scan" option to allow Windows Security to thoroughly examine all files and running programs on your hard disk. This scan is more exhaustive than the "Quick Scan" and can take significantly longer but is more effective at detecting hidden malware.

  4. Start the Scan: After selecting "Full scan," click on "Scan now" to commence the process. Ensure your PC is plugged in, as this can take a while depending on the amount of data and the speed of your system.

This in-depth scan will ensure any malware that might be hijacking your browser settings or redirecting your searches for their gain is identified and removed. It's a crucial step towards maintaining your PC's health and security.

antivirus scan

Virus & Threat Protection > Quick Scan

  • This usually happens due to unwanted extensions installed in your Chrome browser that alter search engine settings or due to malware infections that change browser configurations for ad revenue or data theft.

  • Start by inspecting and removing any suspicious or unknown extensions from Chrome. Navigate to Chrome's extension settings, review your installed extensions, and remove any that you did not intentionally install or that seem suspicious.

  • If the problem persists, try resetting Chrome to its original settings. This action will disable all extensions and clear temporary data, which can often resolve issues caused by changes in browser settings.

  • Resetting Chrome settings can safely resolve many issues without affecting your saved bookmarks and passwords. However, it will disable all extensions and clear temporary data, so you may need to re-enable extensions manually.

  • Run a full antivirus scan using Windows Security or your preferred antivirus software. This can help detect and remove any malware that may be causing your search engine to switch unexpectedly.

 
Previous
Previous

How To Enable XMP on MSI Motherboards - Complete Guide

Next
Next

How To Join Tournaments in Fortnite - Complete Guide (2024)