

Streamlabs OBS - How To Reduce CPU Usage

Are you a Streamlabs OBS user experiencing high CPU usage while streaming? Don't worry, you're not alone. High CPU usage is a common issue that many users face while streaming with Streamlabs OBS. The good news is that there are several ways to reduce CPU usage and optimize your streaming experience. This article will explore different methods to reduce Streamlabs OBS CPU usage and improve your overall streaming quality. From optimizing Streamlabs OBS settings to utilizing third-party tools, we'll cover everything you need to know to improve your streaming experience.
Adjust the Streamlabs Settings
Video Output Settings
Open up Streamlabs OBS and navigate to your settings. In the Output section, make the following changes:
Set the Output Mode to Advanced
Set the Encoder preset to NVENC if you have a powerful enough NVIDIA GPU to take off some load from your CPU
Downscale your Streaming Resolution to 720p
Set your Rate Control to CBR
Set your Keyframe Interval to 2 seconds
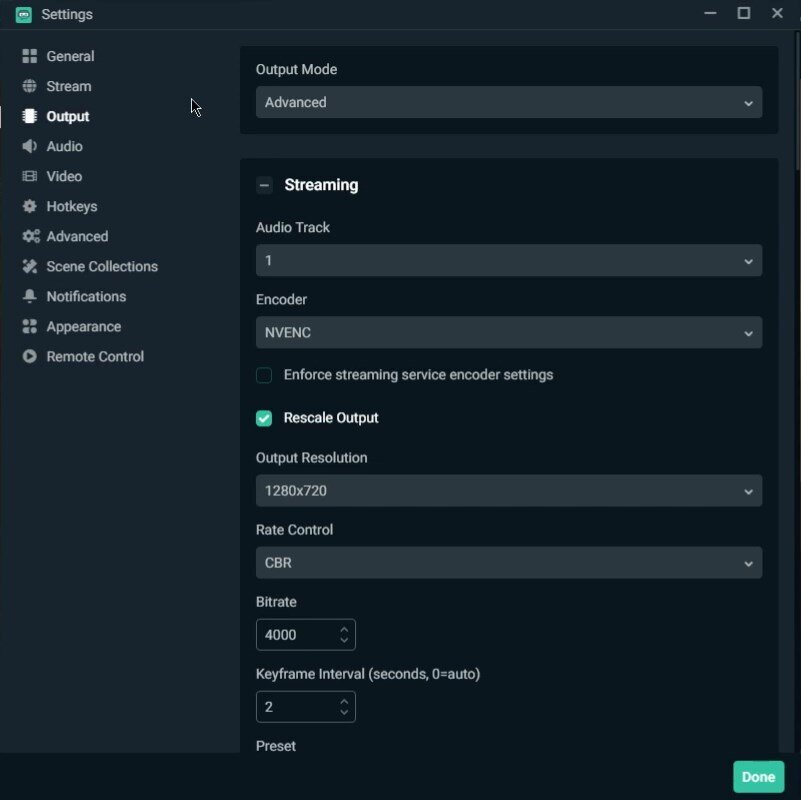
Adjust your Streamlabs Output settings for reduced CPU usage
Streamlabs Video Settings
In the Video section, set your Downscale Filter to bicubic or bilinear.

Streamlabs Settings > Video
Streamlabs Advanced Settings
Navigate to the Advanced section and here set the Process Priority to High or Above Normal.

Streamlabs Settings > Advanced
End Resource-Intensive Tasks
To reduce the CPU utilization from other programs, we suggest you end some programs from running in the background, which you don't need while streaming or playing. Right-click your taskbar to open up your task manager. In the Processes tab, right-click the programs you want to end, but make sure only to end programs from running that you know won't break your operating system.
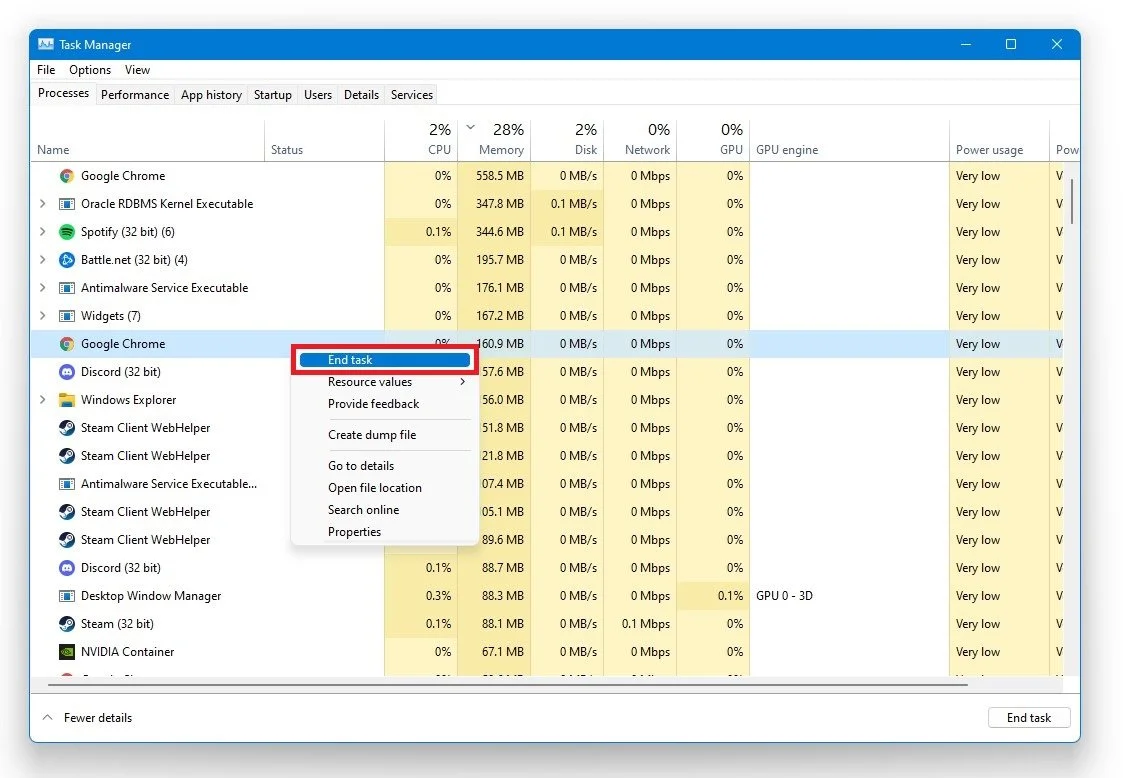
Task Manager > Processes > End Task
In the Startup tab, you can additionally prevent programs from starting up on system boot.

Task Manager > Startup
Delete the Windows Temporary Files
Your hard drive might be cluttered with unwanted files. These files will induce lag if not removed properly. You can delete your temporary files manually or use PC cleanup programs, such as CCleaner. These applications are usually the best choice as they automatically keep your hard drive clean. To manually delete your temporary files, enter %temp% in your taskbar search and hit enter. A new folder will open up in which you should delete everything.
Sometimes, this can take a few minutes if you haven’t done this before. Some files will most likely stay in your temp folder, as these are still in use by your programs. To completely delete these files, you should also empty your recycle bin.
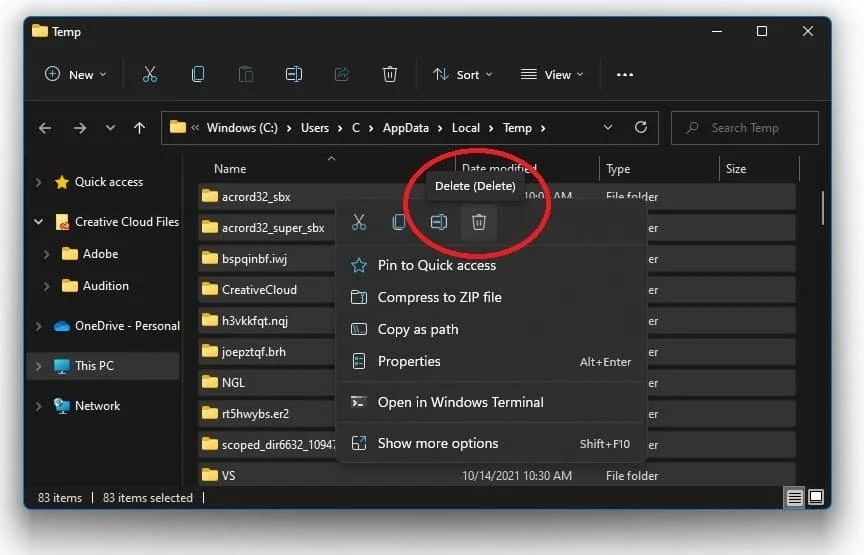
Delete the temporary Windows files from time to time


