

Apex Legends - Unable to Boot Game & Crashing Fix on Windows 11

If you're an Apex Legends player experiencing issues with your game crashing or not even booting up on your Windows 11 PC, you're not alone. These frustrating problems can be caused by a variety of factors, but don't worry – there are solutions out there that can help you get back in the game.
In this article, we'll provide you with a comprehensive guide on how to fix Apex Legends’ crashing and booting issues on Windows 11. We'll cover everything from basic troubleshooting steps to more advanced solutions, so no matter your level of tech expertise, you'll be able to find a fix that works for you.
Repair Easy Anti-Cheat
Open up your File Explorer and navigate to the drive you saved the game on, in this case it’s the D: drive. Navigate to: Program Files > Steam > steamapps > common > Apex Legends > EasyAntiCheat. Double-click the EasyAntiCheat_Setup application. After a second, a new window will open up. Select Repair Service. This should only take a few seconds to complete, and you can close the window when it’s finished reinstalling.

Easy Anti-Cheat Service Setup > Repair Service
Change the Apex Legends Compatibility Settings
Next, navigate back to the Apex Legends folder, scroll down and right-click r5apex. Select Properties. In the Compatibility tab of this window, select Run this program in compatibility mode for Windows 7. In your Settings, make sure to Disable fullscreen optimizations. Don’t forget to apply your changes. After applying your changes, you can close this window and your file explorer.

r5apex.exe Properties > Run this program in compatibility mode for Windows 7.
Verify the Integrity of the Apex Legends Game Files
For Steam users, open up your Steam library. You can do the same step in your Epic Games or Origin launcher. Right-click Apex Legends and select Properties. In the Local Files tab, select Verify integrity of game files. Redownloading and replacing any missing or corrupted game files will take a minute.
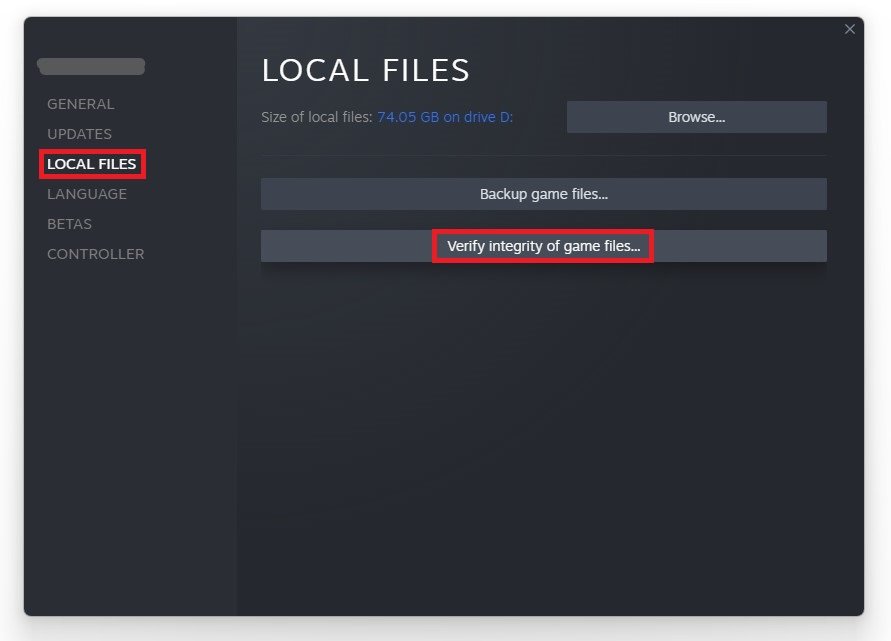
Apex Legends Properties > Local Files > Verify Integrity
Use Launch Options for Apex Legends
In the General tab, you should use Launch Options, which are commands that can improve your game’s performance and fix startup issues. Use some of the following commands:
+fps_max
Set an FPS value to which you want the game to run. Set it to 0 to uncap your FPS, which might decrease performance.
-novid
Will enable you to skip the game’s intro when launching Apex Legends.
-cl_forcepreload (1/0)
Set it to 1 to force the game to load sounds, textures, and other assets before jumping into a game. This will increase loading times at first but increase your performance while playing.
-refresh
Set this to your monitor's refresh rate to force you to run the game at the same refresh rate. For example -refresh 144
+cl_showfps 1
This will show your FPS value while playing the game.
+cl_showpos 1
This allows you to verify your exact position in the game, as well as your velocity and other useful information.
-forcenovsync
Makes sure that your vertical sync is always turned off. This could induce screen tearing, but also increase performance.
+twitch_prime_linked 1
This will make the game think that you have a Twitch Prime account linked to the game and thus enables you to enjoy twitch prime loot
-fullscreen
This will force the game to run in fullscreen mode.
+exec autoexec
This enables you to run an auto-executable file with additional commands before launching the game.
Update Graphics Card Driver
If the issue persists, then make sure that your graphics card driver and operating system is up to date. We suggest using the GeForce Experience application for an NVIDIA graphics card, but you can also use the AMD driver suite. In the Drivers tab, click Download, and the application will automatically download and install the latest driver.

GeForce Experience > Drivers > Download
GeForce Experience Optimization Settings
In the Home tab, click on Details for Apex Legends. You will be presented with the current and optimal in-game settings. You have the option to let the application optimize the settings for you, or click on the wrench icon to do it yourself. Optimize your settings for performance. You can always change the settings back once you're in-game. You should set the resolution to your native monitor resolution, and launch the game in windowed mode to make sure that it's launching properly.

GeForce Experience > Home > Apex Legends > Change Display Resolution and Display Mode
Disable the GeForce Overlay
In your GeForce Experience settings, disable the in-game overlay in the General tab, as some application overlays can cause the game to crash or not launch properly.

GeForce Experience > General Settings > In-Game Overlay
Windows OS Update
Next, search for Update in your start menu search to open up your Check for updates system settings window. Click on Check for updates, and after downloading the latest OS update, restart your PC.
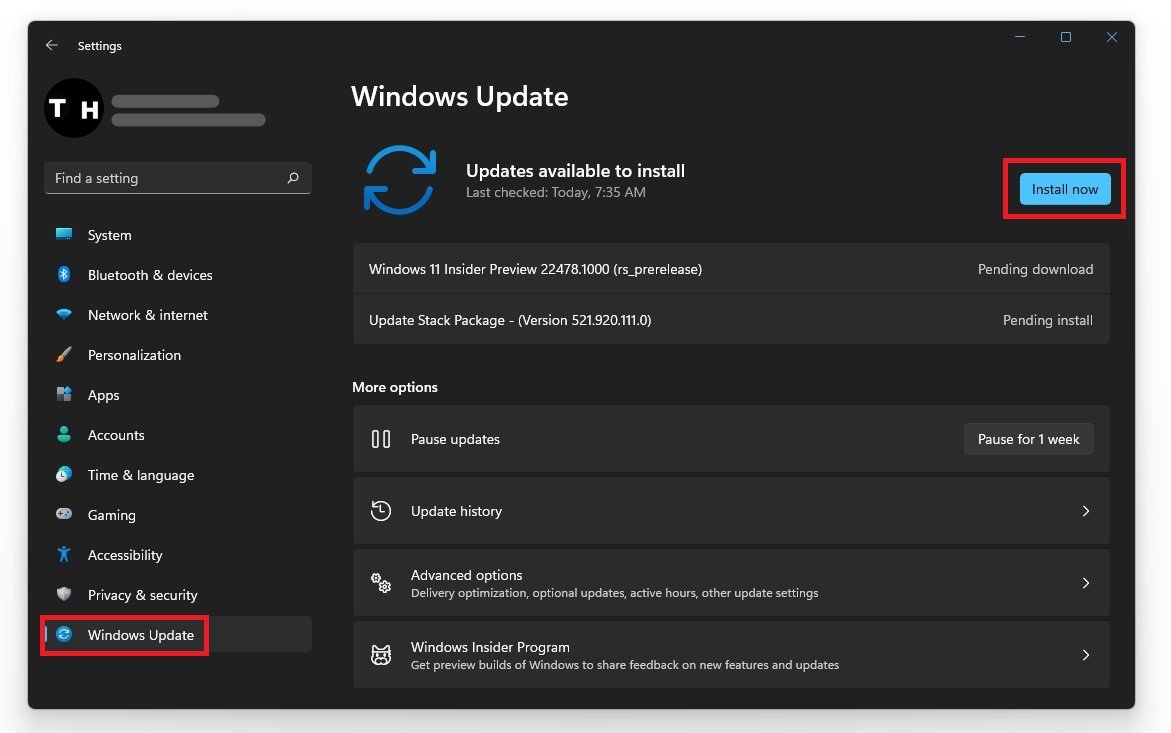
Windows Settings > Windows Update
End 3d-Party Applications from Running
If you still experience startup issues, then you most likely have software running on your system, hindering you from playing the game. To fix this, I suggest uninstalling recently installed programs that can change your files, or using up your available resources, such as OBS, Shadowplay, CCleaner, or Adobe applications, to troubleshoot which program is causing the error. Sometimes, even your firewall or antivirus application can negatively impact the game’s anti-cheat.
Open up your Task Manager by right-clicking your taskbar and selecting it. In the Processes tab, make sure to end programs from running that you don’t need while playing the game and which could trigger the anti-cheat software. In addition, close applications which could show an overlay while in-game.
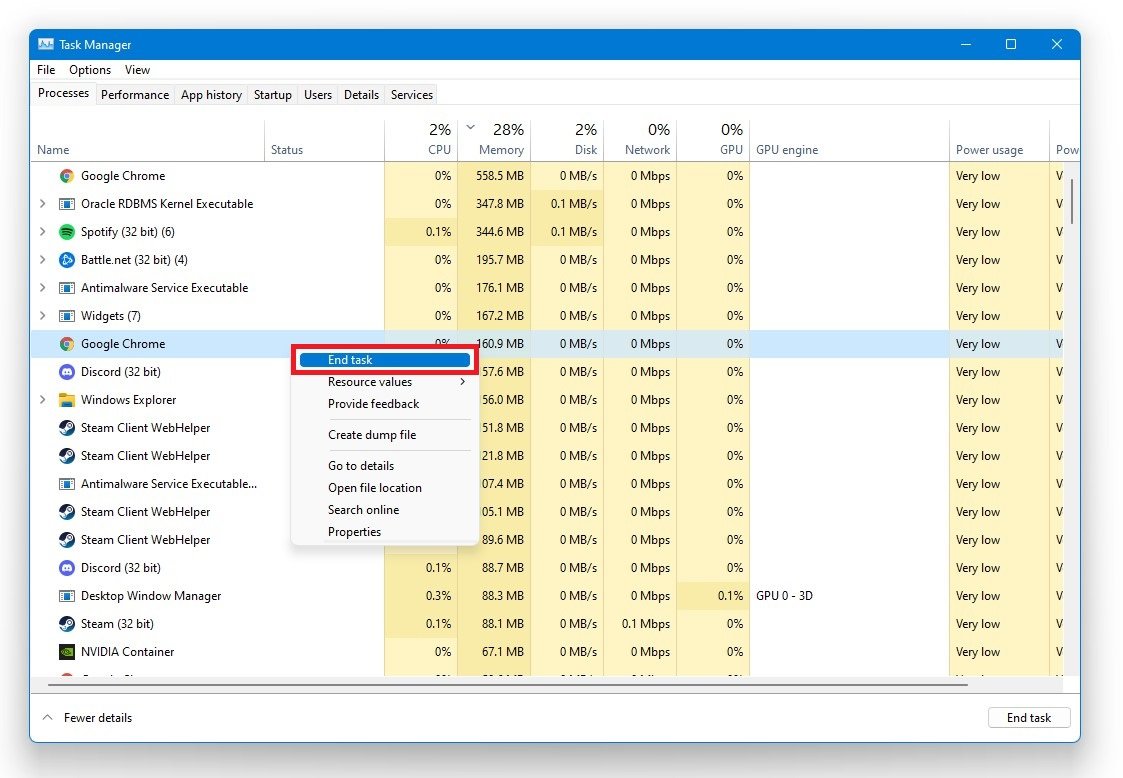
Task Manager > Processes > End Task
Delete Temporary Windows Files
Lastly, delete your temporary files. Search for %temp% in your start menu search and hit enter. A new folder will open up containing all of your temporary files. These files are saved by your programs and should be deleted occasionally. Use the shortcut CTRL + A to select everything and delete the content. Some files may remain, so just leave them there.
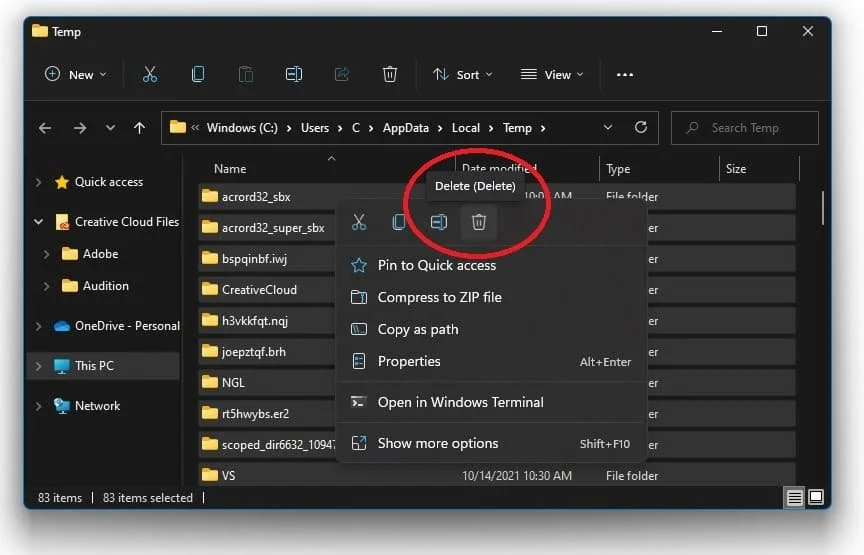
Delete the content of the %temp% folder


