Audacity - Best Settings & Mic Setup on Windows
Audacity is one of the most popular and widely used audio editing applications available today. With its vast array of features, intuitive interface, and comprehensive compatibility, Audacity is the perfect choice for both professional and amateur audio engineers. However, configuring your microphone and audio settings on Windows can be a challenge, especially for those new to Audacity. To help you get started, this article will guide you through the best settings and microphone setup for Audacity on Windows. Whether you're recording a podcast, a video, or a music track, these tips and tricks will help you achieve the best results possible.
Audacity Device Preferences
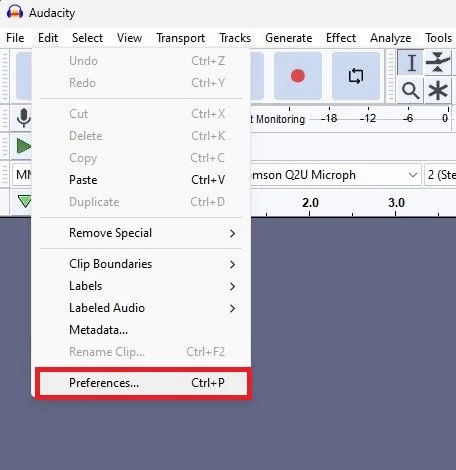
Open up Audacity, navigate to Edit > Preferences, or use the shortcut CTRL & P.
Audacity Preferences
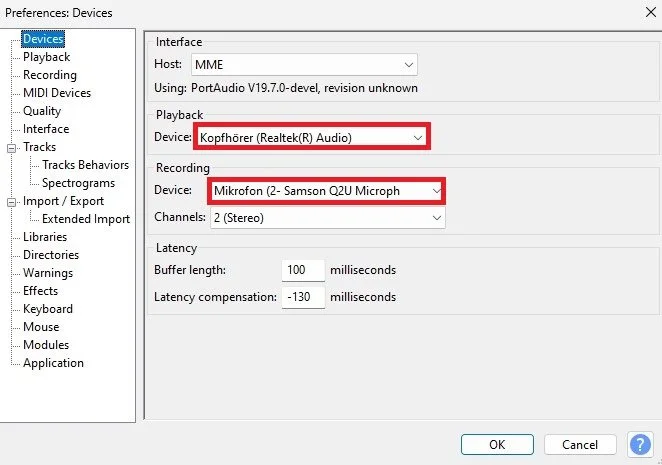
In the Devices section, set the Playback device to your preferred output device, in my case, this will be my headphones. Set your Recording device to your microphone or another recording device.
Audacity Preferences > Devices
Recording Preferences
In the Recording section of your preferences, disable the Overdub option.
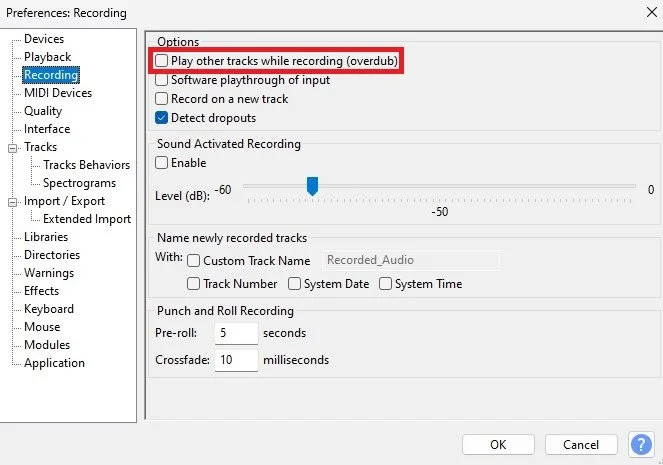
Audacity Preferences > Recording
Quality Preferences
Under Quality, set your Default Sample Rate to either 44’100 or 48’000 Hz. This will depend on your audio device. Below, set the Default Sample Format option to 32-bit float.
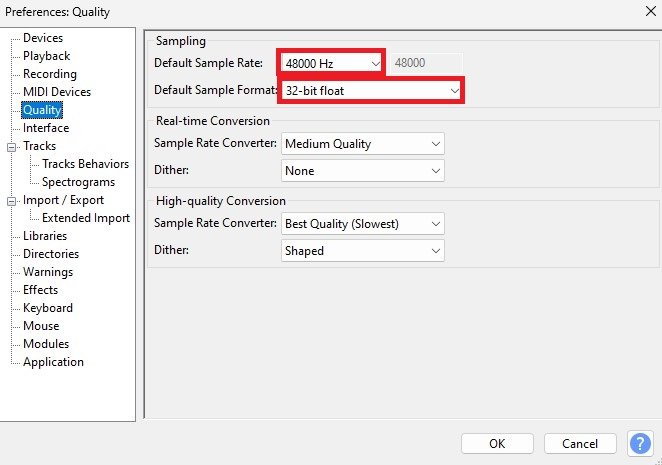
Audacity Preferences > Quality
Windows Sound Output Settings
To find out which sample rate you are using, open up your Windows settings. Under System, select Sound.
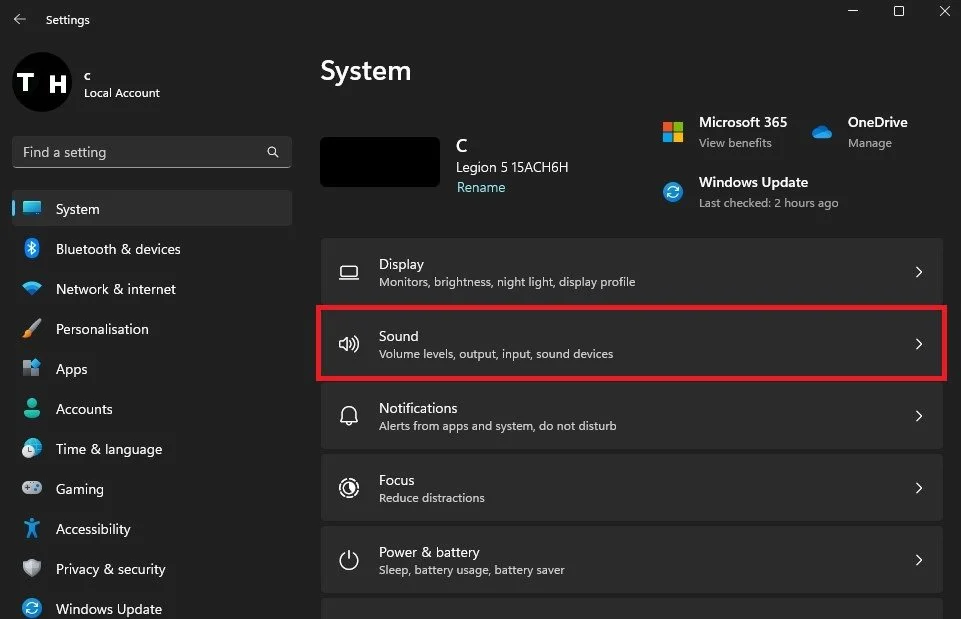
Windows Settings > System > Sound
Make sure that your preferred audio output device is selected and navigate to its properties. Here, you can preview your output format. Under Audio enhancements, set this option to Device Default Effects.
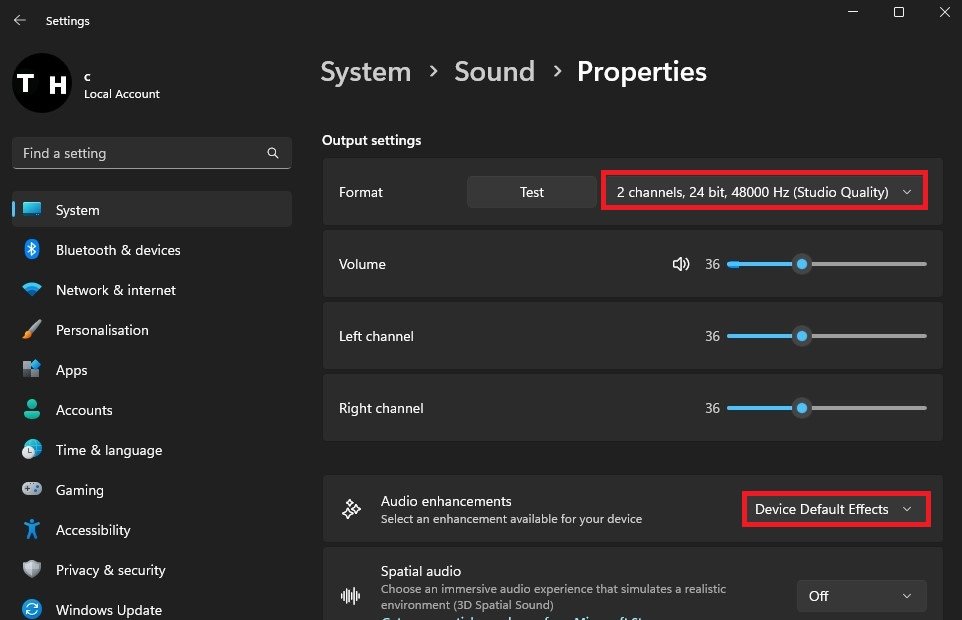
Windows Settings > System > Audio Device Properties
Windows Sound Input Settings
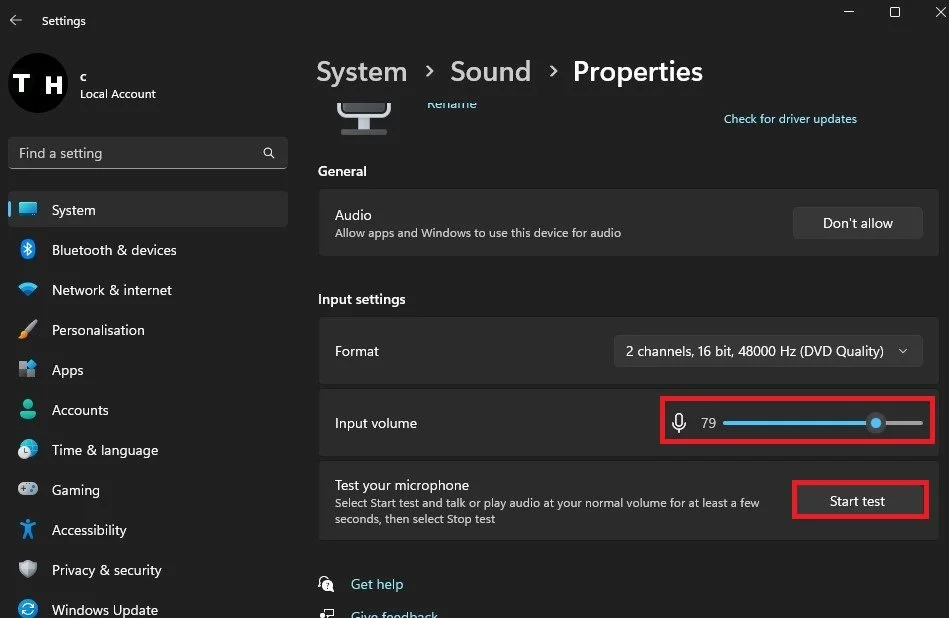
Select your preferred microphone and set the input volume to around 80% in your sound settings. In some cases, you will want to set it to 100%, for regular headset microphones, for example. If unsure, you can test your current microphone levels from here.
Windows Settings > System > Audio Device Properties
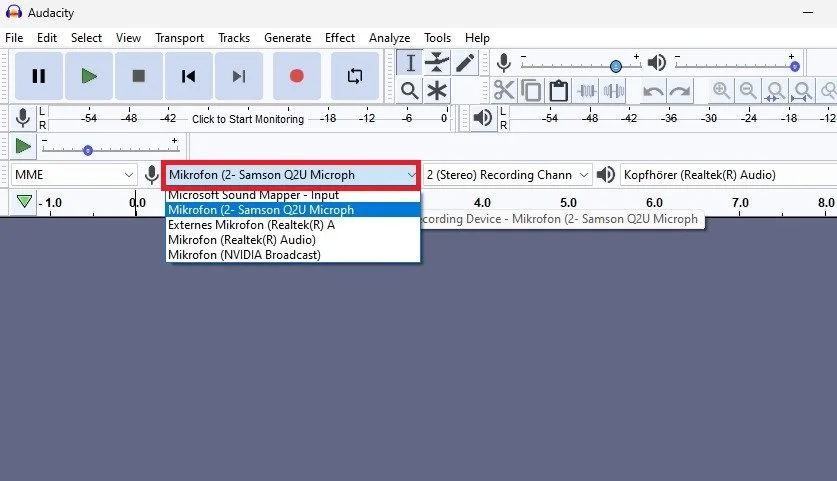
Audacity Microphone & Sound Output Switcher
In some cases, Audacity will change your audio input and output device. Make sure to verify the application’s selection in these drop-down menus.
Audacity Audio Output Device
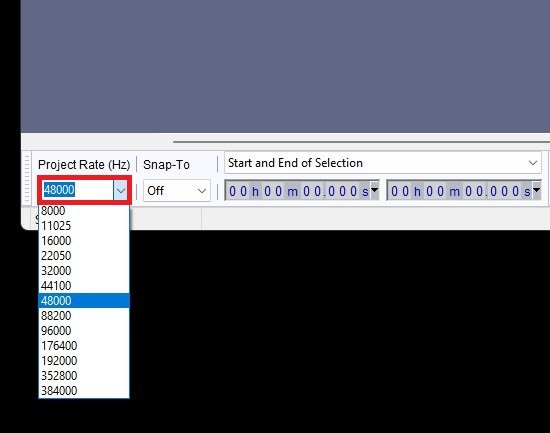
At the bottom of this window, you can also manually change the Project Rate in Hz.
Audacity Project Rate (Hz)
-
Audacity is a free, open-source, cross-platform digital audio editor and recording software. It allows you to record, edit, and manipulate audio tracks with ease, making it a popular choice for both amateur and professional audio engineers. With Audacity, you can record live audio, convert tapes and records into digital recordings, edit audio files, and more.
-
To use Audacity on Windows, you will need a computer with a Windows operating system, a minimum of 512 MB of RAM, and a sound card with a microphone input. Audacity is compatible with Windows 7, 8, 8.1, and 10.
-
The best settings for recording audio in Audacity will depend on the type of recording you're doing and the microphone you're using. However, a good starting point is to set the recording quality to 44.1 kHz and 16-bit. This will provide a good balance between sound quality and file size.
-
Yes, you can use Audacity to record multiple tracks at once. This is known as multitrack recording. To do this, simply go to the File menu and select New Multitrack Session. Then, select the number of tracks you want to record and start recording. You can then edit and manipulate each track individually, giving you complete control over your recordings.