How To Create a GIF in Photoshop - Tutorial
Introduction
Embarking on the journey to craft the perfect GIF is easier than you might think, especially when armed with the powerhouse of image editing - Photoshop. Whether you're aiming to create a captivating series of animation frames or simply transform a collection of still photos into a vibrant GIF, this tutorial holds the key to unlock your creativity.
In the following guide, we'll delve into the seamless process of assembling a GIF in Photoshop, guiding you from the initial step of gathering your preferred images to mastering the timeline panel for frame animation creation. Whether you are using frames rendered in Blender or snapshots from your gallery, we've got you covered.
Initializing Your Photoshop Project
To commence your GIF creation journey, the first step involves collating a series of images that will constitute your GIF. You can opt for a vibrant array of still photos, snippets from a video, or even expertly crafted animation frames. In this instance, we are utilizing frames sculpted in Blender as a prime example.
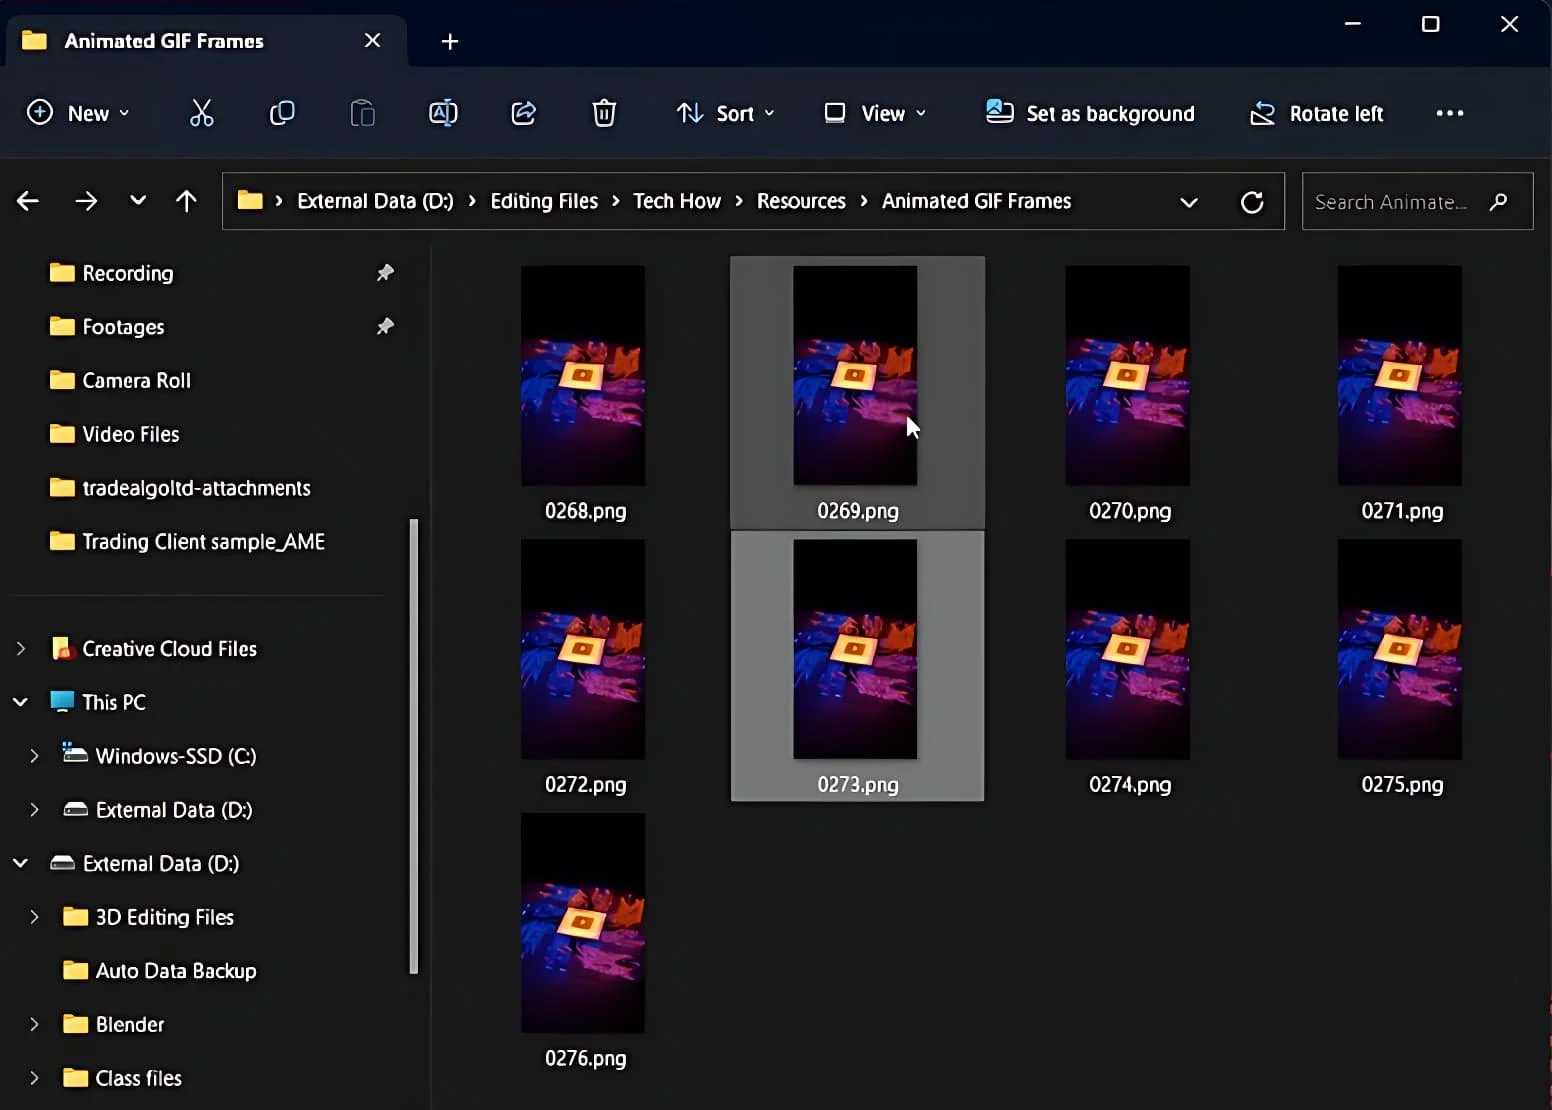
Select your images for your .gif file
Following this, initiate Photoshop and craft a new file to house all your selected images. Navigate through the menu by selecting “File” followed by “Scripts” and then “Load Files Into Stack”.
In the ensuing pop-up window, click on “Browse” and meticulously choose the images destined to be stars in your GIF narrative. This intuitive feature allows you to orchestrate a visually pleasing GIF with ease and precision.
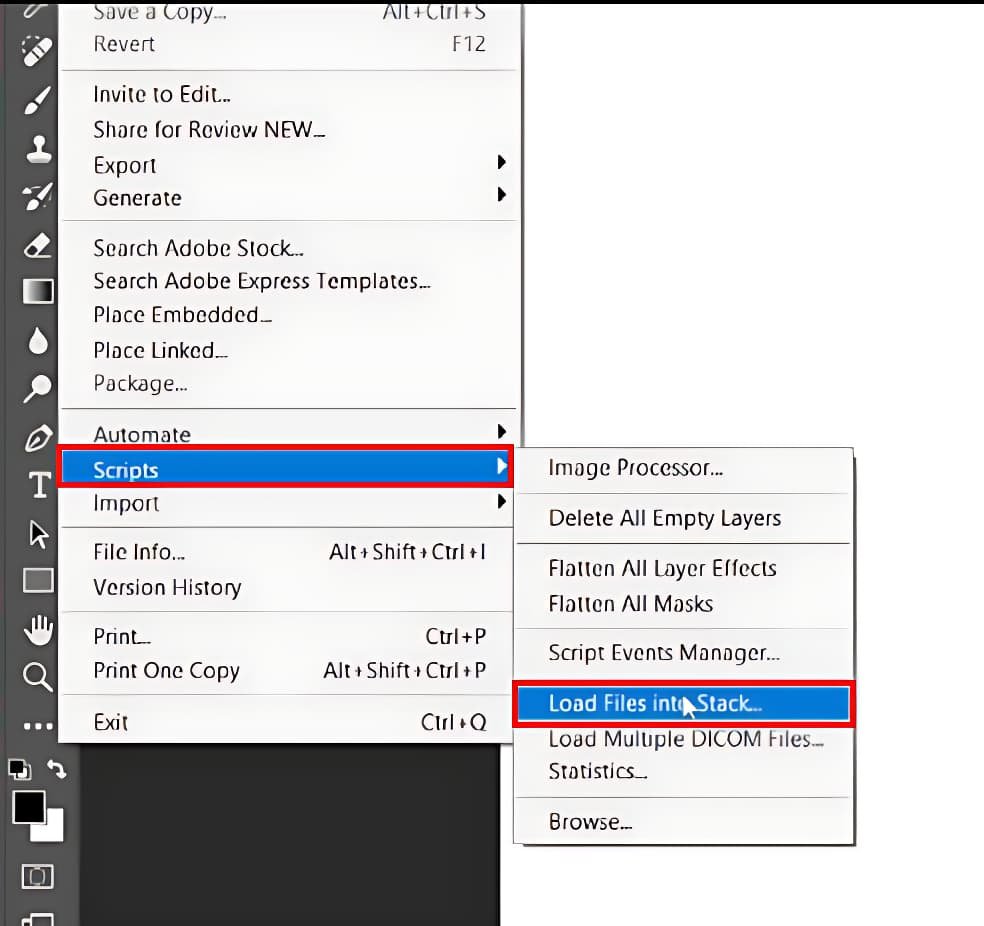
File > Scripts > Load Files into Stack…
Crafting Your GIF in Photoshop
Upon importing your chosen images, direct your attention to the “Timeline” panel available through the Window > Timeline pathway. Here, opt for the "Create Frame Animation" choice, facilitating the organization of your layers into distinct frames on the timeline, a crucial step in the GIF creation process.
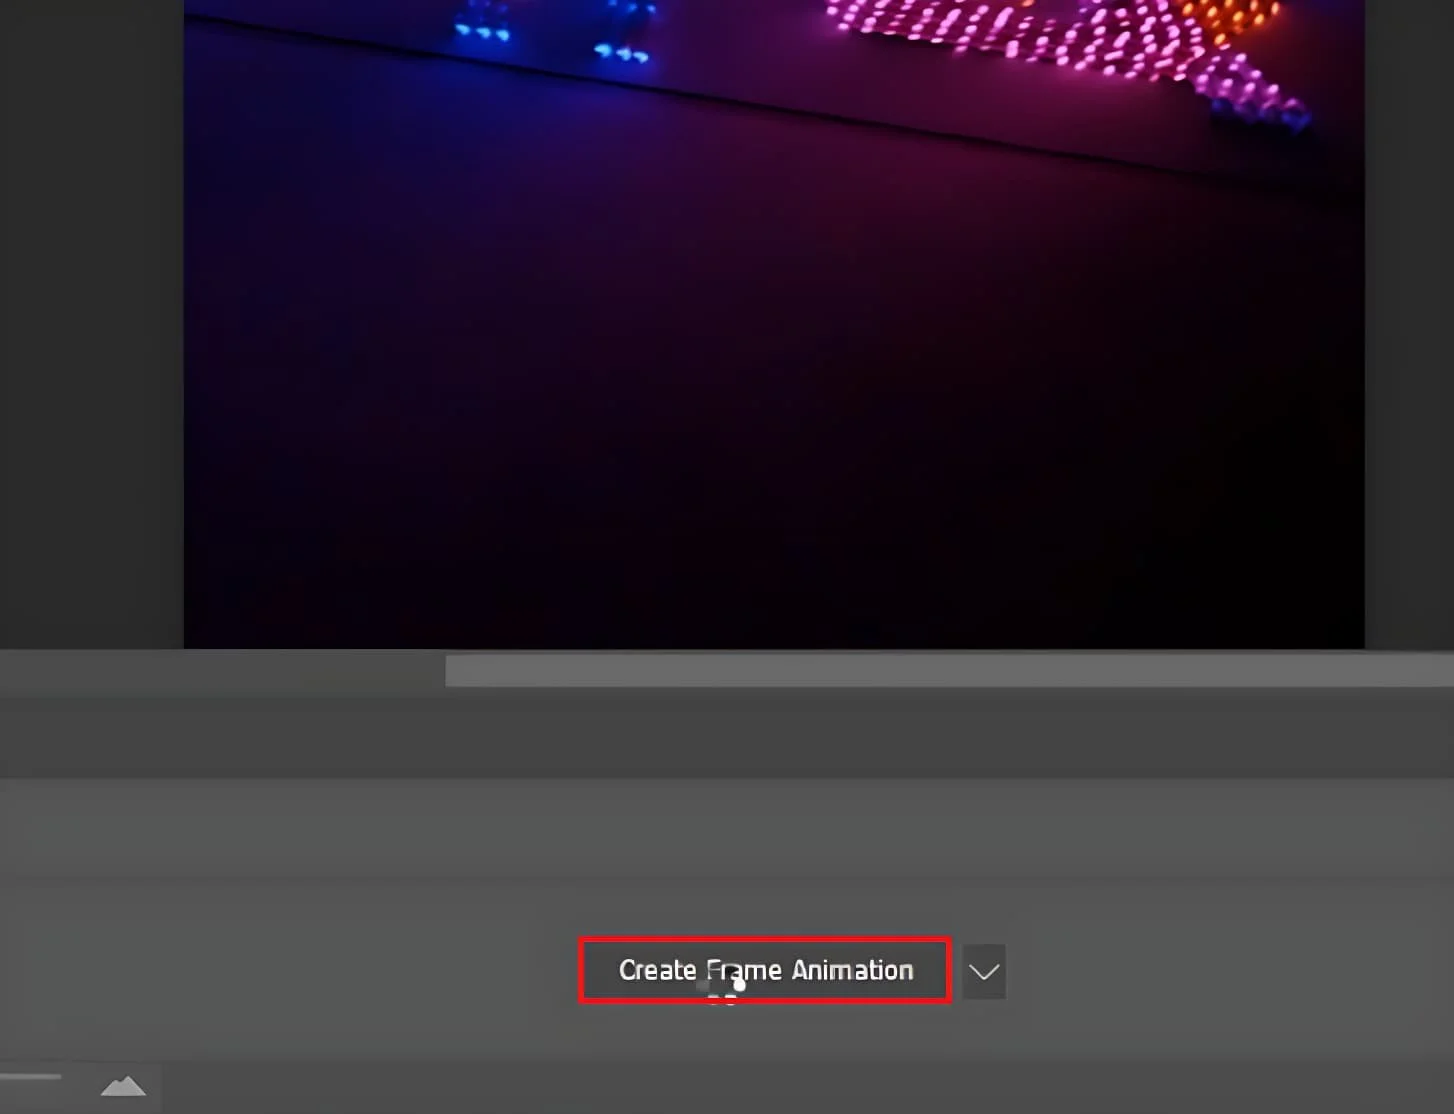
Click “Create Frame Animation”
Next, spot the trio of lines situated at the upper right segment of the timeline window. Click to unveil an array of options, and select “Create New Layer for each New Frame”. Dive back into the menu and choose the “Make Frames From Layers” feature, thus setting the stage for a seamless GIF crafting experience with Photoshop.
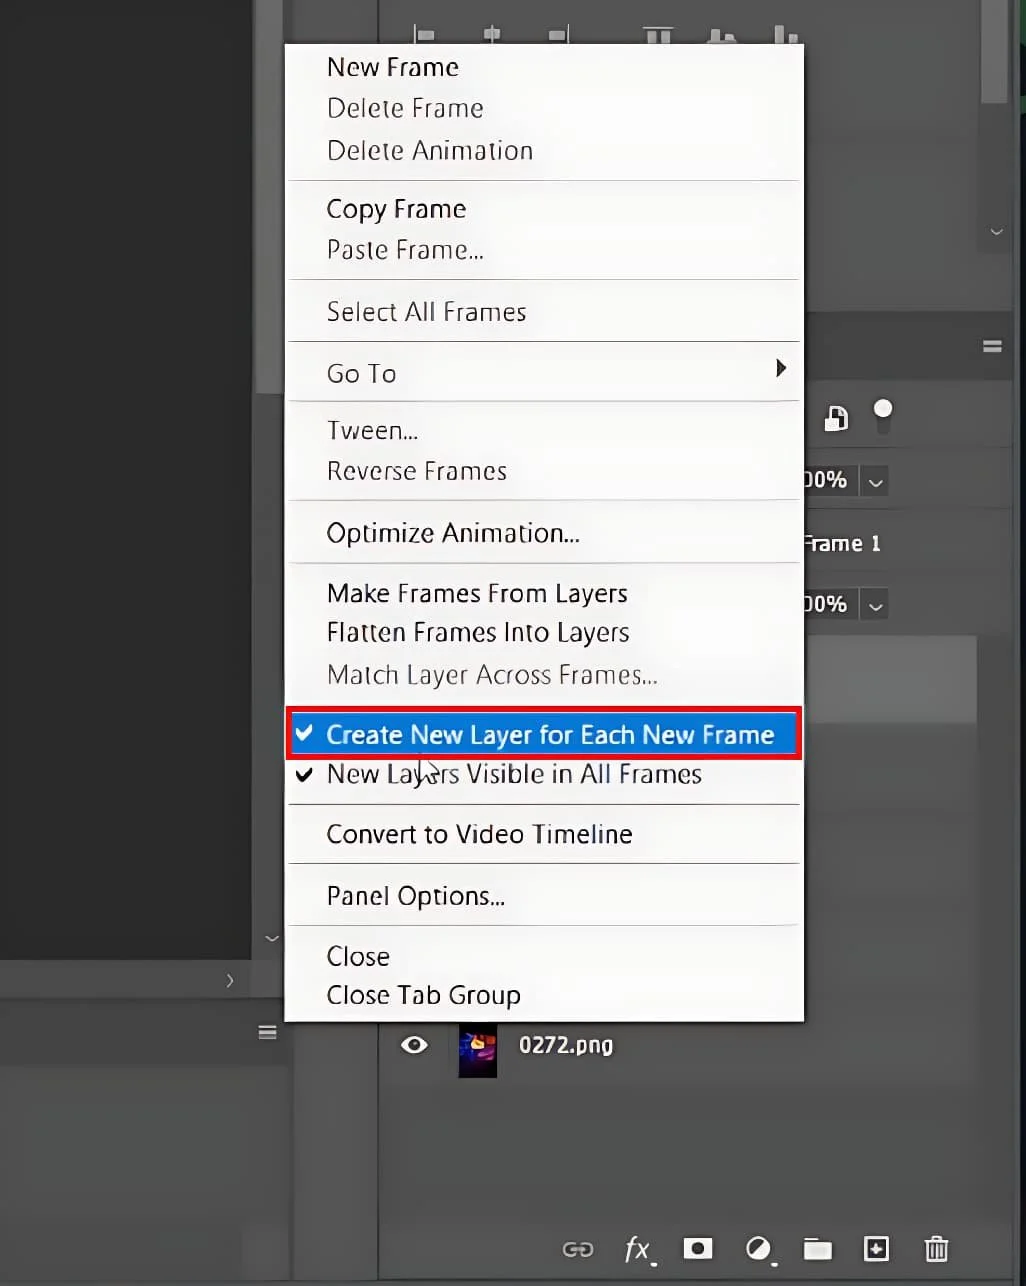
Create New Layer for Each New Frame
Finalize and Save Your GIF
At this stage, fine-tune your GIF to perfection by navigating through the customizable settings available in Photoshop. Adjust the display duration for each frame to create a fluid animation, with options to exemplify a slow-motion or rapid sequence. Moreover, to achieve a continuous loop effect that keeps viewers engaged, activate the "Forever" loop option.

Adjust your GIF settings
Once your animated GIF aligns with your vision, proceed to secure your project. Navigate to File > Export > Save for Web (Legacy), selecting the GIF format as your preferred file type. Choose a suitable location on your system to save, ensuring your artistic creation is ready for sharing and impressing audiences.
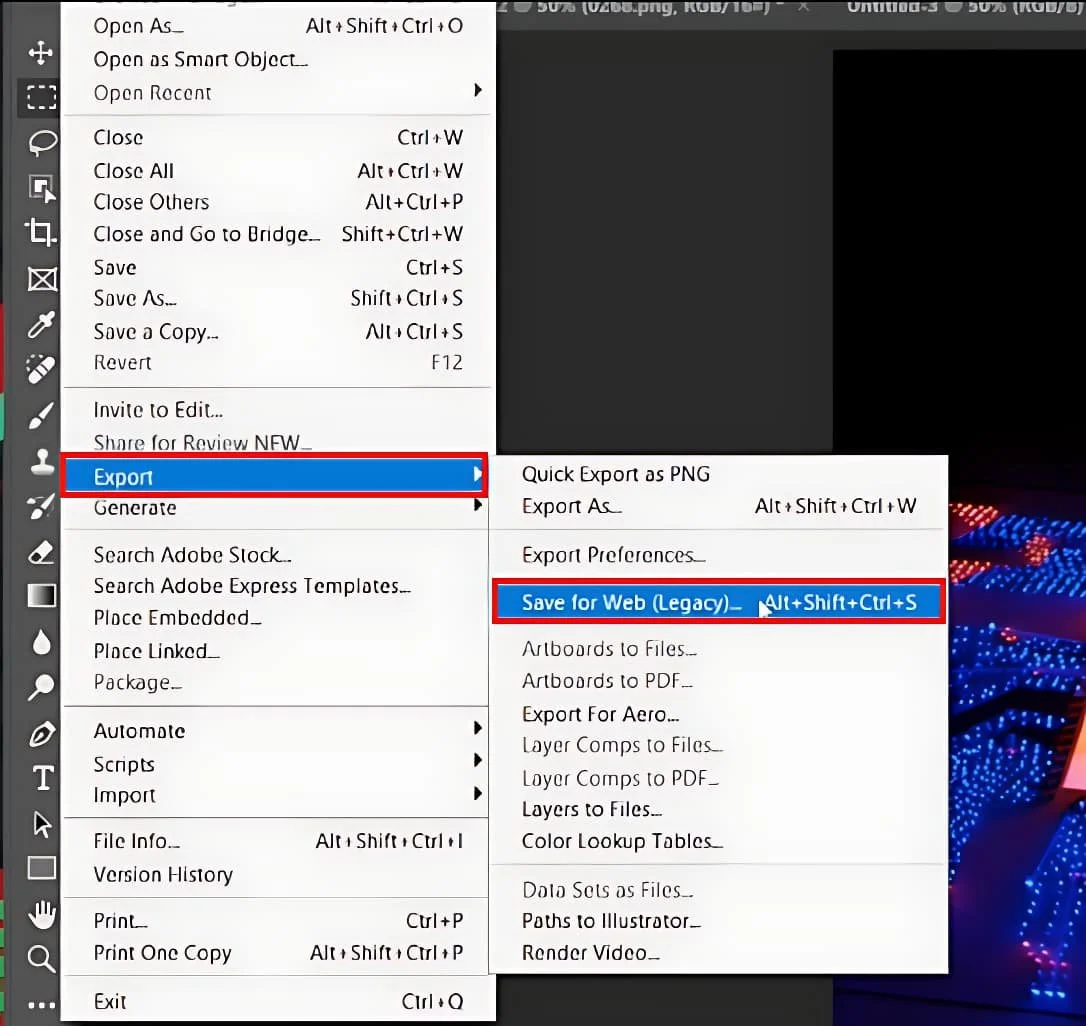
File > Export > Save for Web (Legacy)… Alt + Shift + Ctrl + S
-
To create a high-quality GIF in Photoshop, it is recommended to use images with consistent dimensions and format, such as PNG or JPEG, which retain a good level of detail and color richness.
-
Within the timeline panel of Photoshop, you have the option to set the loop preference to "Forever". This ensures that your GIF will play in a continuous loop, offering a seamless viewing experience.
-
Absolutely, Photoshop allows users to modify the display duration for each frame within the timeline panel. Adjusting this setting lets you control the speed of your GIF, whether you desire a slow or fast-paced animation.
-
The 'Save for Web (Legacy)' option is a specialized tool within Photoshop designed to optimize images and GIFs for online use, ensuring they retain quality while being suitably compressed for quick loading on web platforms.
-
Yes, while in the timeline panel, you can select the option labeled "Create New Layer for each New Frame", which aids in organizing your project by segregating individual frames into separate layers, facilitating easier editing and adjustments.