How To Disable Adobe Genuine Software Integrity Service Alert
Introduction
Frequent Adobe Genuine Software Integrity Service alerts can disrupt your workflow and affect system performance. This guide provides clear steps to disable these notifications, ensuring a smoother experience with Adobe products on your PC. Whether the alerts are genuine or overly intrusive, follow these methods to silence them without compromising the legality and security of your Adobe applications.
How to Disable Adobe Genuine Software Integrity Service
Disabling Through Service Manager
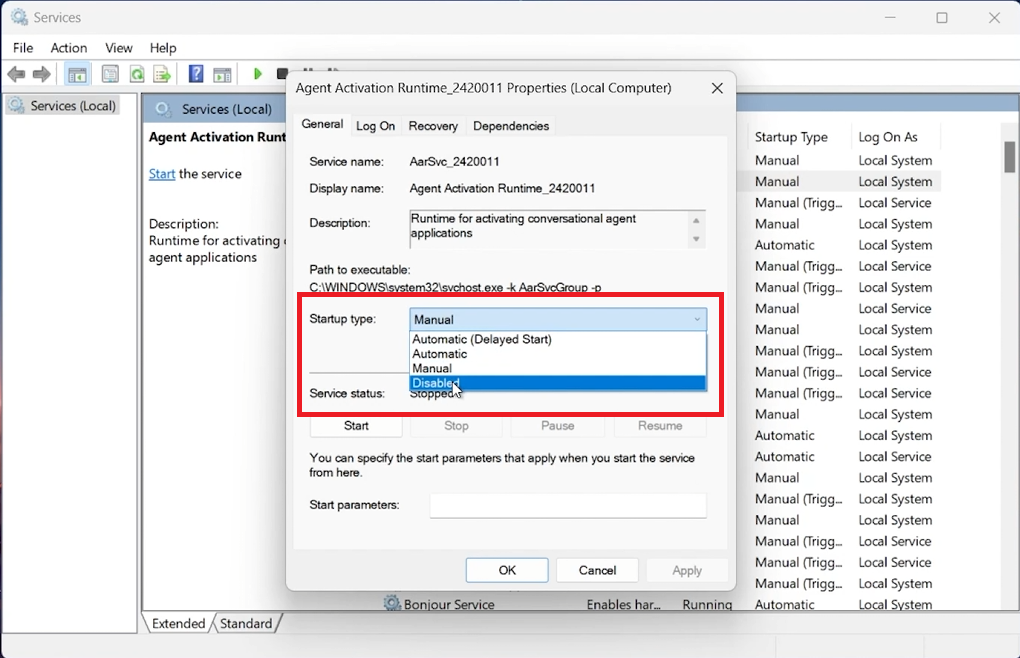
Open Service Manager: Type 'Services' in the Start Menu search bar and open the application.
Locate the Service: Scroll down to find "Adobe Genuine Software Integrity Service."
Modify Service Settings: Right-click the service, select 'Properties,' set the Startup type to 'Disabled,' and click 'Stop' to halt the service.
Restart Your Computer: Restart to apply the changes.
This method prevents the service from running on startup and stops the alerts without removing the service from your system.
Disable the Adobe GCI Service
Removing the AdobeGCIClient Folder to Stop Alerts
Ending the Adobe Genuine Service Process
Access Task Manager: Press Ctrl + Shift + Esc or search for 'Task Manager' in the Start Menu.
Terminate the Service: In the 'Processes' tab, find "Adobe Genuine Software Integrity Service" or "AGSService.exe," right-click, and select 'End Task.'
Deleting the AdobeGCIClient Folder
Locate the Folder: Open File Explorer and navigate to C:\Program Files (x86)\Common Files\Adobe.
Delete the Folder: Right-click the AdobeGCIClient folder and select 'Delete.'
Restart Your Computer: Restart to ensure changes take effect.
This approach is more aggressive but effective in stopping the alerts.

Delete the Adobe GCI Folder
How to Uninstall Adobe Genuine Service
Steps to Uninstall Adobe Genuine Service
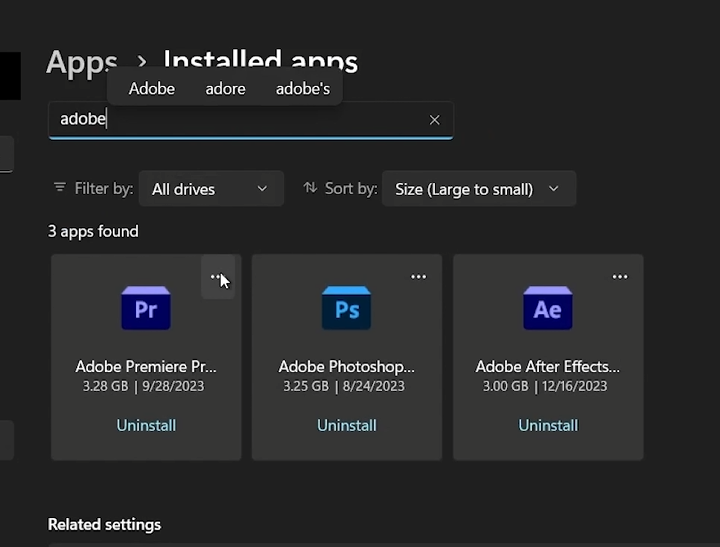
Access Settings: Press Windows + I to open Settings.
Navigate to Applications: Select 'Apps' and then 'Installed Apps.'
Locate Adobe Genuine Service: Use the search bar to find 'Adobe Genuine Service,' click the three dots next to it.
Initiate Uninstallation: Select 'Uninstall,' confirm your decision, and follow the instructions.
Restart Your Computer: Restart to apply changes.
Uninstalling the Adobe Genuine Service removes its presence from your computer, stopping all related alerts and notifications.
Uninstall Adobe GCI
By following these steps, you can effectively manage and disable the Adobe Genuine Software Integrity Service alerts, ensuring a smoother and less interrupted user experience with your Adobe products.
-
To stop these alerts, you can disable the service via the Service Manager, delete the AdobeGCIClient folder, or uninstall Adobe Genuine Service through the 'Installed Apps' section in your Windows Settings.
-
Disabling the service stops the alerts temporarily but does not remove the service from your system. For a permanent solution, consider uninstallation.
-
While deleting the AdobeGCIClient folder can stop the alerts, it's important to proceed with caution. Ensure you have a backup in case you need to restore any files.
-
Uninstalling Adobe Genuine Service should not directly affect the functionality of your Adobe applications, but ensure your software is legitimately acquired to avoid potential issues.
-
If alerts persist, it might be due to residual files. Consider using a software cleanup tool or contacting Adobe support for further assistance.