Mac OS Ventura - How To Use Stage Manager

Mac OS Ventura has taken the world of computing by storm, offering a sleek and intuitive interface unlike anything seen before. With its powerful features and user-friendly design, it's no wonder many people are switching from other operating systems. If you're a Mac user and want to learn how to get the most out of this amazing platform, you've come to the right place. In this article, we'll explore the Stage Manager - one of Mac OS Ventura's most innovative and useful features. Read on to learn how to use it like a pro!
Enable & Use Stage Manager
While using your Mac, click on the Control Center icon in your menu bar. Here, the Stage Manager icon should be visible. Click on the icon to enable Stage Manager. This should open a prompt showing you how Stage Manager works the first time you launch it.
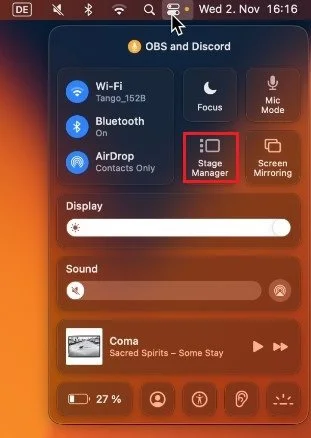
macOS Control Center
After selecting to enable stage manager, you should see that all of your minimized windows will appear on your screen's left side. Switch between windows when clicking on a window in your stage manager.

macOS Stage Manager
Show Stage Manager in Menu Bar
If you’d like to toggle Stage Manager in your menu bar, open up your System Settings. In the Control Center section, select to show Stage Manager in the menu bar.

System Settings > Control Centre > Stage Manager
Customize Stage Manager
In your Desktop & Dock settings, scroll down until you can find your Stage Manager settings. This will allow you to customize your stage manager, such as showing recent applications on the left side of your screen and showing or hiding desktop items while Stage Manager is enabled. Below you can also decide whether to show all application windows at once or just one at a time.

System Settings > Desktop & Doc > Stage Manager