iMovie - Best Export Settings - High Quality & Fast Rendering
Video editing just got a whole lot easier with iMovie. With its user-friendly interface and wide array of editing tools, you can bring your creative vision to life in no time. But with so many export options available, choosing the right one can be challenging. That's why we've put together this comprehensive guide on the best export settings for iMovie - ensuring both high quality and fast rendering for your final product. Read on to take your movie-making game to the next level!
iMovie Export Settings
After editing your project, click on File in your Menu bar and navigate to Share > File.
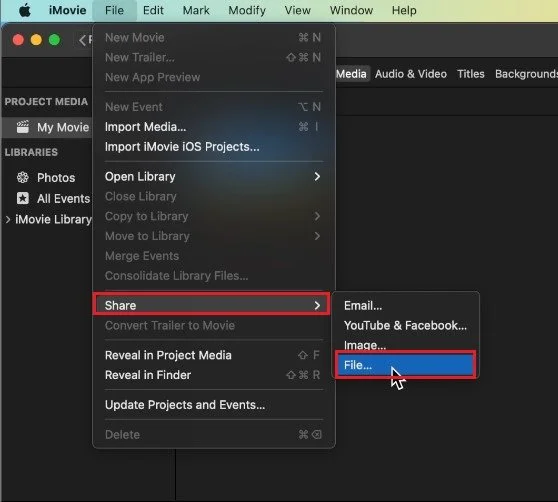
iMovie > File > Share > File
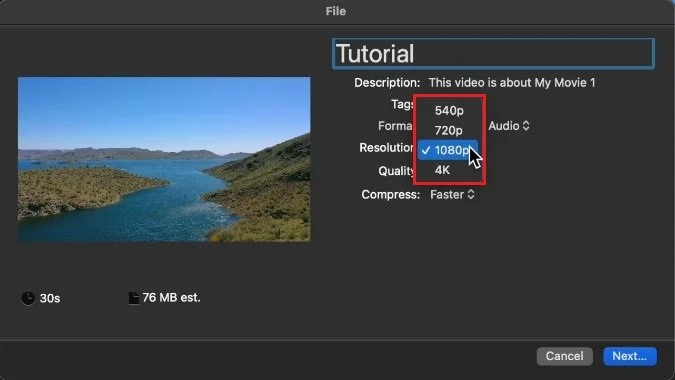
On this window, rename your exported file if you want to. Under Format, make sure that Video and Audio are selected. Below, choose the best resolution for your video file. To get the highest possible video quality, set this option to 4k if available; otherwise, set it to 1080p, which is still a great video resolution.
If the 4k option is not showing up, then this is because your first clip imported to your iMovie project was in a lower resolution. You can fix this by importing a 4k video first before starting the editing project in your timeline.
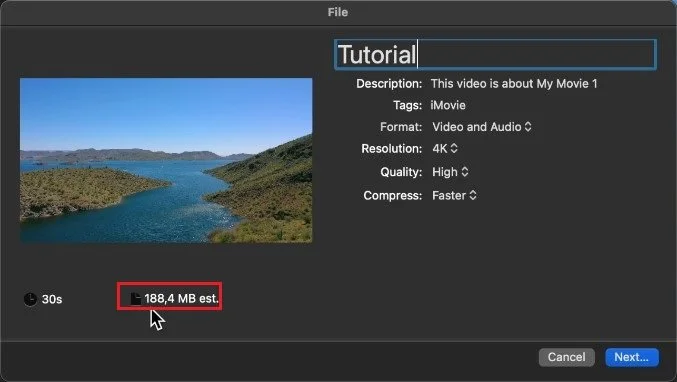
While making changes to these options, you should see how your estimated file size changes too. I suggest setting the Quality option to High. This allows you to preview and share the final video without inflating the file size by too much. Fast-moving videos, such as action cameras or gameplay footage, should use a higher video quality.
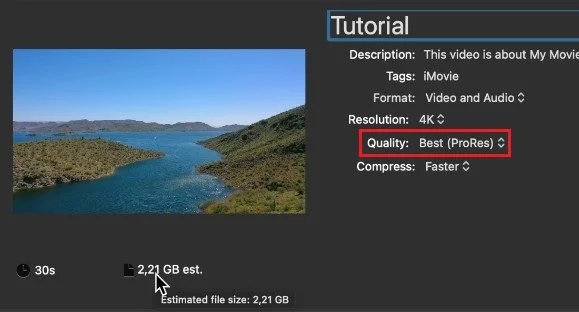
When setting this option to ProRes, which is a lossless video compression format, then your file size will increase by a lot. Still, it will allow you to keep most of the visual information to further edit the video in a different application, for example.
You can also set this option to Custom. Custom allows you to use a slider to manually determine how large your file size will be compared to the video quality.
Lastly, set the Compress option to Faster to export your video much more quicker. This will decrease the video quality by a bit, but depending on which footage you are using, it will not make a huge difference. I like to keep Faster enabled.
Export iMovie Project
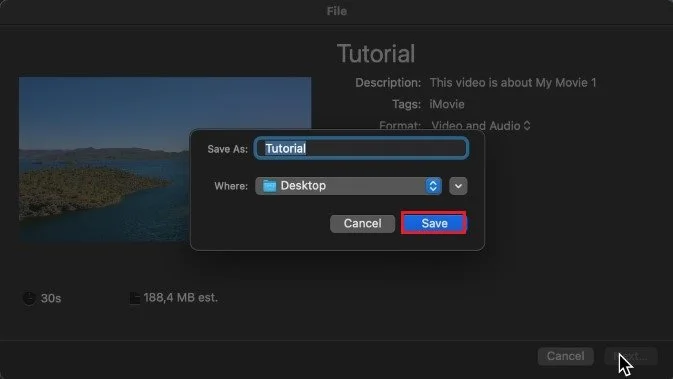
Click on Next and choose a save location before starting the rendering process. To further speed up the export process for iMovie, you should prevent using too many applications simultaneously. Close apps that you don’t currently need to free up some resources on your Mac.
iMovie > Export > Next
-
The recommended export format for iMovie videos is QuickTime movie (.mov) or MP4. It is compatible with most video editing software and is widely used for video sharing and playback.
-
Yes, you can export iMovie videos in 4K resolution. To do so, select the 4K option in the resolution section when exporting your video.