How To Fix iMovie Export Error on Mac OS Ventura

Are you trying to export your latest iMovie project on Mac OS Ventura, but keep encountering an error message? Don't worry, you're not alone! Many Mac users have faced this issue and the good news is that it can be easily fixed. This article will guide you through a step-by-step process to troubleshoot and resolve the iMovie export error on Mac OS Ventura.
iMovie Export Settings
To quickly fix the export error you are getting, you should, first of all, make sure that your iMovie project is saved. Next, click on File in your Menu bar and navigate to Share > File.
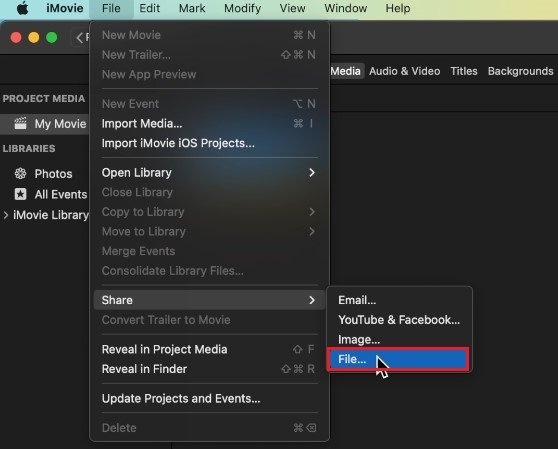
iMovie > File > Share > File
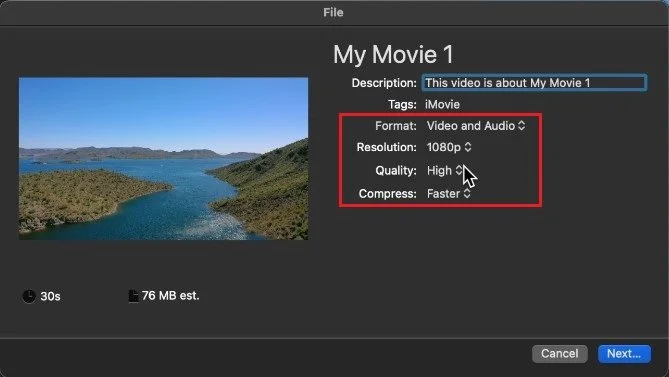
Make sure that no special characters are used as the title or description for your new iMovie project. Next, use render settings that make the most sense for the footage you are using. For this project, it’s best to use 1080p as the Resolution, which is entirely high definition. The Quality will be set to High and Compress to Faster. On the left side of this window, you will see the expected export duration and estimated file size for your project.
Click on Next, and choose a file location on your Mac with enough storage left. When still experiencing render and export issues with iMovie, ensure your project is saved and close iMovie for now.
iMovie > Export Settings
Update iMovie Application
Open up your App Store application. Look up iMovie to make sure that the application is up to date. You should also be able to find your outdated apps in the Updates section of your App Store.
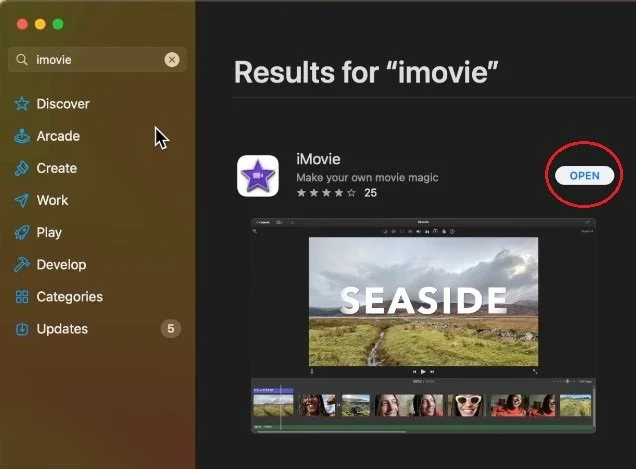
App Store > iMovie
Mac OS Storage Settings
Next, close this window and click on the Apple icon on the top left of your screen. Click on System Settings. Your settings might look a bit different on your device, depending on which macOS version you are using.
In the General section of your settings, select Storage. It might take a few seconds to load your storage information, and you can then preview if you have enough storage left for the estimated project file size. To quickly free up some space, empty your bin and delete previously downloaded files you no longer need.

System Settings > General > Storage
Disable Low-Power Mode
Next, if you are using a laptop, such as a MacBook Pro or MacBook Air, navigate to the Battery section of your settings. Make sure that the Low Power Mode option is set to Never. The low power mode will reduce your overall system performance and can cause export errors with iMovie.
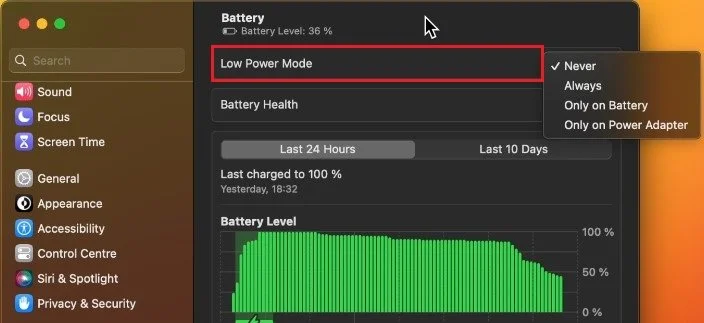
System Settings > Battery > Low Power Mode
Mac OS Software Update
When this is done, while still in your settings, navigate to the General section and click on Software Update. Updating your Mac from time to time is suggested, especially if you are experiencing errors and other issues. You will be prompted to restart your Mac once the update is downloaded.

System Settings > General > Software Update
Corrupted Video File
In case nothing seems to help out, even after a system restart, then make sure that the video file you’re trying to export is not corrupted. Try to open the video file to see if it plays well on your Mac. Next, try to export a different iMovie project. This will help you determine if this issue is related to iMovie or your operating system.

Reinstall iMovie
If you cannot export any iMovie project, then make sure that all of your projects are saved and proceed to reinstall iMovie to your system.
-
The most common cause is a lack of available hard drive space or a slow internet connection during the export process. This only applies when exporting the video to a video-sharing platform like YouTube.
-
Updating to the latest version of iMovie can sometimes resolve the export error.
-
While we believe in the power of positive thinking, this may not be the most effective solution for resolving technical issues. It's best to try the troubleshooting steps first.