How To Increase & Decrease the Font Size on macOS
Customizing font size on macOS can improve readability or maximize screen space based on your needs. This guide explains how to adjust font size and provides additional tips for personalizing your Mac experience.
1. Adjust Font Size via macOS Settings
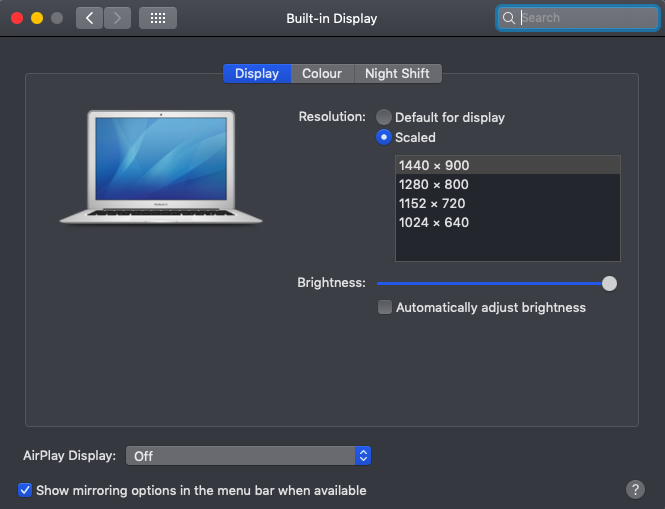
Open System Preferences and navigate to Displays.
In the Displays window, set the resolution to Scaled.
Choose a scaling option that adjusts the overall font and UI size across macOS.
Path: macOS Settings > Displays
macOS Settings > Displays
2. Change Font Size for Finder Items
Open your desktop or a Finder window.
Click View in the top menu bar and select Show View Options.
In the View Options panel:
Adjust Icon Size using the slider.
Increase or decrease the Font Size as desired.
Change the text size among other preferences
3. Use Accessibility Features for Larger Text
Open System Preferences and go to Accessibility.
Navigate to Zoom to enable features that magnify text and interface elements.
You can also use Display > Larger Text for enhanced readability.
4. Use Browser and App-Specific Font Settings
Most browsers and apps have individual font size controls:
For web browsers: Press
Command +to zoom in orCommand -to zoom out.Look for font size options in app-specific settings for better control.
Tips for Customization:
Use high-resolution displays for sharper fonts at smaller sizes.
Combine font size adjustments with scaling options for the best balance between readability and screen space.


