How To Manage & Free Up Storage on Mac OS Ventura

Are you tired of constantly receiving "Your disk is almost full" alerts on your Mac OS Ventura? Don't worry, managing and freeing up storage on your device is a breeze. In this article, you'll learn how to make the most of your storage space and keep your Mac running smoothly. From simple tricks to more advanced techniques, this guide will help you reclaim precious storage and get your device back to optimal performance.
Mac OS Storage Settings
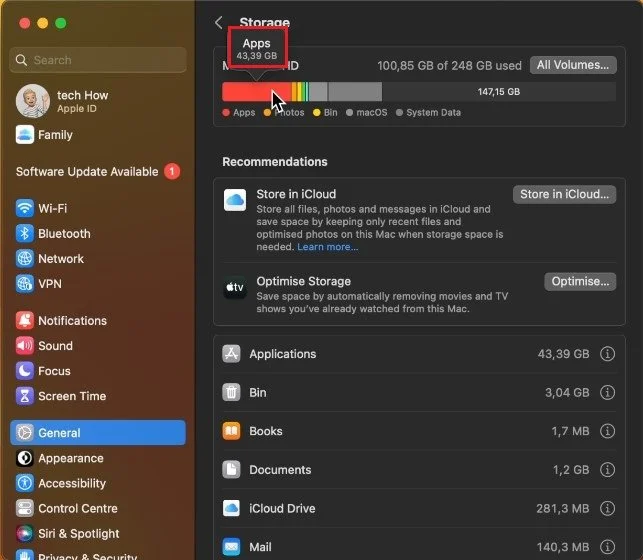
There are different methods to free up storage on your Mac, and I suggest taking a look at your Storage Settings first. Open up your System Settings. For macOS Ventura users and later, navigate to the General section and click on Storage.
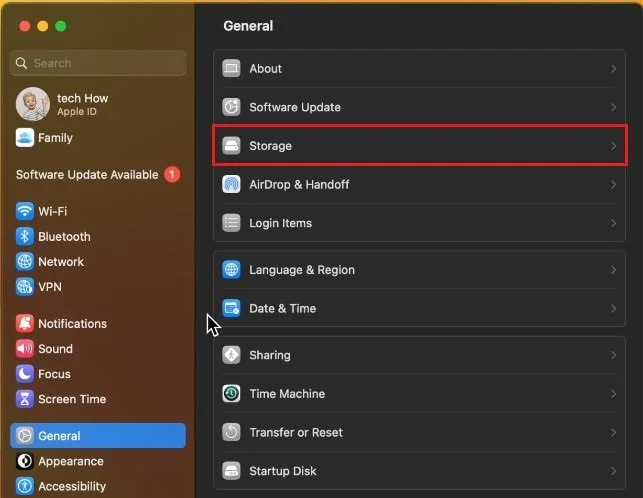
System Settings > General > Storage
It may take a couple of seconds to load your storage information. Hover over these storage sections to see how much space your files are taking up. In my case, apps are taking up about 50% of my used storage, which means that uninstalling unneeded apps can have the biggest effect in freeing up space.
System Settings > General > Storage
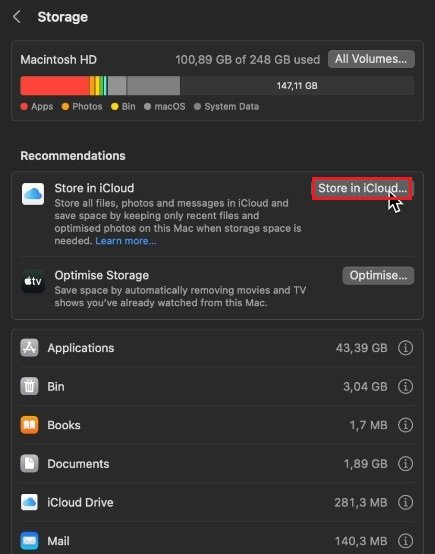
Storage Recommendations
Below, you should see a couple of recommendations, such as storing your photos, files, or messages in your iCloud, or optimizing your storage, which will remove watched movies and shows for example. In my case, I like to back up important files which are shared with other Apple ID devices in my iCloud storage.
Empty Bin & Delete Downloads
To quickly free up storage, you can empty your bin and delete the content of your Downloads folder in your finder.
Empty Bin
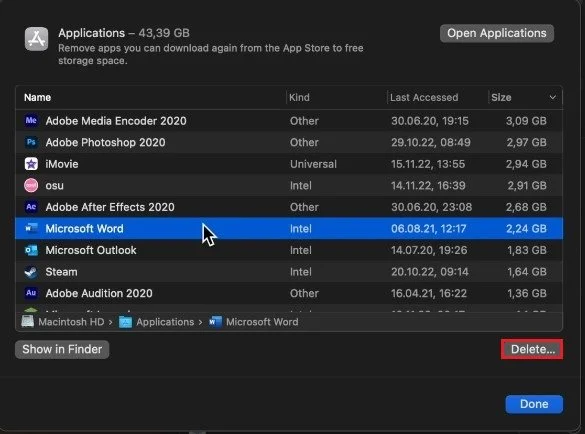
Uninstall Unneeded Applications
Next, click on the “i” icon next to your Applications. You can sort this list by size or by the date you last opened it. Select applications you no longer use or need and select Delete. This will uninstall the applications, but some local user files might stay saved on your storage.
System Settings > General > Storage > Applications
Delete Unwanted Messages
In some cases, messages or images and videos saved within your messages can take up a large chunk of your used storage.
Click on the “i” icon for your Messages, and sort this list by size to locate larger, unneeded files. Proceed to delete everything you no longer need. If you want to keep large files, but prefer to still free up storage, then you can either use an USB stick or other external storage, or make use of a cloud service, such as iCloud or Google Drive.

System Settings > General > Storage > Messages
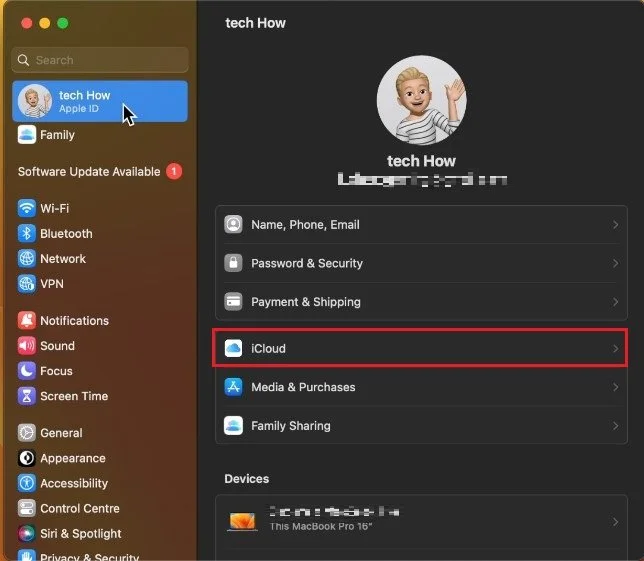
Manage iCloud Storage
In case you’re unsure about your iCloud storage usage and setup, then click on your Apple ID name on the top left of this window and select iCloud.
System Settings > Apple ID > iCloud
Make sure that your iCloud storage is turned on. Next, click on Manage. You will be presented with a list of apps and other files taking up your iCloud storage. Select and delete the files you don’t want to be backed up in your iCloud.
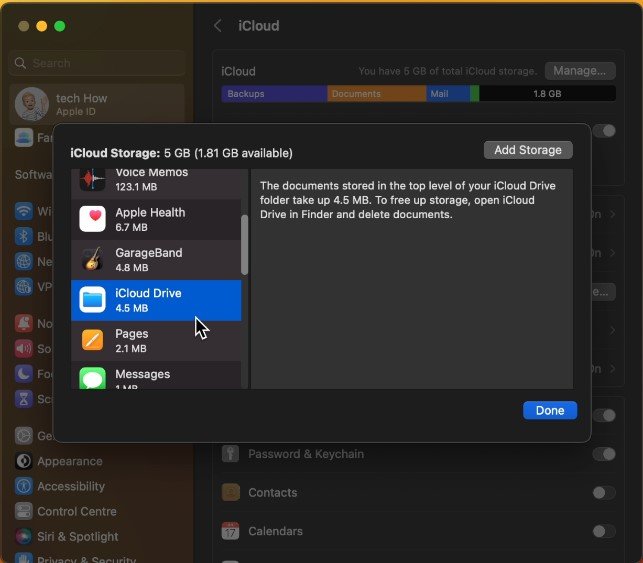
System Settings > iCloud > Manage Storage
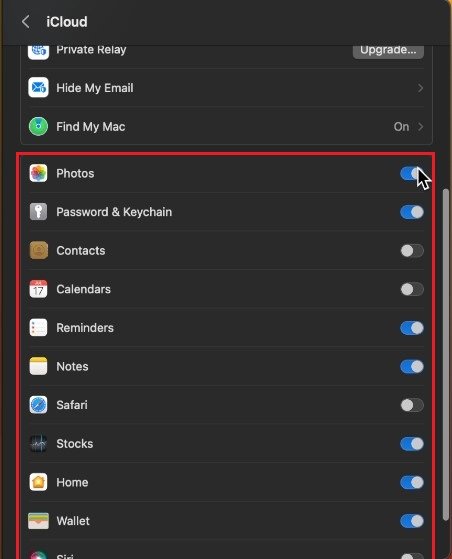
Back in your iCloud settings, you can enable or disable some apps to be backed up in your iCloud storage. Photos and videos are notorious for taking up a lot of storage, especially when taking a lot of pictures with your iPhone and connecting it to your iCloud.
-
The easiest way to free up storage on your Mac is to delete unnecessary files and uninstall unused applications. Additionally, you can reduce the size of your photo library by optimizing images or moving them to an external hard drive.
-
The "Other" category in the storage tab includes files that can't be easily categorized, such as system files and caches. In general, it is safe to delete these files, but it's always a good idea to make a backup of your device before making any major changes.
-
To manage your email storage on Mac OS Ventura, you can start by removing attachments from old emails, marking emails as "read" instead of archiving them, and using an email client that supports cloud storage.