

OBS - How To Fix “Failed To Connect To Server” Error

If you're an OBS user, you may have encountered the "Failed to connect to server" error at some point. This error can be frustrating and prevent you from streaming or recording your content. Fortunately, there are several steps you can take to fix this issue and get back to creating your content. In this article, we'll walk you through the process of troubleshooting this error and provide you with actionable steps to fix it. From checking your network settings to updating your OBS software, we'll cover everything you need to know to eliminate this error for good.
Verify the OBS Stream Settings
Open up OBS and navigate to your settings. In the Stream section of your settings, change the Server location to another server you have used until now. Ensure your Stream Key is correct. On most platforms, you must display the stream key before copying it. This can already fix the issue.

OBS Settings > Stream > Service
Adjust the OBS Bitrate
In case the problem persists, then navigate to your Output settings. Set the Output Mode to advanced, and in the streaming section, make sure you’re using a bitrate that your connection can handle. If you’re unsure about your current up- & download speed, visit speedtest.net.
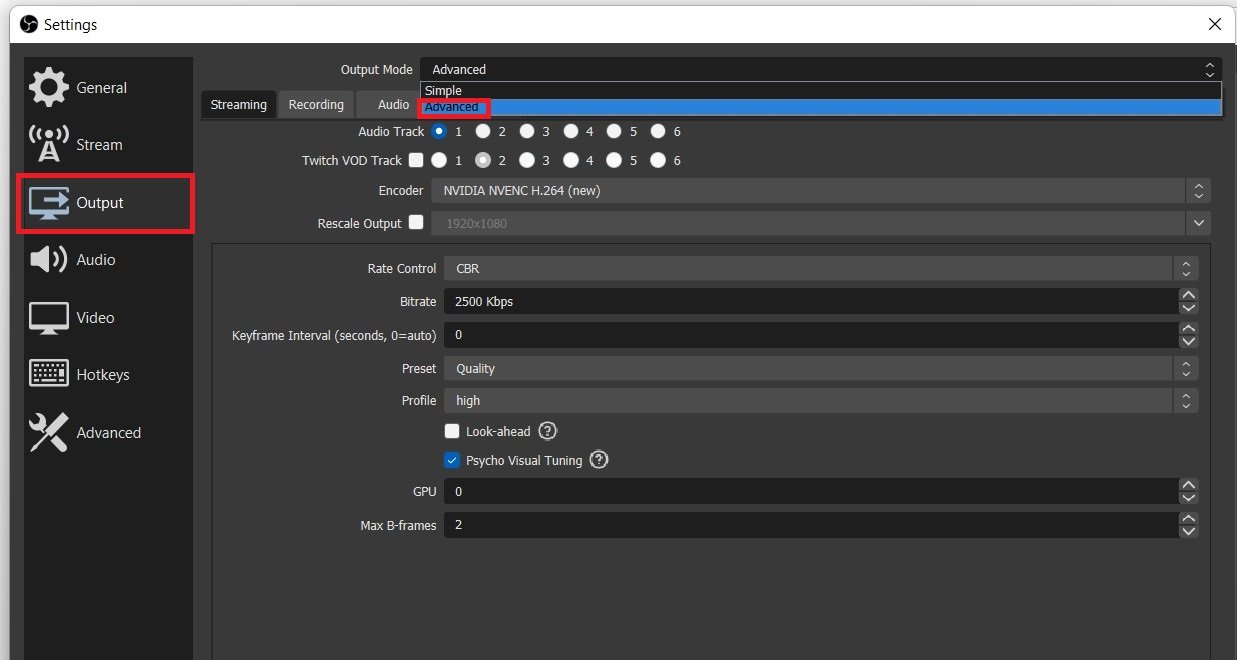
OBS Settings > Output
A normal upload speed, without interruption, is essential to stream on your system properly. Your latency should also not exceed 100 ms, which could also trigger the “Failed to connect to server” error. To improve your connection, use an ethernet cable to ensure the best possible connection. If you have to use a Wifi connection, then make sure to restart your router or modem if you haven't done this in a while, and reduce the number of devices connected to the same network.
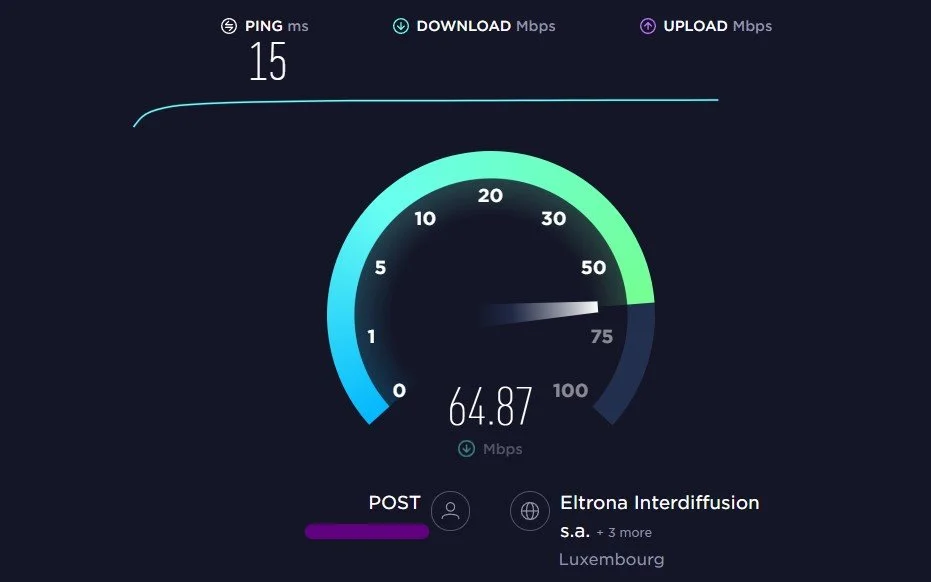
Test your average up- & download speed
OBS Advanced Settings
You should now be able to estimate your upload speed better. Ensure not to set the Bitrate value in your streaming options above your connection’s capacity. After applying your changes, navigate to the Advanced settings tab, and here try to bind your network connection to your IP. This can fix the issue, depending on where it’s coming from. Lastly, you should ensure you’re using an up-to-date software version. If the program doesn’t auto-update, download the latest installer and run it.

OBS Settings > Advanced


