NVIDIA Control Panel - How To Create A Custom Resolution

Welcome to the world of high-quality gaming and graphics! If you're a passionate gamer or a graphic designer, you know how important it is to have the right resolution settings for your display. NVIDIA Control Panel is a powerful tool that lets you customize various settings to optimize your gaming experience or creative work. One of the key features of the NVIDIA Control Panel is the ability to create a custom resolution. In this article, we'll guide you through the steps to create a custom resolution using NVIDIA Control Panel. We'll also provide some tips on choosing the best resolution for your needs.
Access your NVIDIA Control Panel Resolution Settings
Right-click your desktop and select NVIDIA Control Panel.
In your control panel, navigate to Change Resolution.
Ensure the monitor you wish to create a custom resolution for is selected.

Create a Custom Resolution
Click on the Customize button. This will bring up the custom window. Select Create custom resolution. An NVIDIA Legal Disclaimer window will appear. If you agree, proceed to click on the accept button. Finally, you can change the horizontal and vertical pixel height and width on this window. Change the refresh rate below, but do not exceed your monitor’s capabilities. Change your timing options below, and then you can test your new custom resolution.
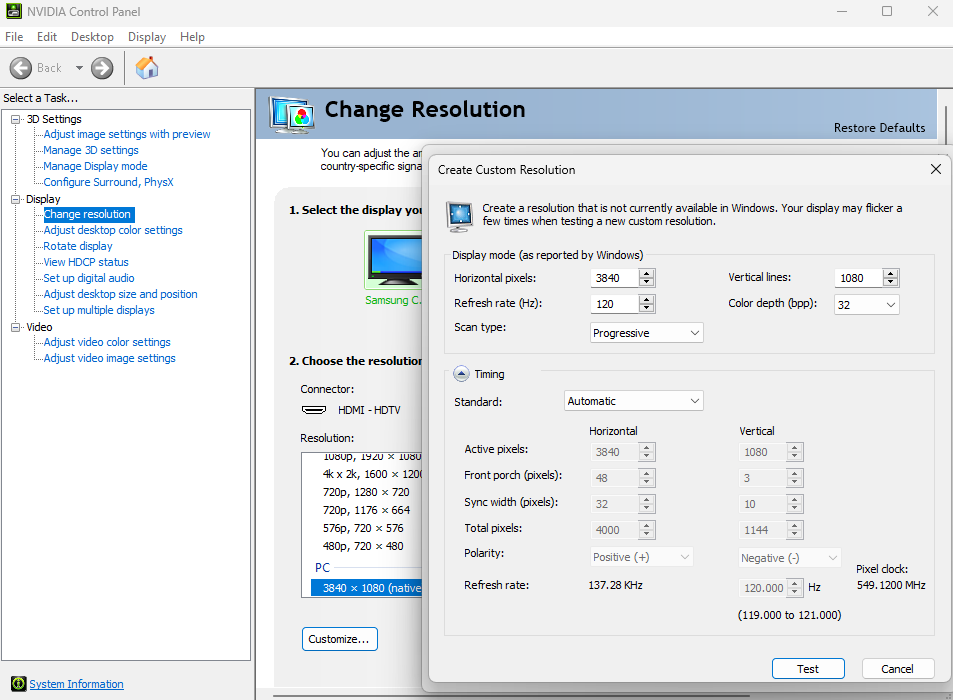
NVIDIA Control Panel > Change Resoltion > Customize
Test your New Resolution
If the new mode is accepted by your display, then you will see a window asking you to confirm the new resolution. If the new mode fails the test, then your screen will likely display an out-of-range message or black screen. After a few seconds your picture should resume to normal. If the new mode passed the test, you should see it listed in the resolution list for your display.

Create Custom Resolution