Photoshop CC - How to Edit and Save GIF (.gif File)
If you're looking to add some pizzazz to your website or social media profiles, creating animated GIFs can be an excellent way to do it. GIFs are a popular form of media that can capture attention and convey a message effectively. But how do you go about editing and saving a GIF file? With Photoshop CC, you have access to a powerful suite of tools that can help you create and manipulate GIFs to your heart's content. In this article, we'll show you how to edit and save GIFs using Photoshop CC. From cropping and resizing to adding filters and text, we'll cover everything you need to know to make your GIFs stand out.
Adjust the Photoshop Timeline Settings
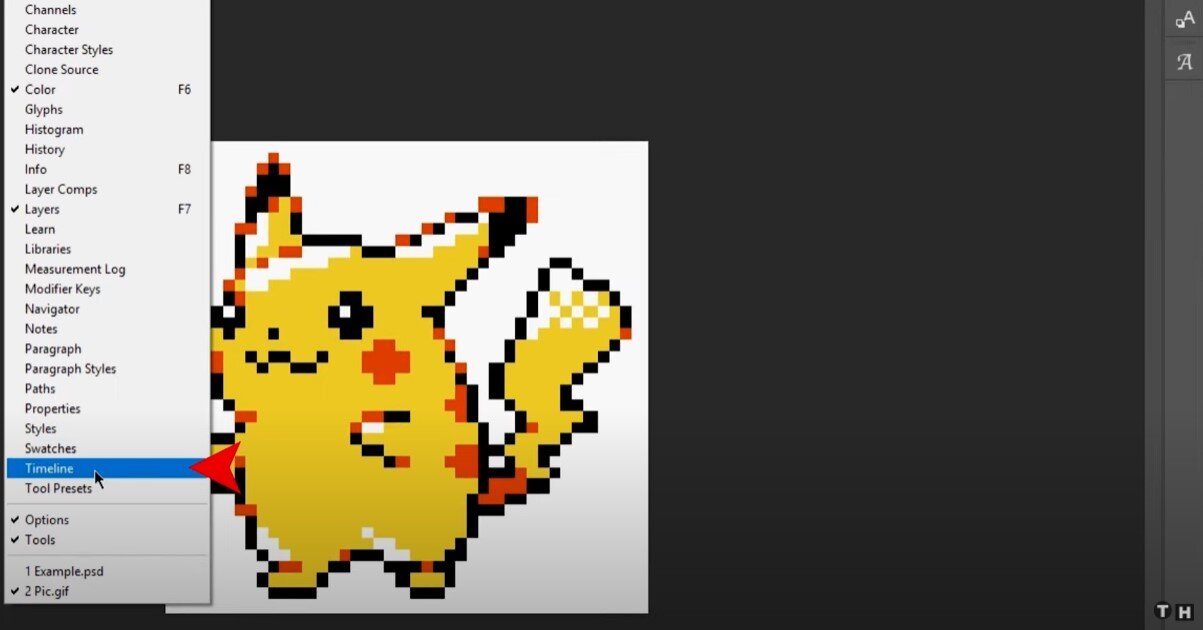
Drag and drop the GIF into Photoshop CC. You should be able to see every frame as a new layer. Navigate to the Window tab, and select Timeline. Now that the timeline window is visible, you can edit the layers you wish to change. Ensure that your layers are set to Visible, and to see how your changes look, you can preview your GIF when selecting the Preview button.
Photoshop > Window > Timeline
After completing your changes, navigate to the File tab and select Export, and then Save for web.
File > Export > Save for Web
Change the GIF Settings
A new window will open up. In the Preset drop-down menu, select GIF. If you have a GIF with gradients, choose Dithered GIF to prevent color banding. If your image employs a lot of solid colors, you may choose the No Dither option. The number next to the GIF file determines how large and precise the GF colors will be compared to the original JPEGs. A higher dithering percentage translates to the appearance of more colors and detail, but it increases the file size.
Preset > GIF 128 Dithered
Export GIF
You can then select Save to file at the bottom, and you’re done.
Save GIF for Web


