Create Awesome Facebook Banners in Photoshop - Tutorial & Template
Introduction
Designing a captivating Facebook banner just got easier with Photoshop! This tutorial will guide you through creating stunning banners using a versatile template from Envato Elements. Ideal for those looking to elevate their social media presence, this guide simplifies the process of banner creation, showing you how to customize images, text, and backgrounds to create an eye-catching design in just a few clicks. Perfect for beginners and Photoshop pros alike, this tutorial is your gateway to making standout Facebook banners.
Downloading and Extracting the Facebook Banner Template
Creating an eye-catching Facebook banner is made easier with the right template. Here’s how you can download and prepare a Facebook banner template from Envato Elements for use in Photoshop:
Acquiring the Template from Envato Elements
Visit Envato Elements:
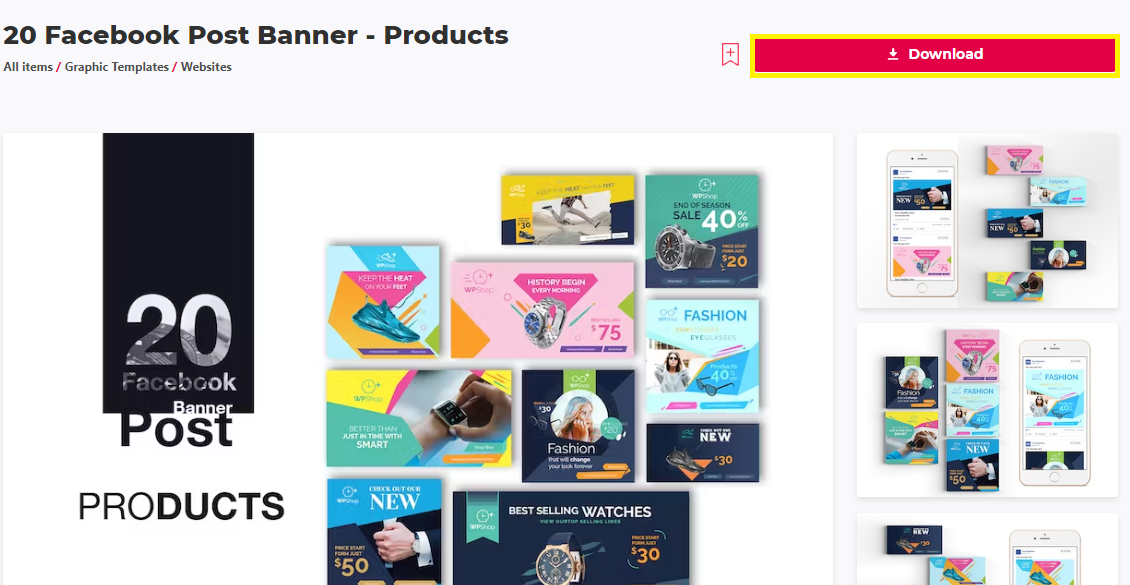
Click here to access the Envato Elements Facebook Banner template page.
Get Envato Elements Membership:
Sign up for Envato Elements if you haven't already. This membership gives you access to a wide range of resources, including the Facebook banner template, as well as various add-ons, plugins, and other Photoshop templates.
Download the Facebook Banner Template:
Search for the Facebook banner template on Envato Elements.
Initiate the download, and the file will be saved to your computer, typically in the 'Downloads' folder.
Download Facebook Post Banner Template for After Effects
Extracting the Template File
Unzip the Downloaded File:
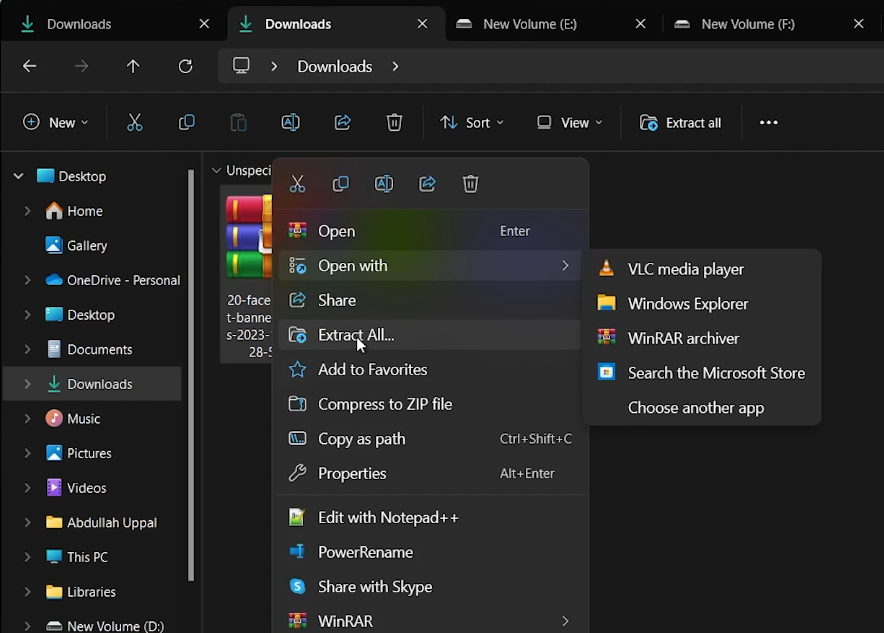
On a Windows PC: Right-click the .zip file and select 'Extract All' to unzip it in the 'Downloads' folder.
On a Mac: Simply double-click the .zip file, and it will automatically extract.
Opening the Template in Photoshop
Launch Photoshop:
Open Adobe Photoshop on your computer.
Open the Template:
Drag and drop one of the “Facebook Banner” files from the extracted folder into Photoshop.
Each file in the folder might have different properties or styles – choose the one that best suits your needs.
The process to edit these templates is user-friendly and straightforward, making it suitable for users of all skill levels.
With the template now open in Photoshop, you’re ready to start customizing it to create a personalized and professional-looking Facebook banner.
Extract the downloaded template file
Customizing the Facebook Banner Template in Photoshop
Editing your Facebook banner in Photoshop allows you to personalize it with your images and style. Here's a guide to modifying the template content effectively:
Adding and Adjusting Images
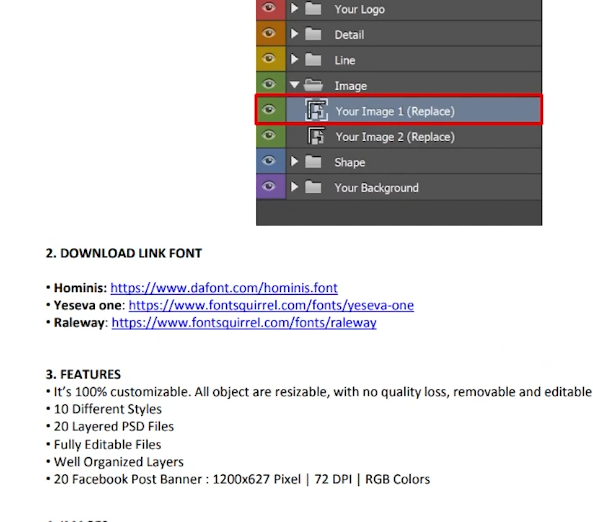
Expand the Image Layers:
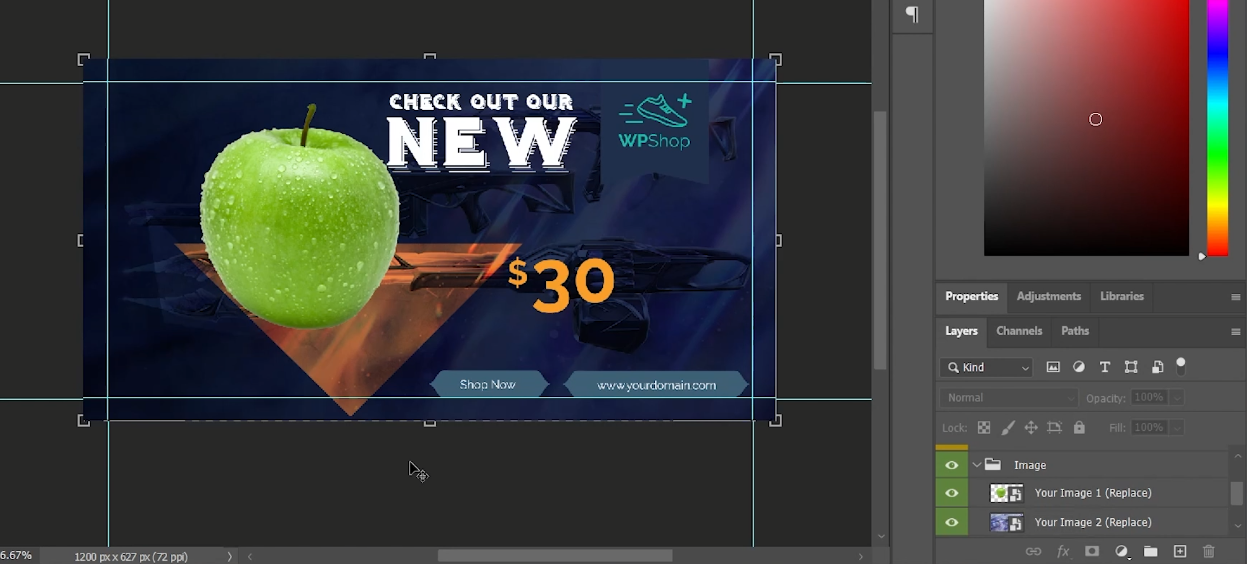
In Photoshop, with the Facebook banner template open, click the arrow next to “Images” to view the image layers.
Replace with Your Image:
Double-click the first image layer to open a new tab.
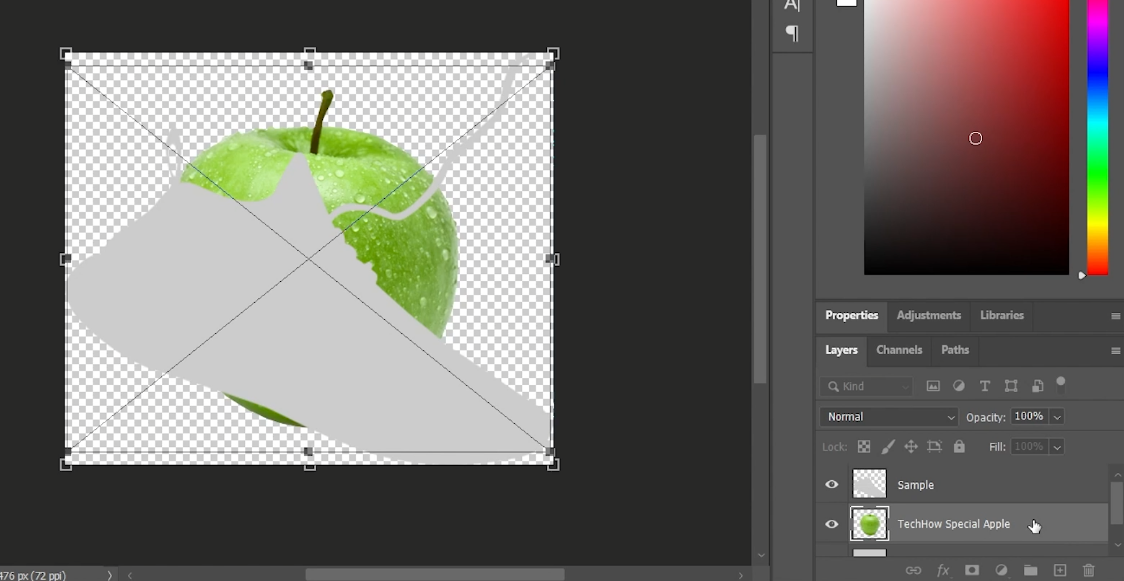
Drag and drop your chosen image onto the workspace canvas.
To adjust this image further, double-click its thumbnail, which opens a window for more detailed customization.
Save your changes by pressing 'Ctrl + S' (Windows) or 'CMD + S' (Mac).
Insert your images and graphics to the template
Manage Layer Visibility:
If the default layers in the template obscure your image, toggle the “eye” button next to those layers to hide them.
Remember to save any changes you make.
Customizing the Background
Insert a Background Image:
Drag and drop your preferred background onto the canvas.
Ensure the background layer is positioned below the main image layer.
Resize and position the background as needed.
Fine-Tune Background Settings:
Double-click the background layer's thumbnail to open customization options.
Access the “Layer Style” window by double-clicking an empty space next to the layer.
Explore various settings to adjust the background’s appearance.
Save your adjustments with 'Ctrl + S' (Windows) or 'CMD + S' (Mac).
By following these steps, you can effectively edit and personalize the Facebook banner template in Photoshop, ensuring that your banner stands out with a professional and customized look.
Customize the template background
Editing Text and Finalizing the Facebook Banner in Photoshop
Customizing the text and finalizing your Facebook banner in Photoshop is an essential step to ensure your banner aligns perfectly with your brand or personal style. Here’s how to edit text content and finalize your banner file:
Modifying Text Layers
Access Text Layers:
In the Facebook Banner tab within Photoshop, locate the text layer you wish to edit.
Double-click on the layer’s thumbnail to begin editing.
Edit the Main Text:
In the 'Details' group, find and expand the 'Title' group.
Double-click on the thumbnail next to the title text.
Now, you can modify the text to your preferred wording.
Handling Font Issues:
If a “missing font” warning appears, refer to the PDF file included with the template download.
This PDF contains a link to the original font used in the template.
Alternatively, you can choose any other font from your Photoshop library.
Experimenting with Other Template Elements
Customize Further:
Feel free to explore and adjust other elements in the template, such as colors, shapes, or additional text layers.
Finalizing Your Facebook Banner
Review and Adjust:
Once all elements are edited to your satisfaction, review the entire banner for alignment, readability, and overall aesthetics.
Make any final adjustments needed.
By following these steps, you can effectively edit and finalize a Facebook banner in Photoshop, ensuring it represents your desired message and style. This personalized banner can then be used on your Facebook profile or page to enhance your social media presence.
Download the correct font for the Facebook banner template
-
Yes, with the right template and this tutorial, even beginners can create professional-looking Facebook banners in Photoshop.
-
Double-click the text layer thumbnail in Photoshop to edit. You can modify the wording, font, and color as per your preference.
-
Refer to the accompanying PDF that comes with the template download for a link to the original font, or you can choose an alternative font from your Photoshop library.
-
Absolutely. You can drag and drop your images into the template and adjust their size and positioning as needed.
-
After designing, preview the banner in various sizes to ensure it's visually appealing and readable on both mobile and desktop screens.
Affiliate Disclosure: Some of the links on this page are affiliate links, which means that we may earn a commission if you click through and make a purchase from our recommended template providers. This doesn’t affect the price you pay and helps us maintain this site to continue providing you with the best template recommendations.


