Photoshop CC - How to Save As PDF - Export File as PDF

Photoshop CC is a powerful tool used by designers, photographers, and creatives to create stunning visuals and graphics. One of the key functionalities of Photoshop CC is its ability to save and export files in different formats. In this article, we will focus on the "Save As PDF" feature in Photoshop CC, which allows users to export their designs as a PDF file. Whether creating a brochure, a poster, or any other type of document, knowing how to save your work as a PDF can be extremely useful.
Save your Project as a PDF File
After editing your Photoshop file, navigate to File and then Save As … Or, use the shortcut Shift + CTRL + S to open up the Save As window.
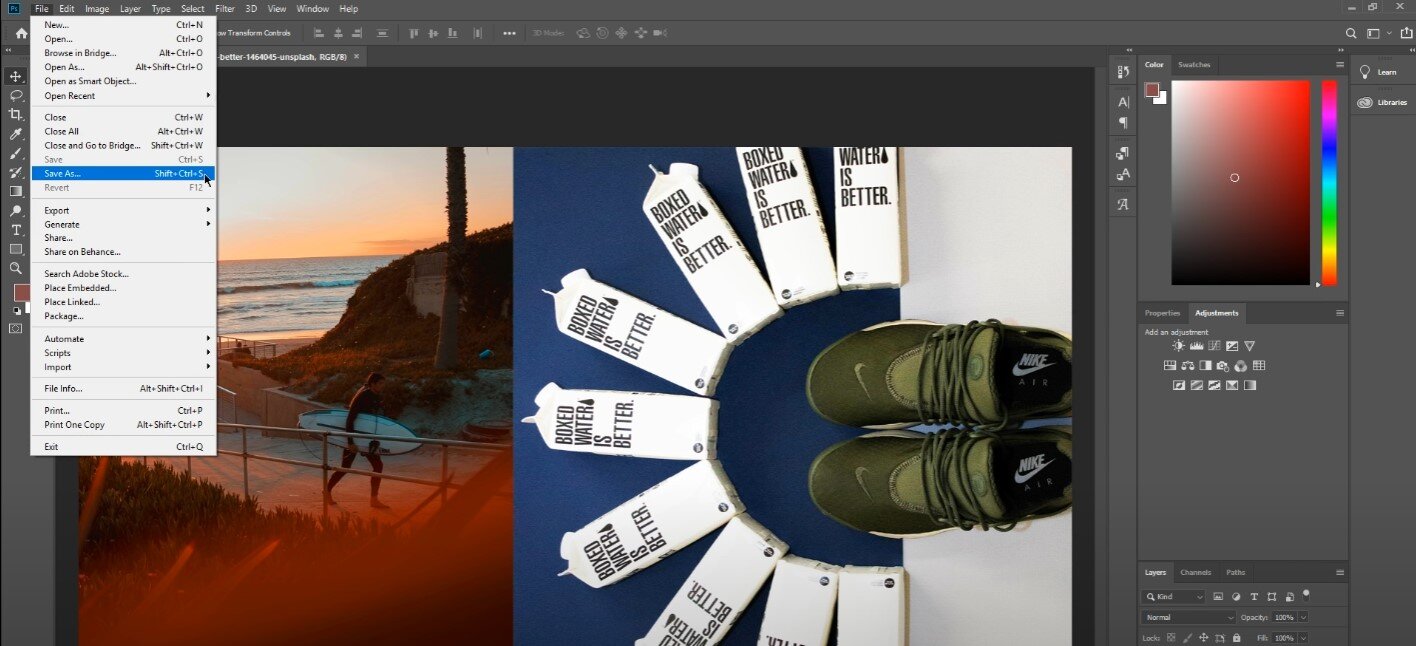
Photoshop > File > Save As
Name the file whatever you like, and select to save it as a Photoshop PDF file. Select OK on the Adobe Photoshop window, and then you must change a few options before saving your project as a PDF file. Set the Adobe PDF preset to High-Quality Print in the General tab.

Save Adobe PDF > Adobe PDF Preset
In the Options section, select to Preserve Photoshop Editing Capabilities. In the Compression tab, select not to downsample your file, and set the Compression to none to keep most of the image’s quality. Lastly, we prefer not to use a color conversion in the Output tab, and leave the other settings as default.
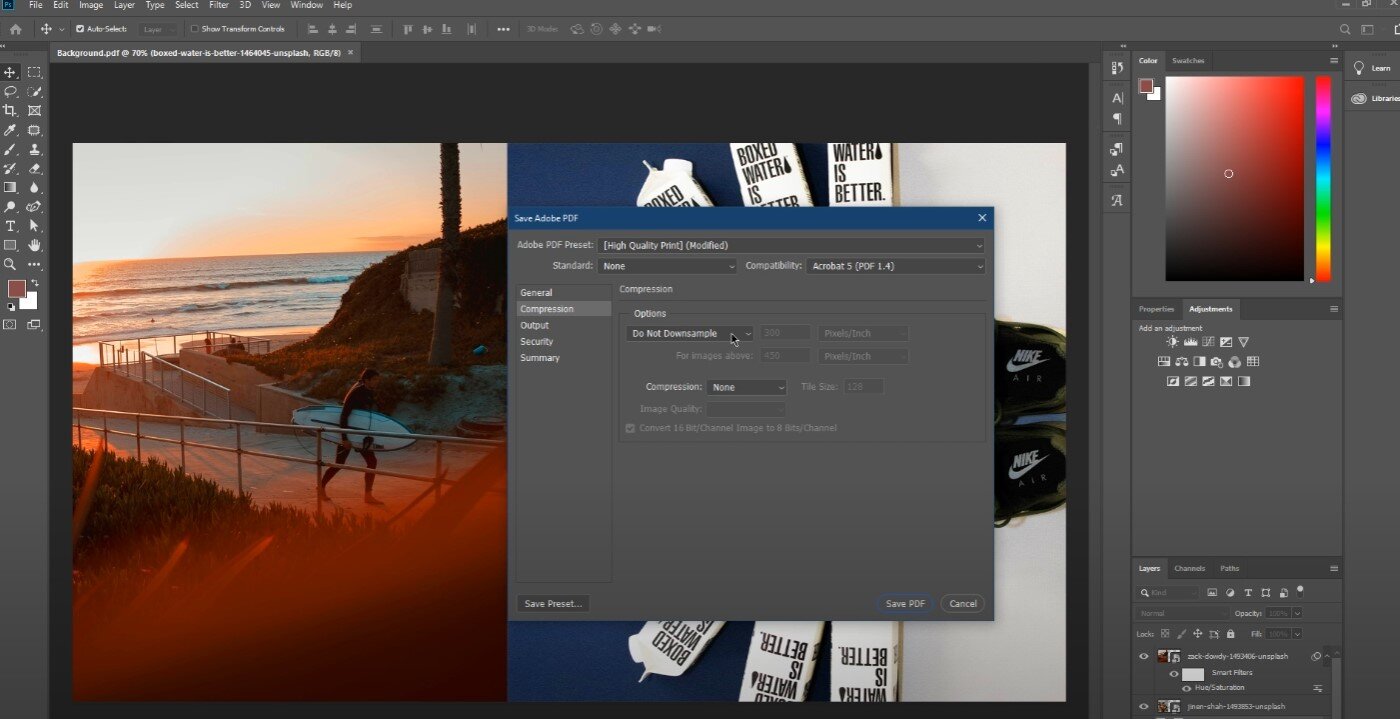
Save Adobe PDF > Compression
You can select to save your file as a PDF and you should be done.

Save Adobe PDF > Output