How To Fix VLC Media Player Sound Issues & No Audio Problem (Windows)
VLC Media Player is one of the most popular media players used by millions of users worldwide. However, many users face audio-related problems, such as no audio, sound issues, and other audio-related problems while using the software. This can be a frustrating experience, especially when you're trying to watch a movie or listen to your favorite music. Don't worry; in this article, we'll walk you through the steps to fix VLC media player sound issues and no audio problems on Windows. With our comprehensive guide, you'll be able to get your audio up and running in no time. So, let's get started!
Update VLC Media Player
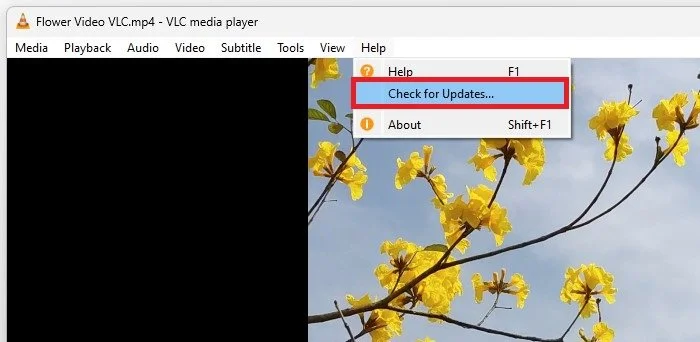
Open up the VLC Media Player application, and under Help, click on Check for Updates. This will allow you to ensure you’re using the latest video player version quickly.
VLC Media Player > Help > Check for Updates
Change Audio Track & Device
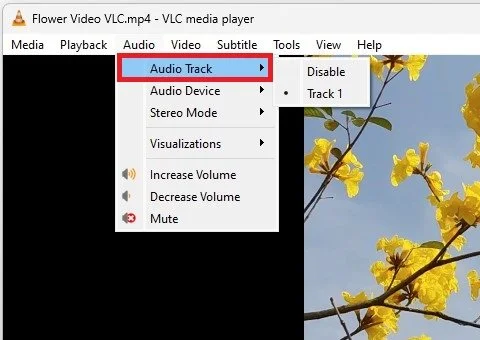
While playing back the video, navigate to the Audio section and make sure that your Audio Track is enabled.
VLC Media Player > Audio > Audio Track
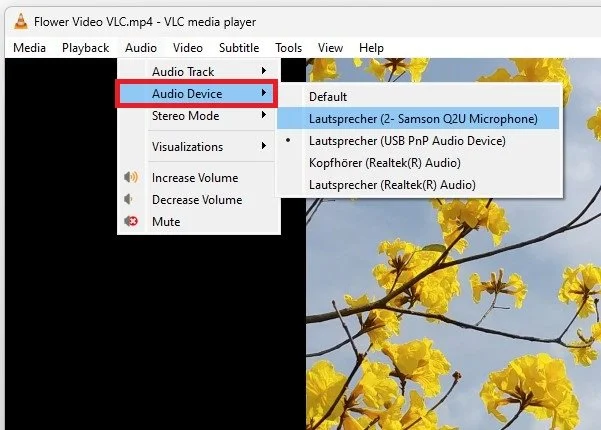
You can also quickly change your Audio Device from here. This will allow you to troubleshoot if the problem is related to your device or the VLC application.
VLC Media Player > Audio Device
Change VLC Audio Preferences
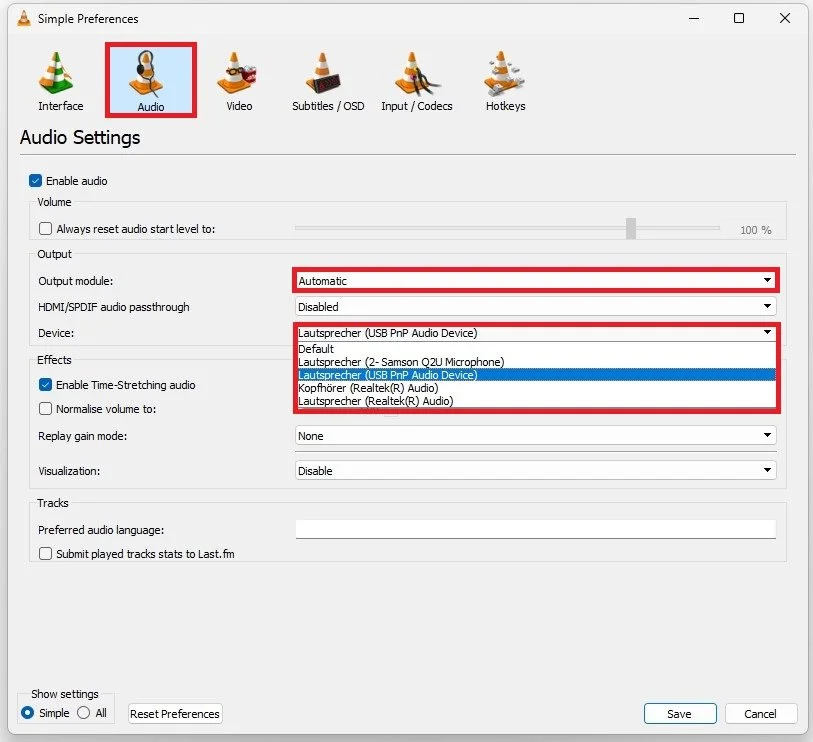
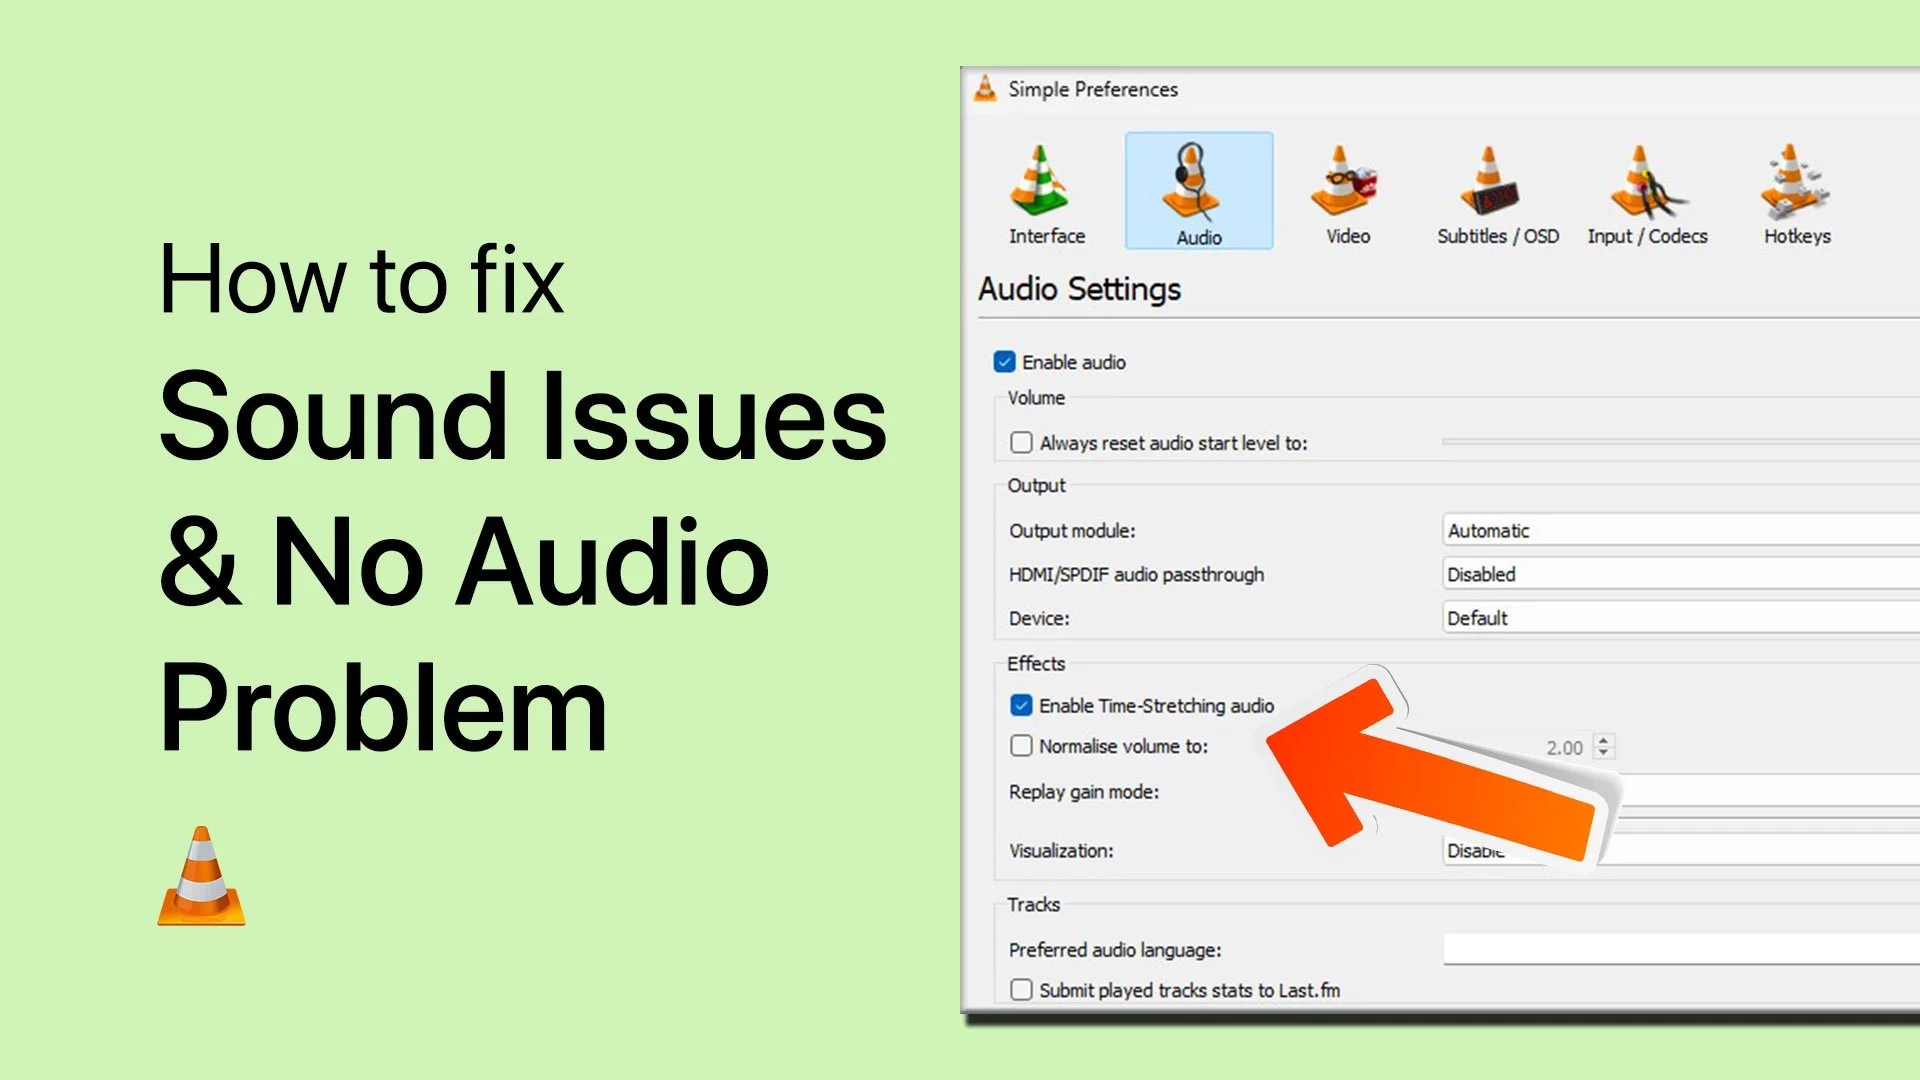
Next, under Tools, click on Preferences. In the Audio section, ensure that the Enable Audio option is checked. Below, set your Output Mode to Automatic and set the Device to the output device you wish to use. Depending on your Windows sound settings, this doesn't have to be your default device.
You can then proceed to close your preferences. While playing a video file, you can use the scroll wheel to increase or decrease the volume to prevent it from being muted.
VLC Media Player > Preferences > Audio
Change Windows Sound Settings
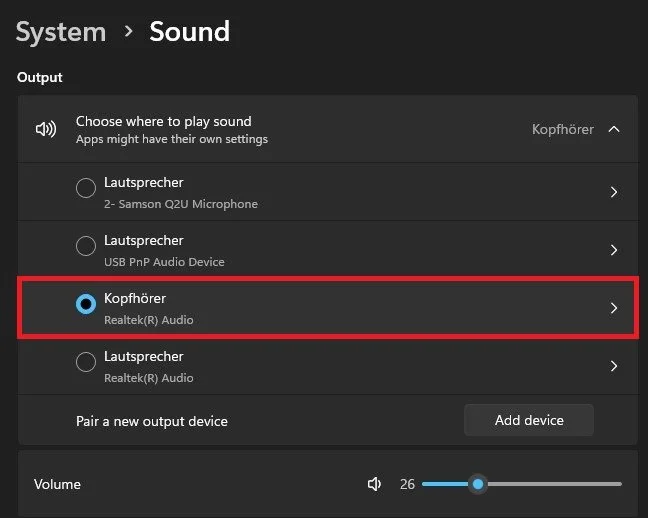
In case the problem persists, then make sure to close the VLC Media Player and open up your Windows settings. Under System, click on Sound. Here, make sure that your preferred audio output device is selected.
Windows Settings > System > Sound
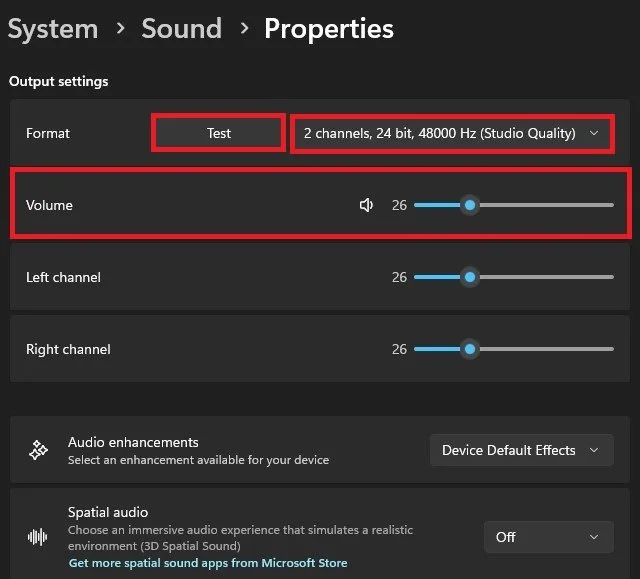
When clicking on it, you can test if it’s outputting any sound. If it’s not, then your device might be faulty. Reconnect it and try again. Below, change the Format to 44’100 or 48’00 Hz, whichever is available. You should also increase your overall volume to troubleshoot audio issues.
System Settings > Sound > Properties
Troubleshoot Sound Problems for Output Devices
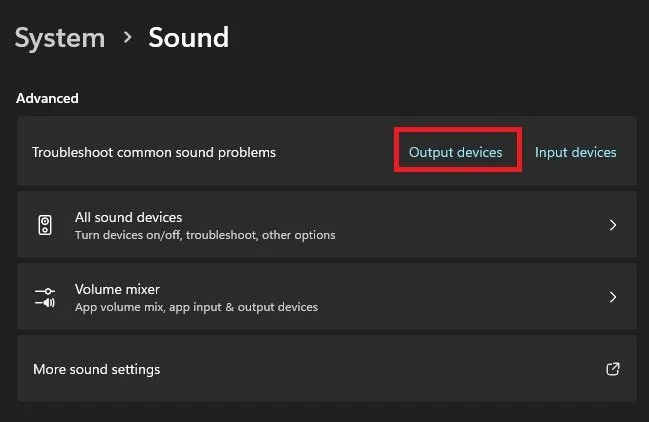
Back in your sound settings, scroll down, and select Troubleshoot common sound problems for output devices. This will take a couple of seconds to detect and fix potential audio issues.
System Settings > Sound > Advanced
Sound Control Panel
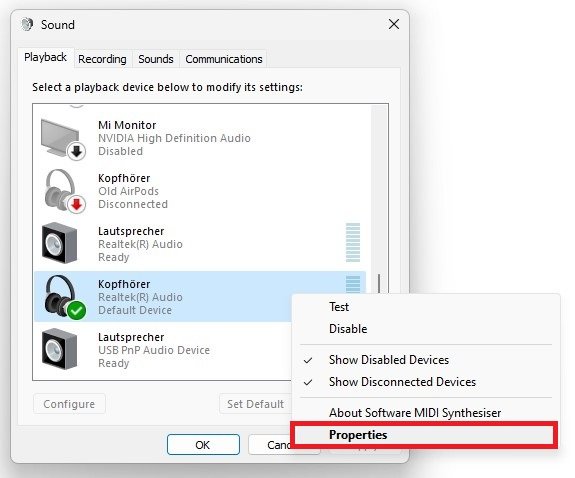
Lastly, from your sound settings, click on More sound settings to open your Sound Control Panel. In the Playback section, right-click and disable all other audio devices you’re currently not using to force the VLC Media Player application to use your default device. Right-click your audio device and select Properties.
More Sound Settings > Playback
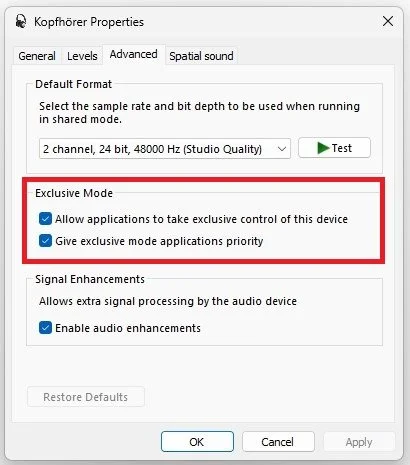
In the Enhancements section, make sure to disable all enhancements. Enable both exclusive mode options in the Advanced section before applying your changes.
Sound Control Panel > Advanced
In the General section, click on Properties. From here, you can update your device driver to ensure that your audio problem is not related to the device itself.
Update Sound Device Driver
Windows Software Update
Lastly, you should ensure that your Windows version is up to date. In your Windows settings, navigate to the Windows Update section. From here, select check for updates and download any updates available before restarting your PC.
Windows Settings > Windows Update
-
There are several reasons why audio problems can occur in VLC media player, including incorrect audio codecs, outdated software, audio device compatibility issues, and more.
-
You can easily update VLC media player to the latest version by going to the "Help" menu and selecting "Check for Updates." If an update is available, follow the instructions to install the latest version.
-
If VLC media player won't play audio on your computer, you can try reinstalling the software, updating your audio drivers, or changing the audio output device in the VLC media player settings.
-
To change the audio output device in VLC media player, go to the "Tools" menu, select "Preferences," and then select the "Audio" tab. From there, you can choose the desired audio output device.


