

How To Fix Voice Chat in Warzone Pacific
Voice chat is an integral part of any multiplayer game, and Warzone Pacific is no exception. With its immersive gameplay and stunning visuals, Warzone Pacific has become a popular game among players worldwide. However, some players have reported issues with the voice chat feature, such as being unable to hear teammates or having their voice chat disconnected frequently. If you're one of these players, don't worry; there are solutions to fix the voice chat issues in Warzone Pacific. In this article, we will guide you on how to fix the voice chat in Warzone Pacific and help you get back to enjoying this exciting game.
Verify the Warzone Audio Settings
Open up the game and navigate to your Audio settings. Scroll down and set your Speakers / Game Sound Device to the Default System Device.
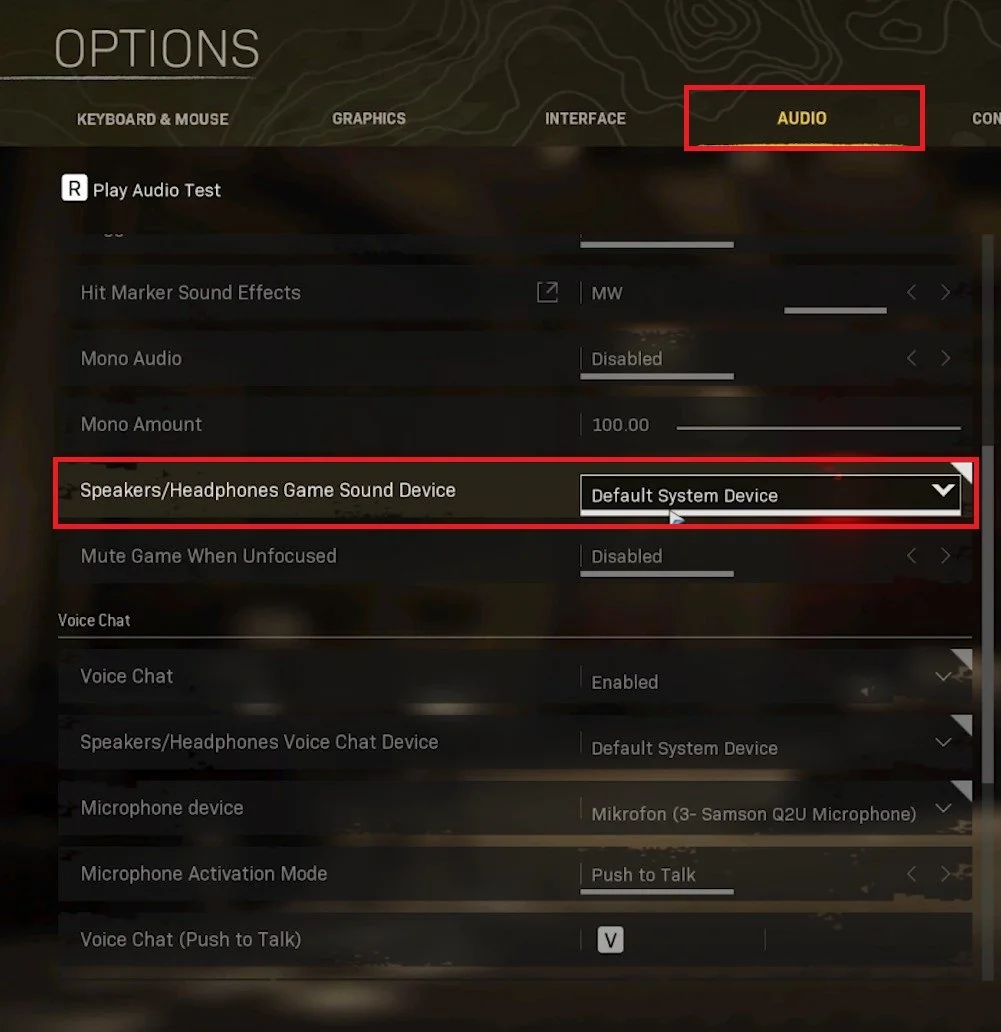
Warzone Settings > Audio
In the Voice Chat section, enable Voice Chat. Set the Speakers and Microphone Device to your Default device or to the device you wish to use. It’s suggested to get used to using Push to Talk as your Microphone Activation Mode to prevent background noise from annoying teammates.
Below, choose a Push to Talk key of your choice and set the Voice Chat and Microphone Volume to 100. This can be decreased later on but will help in finding out why you are having Voice Chat issues.
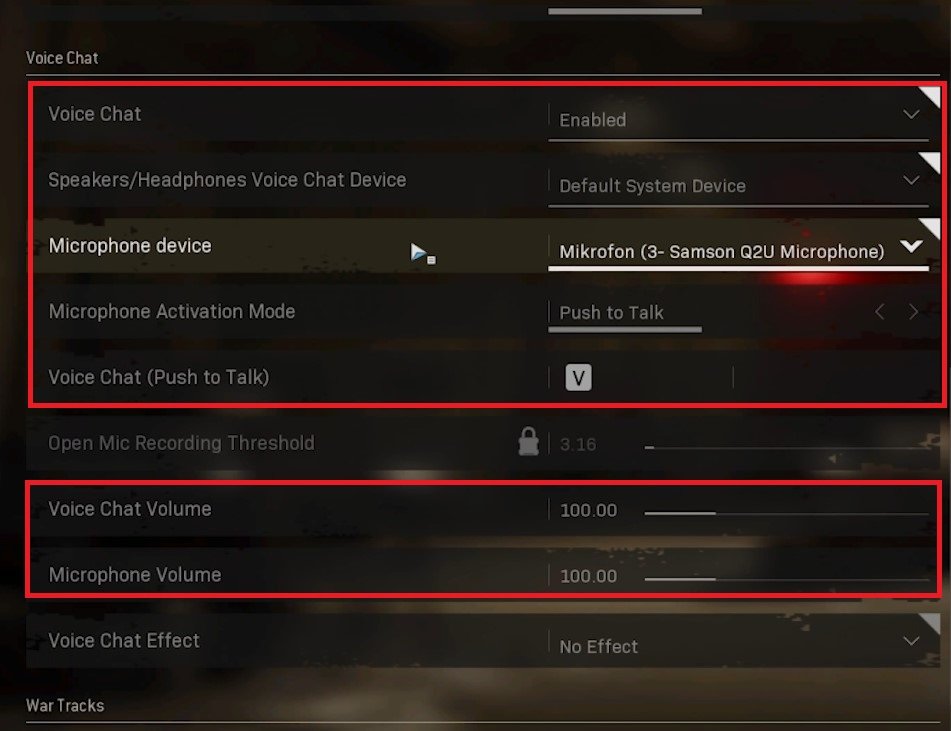
Warzone Settings > Audio > Voice Chat
Optimize the Windows Sound Settings
After changing your Warzone settings, you should close the game and search for Sound in your start menu to open your Sound Settings window. Set the output and input device to your main device. Set the Input Volume to at least 50%, and depending on which microphone you are using, you will want to set it to 100%.
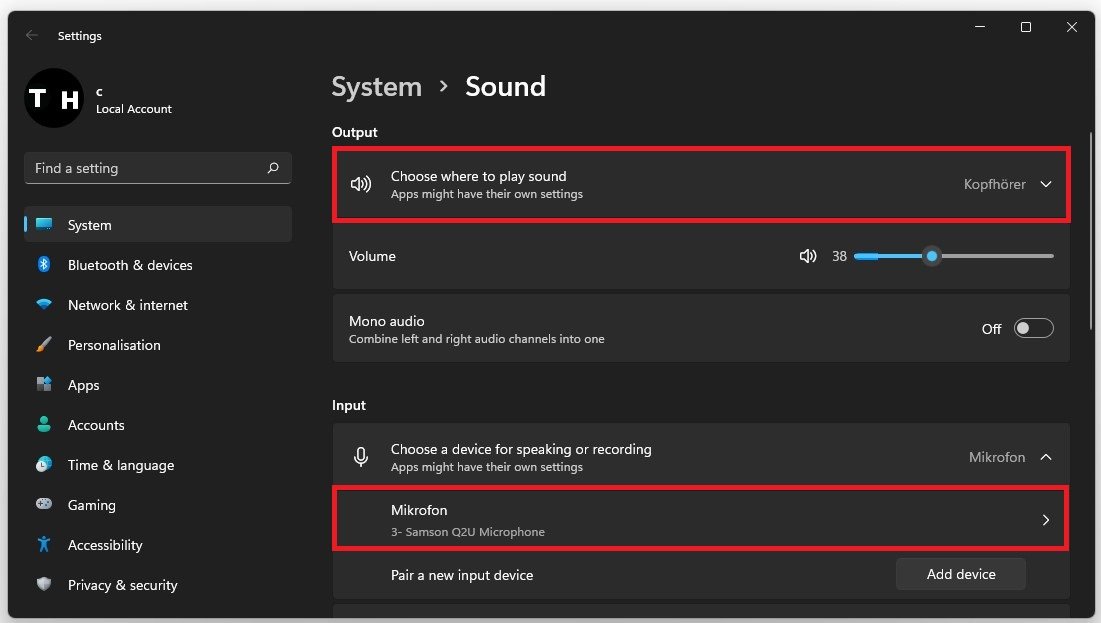
Windows Settings > System > Sound > Input
Click on Troubleshoot common sound problems for Output and Input devices in your Advanced Sound settings. A new window will open, where you must scan your audio devices for common problems. Under Volume mixer, you should ensure your operating system does not mute the Warzone application. Back in your Advanced sound settings, click on More sound settings.
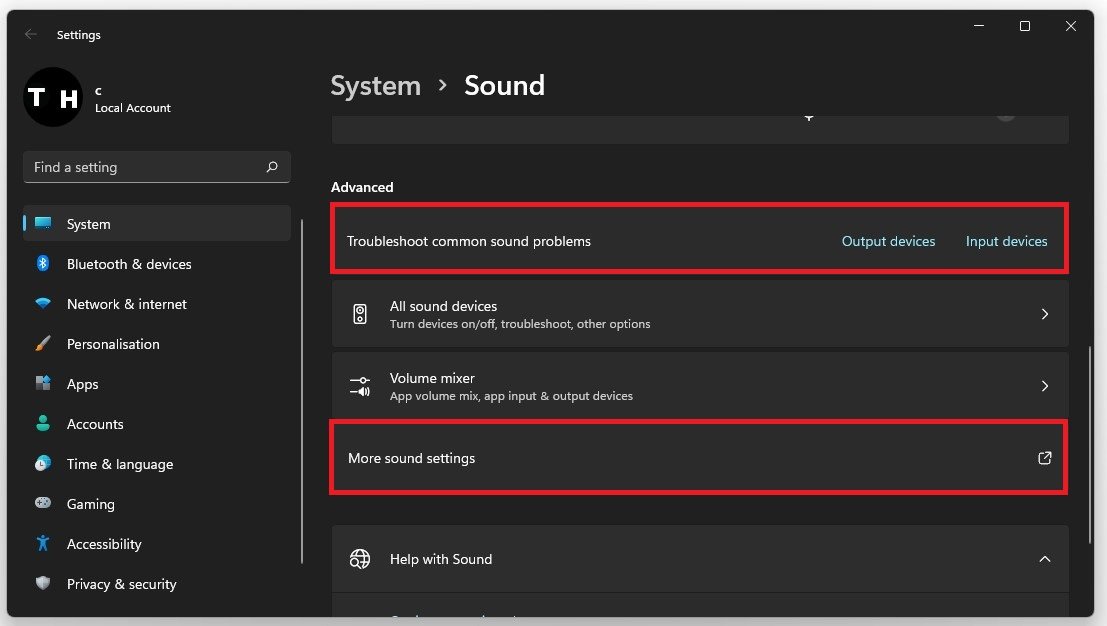
Sound Settings > Troubleshoot common sound problems
Advanced Audio Properties for your Microphone
Your Sound Control Panel will open up. Ensure only your preferred input and output device is enabled. Next, double-click your Recording device and in the Advanced tab, set the Default Format to 44’100 Hz, or 48’000 Hz, depending on what’s available to you. Enable the two Exclusive Mode options, which will allow Warzone to change your input volume for example.
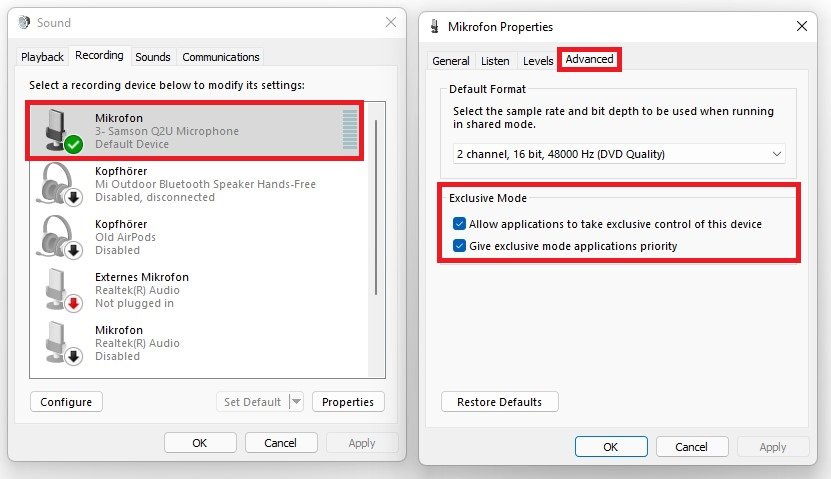
Microphone Properties > Advanced > Exclusive Mode
Update Audio Driver
After tweaking your settings, you can close this window, search for Device Manager in your start menu, and hit enter. Expand Audio inputs and outputs. Right-click the output sound device you prefer to use, select Update Driver, and make sure to Search automatically for drivers. This will take a minute to ensure your device’s driver is up to date.
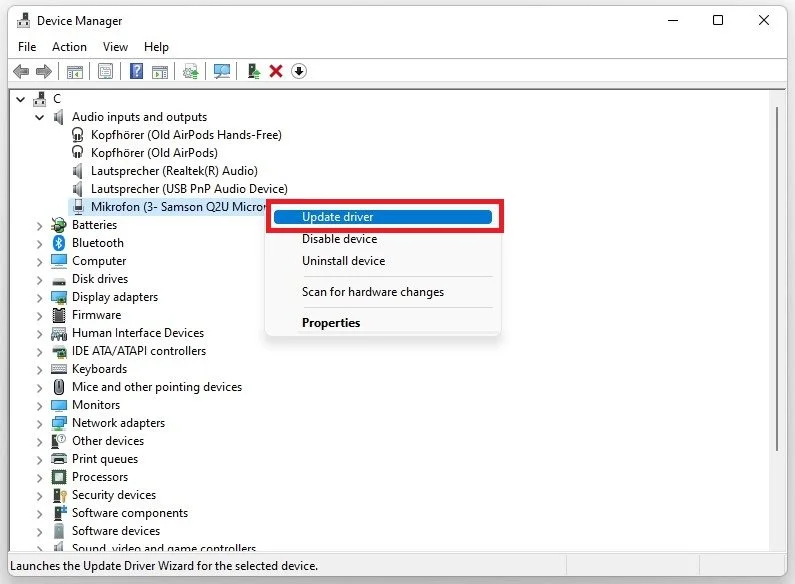
Device Manager > Audio Input Device > Update Driver
Verify the Warzone Game Files
If the issue persists, your game files might be corrupted. Open up your Blizzard launcher and click on the gear icon next to the play button for Warzone. Select Scan and Repair. Redownloading and reinstalling any missing or corrupted game files will take a minute, which could otherwise cause sound issues.

Battle.net > Warzone > Scan and Repair
In case you still encounter voice chat and other audio issues, your hardware might be faulty. Ensure that your input and output device is working fine with other applications on your system.


