100+ Title Templates for Premiere Pro - Complete Tutorial
Introduction
Unlock the world of engaging content with Adobe Premiere Pro by discovering over 100 impressive title templates in our detailed guide. This power-packed tutorial will walk you through the entire process, from downloading a versatile template from Envato Elements to customizing text, color, and scale to make it truly your own. Whether you're a beginner or a seasoned editor, this comprehensive tutorial will drastically shorten your editing time and leave you with professional-level results. Let's dive into the step-by-step process of using these unique title intros, designed to give your project the edge it needs.
Access & Extract the Premiere Pro Title Templates
Step into the world of endless creativity by snagging the Premiere Pro title template from the Envato Elements page. You can utilize the 7-day free trial and get the template, which will land in your downloads folder in just a few moments. With your trial, you also gain access to a multitude of addons, plugins, and templates designed for various creative applications.

Envato Elements Titles Template Pack
Most downloads from Envato Elements come in a compressed format. For Windows users, simply give the .zip file a right-click and opt to extract all in your downloads folder. Mac users can follow the same process to unpack their new arsenal of Premiere Pro tools.
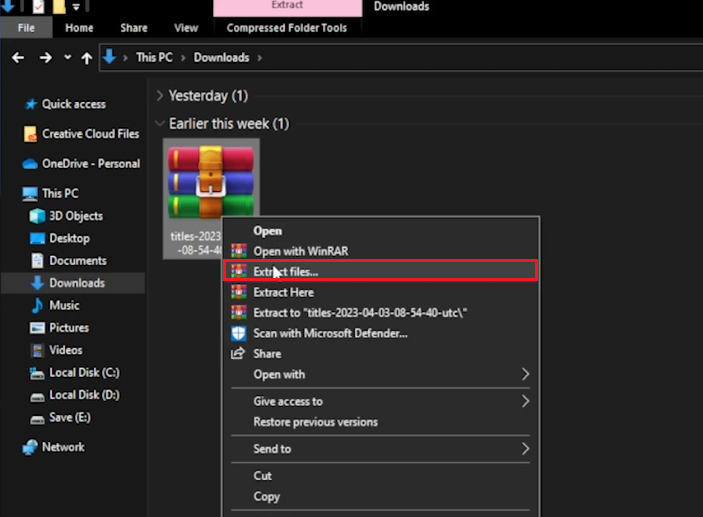
Unzip the downloaded Titles template pack
Integrate the Title Template into Your Premiere Pro Project
Having extracted the file, you'll see a new folder. At this stage, launch Premiere Pro and introduce a video or image to the timeline for further editing.
Then, follow these simple steps:
In the top menu bar of Premiere Pro, click on the "Window" option.
From the subsequent drop-down menu, identify and select "Essential Graphics."
This action will bring up the "Essential Graphics" panel on your screen.
Now you are ready to employ the downloaded title template.
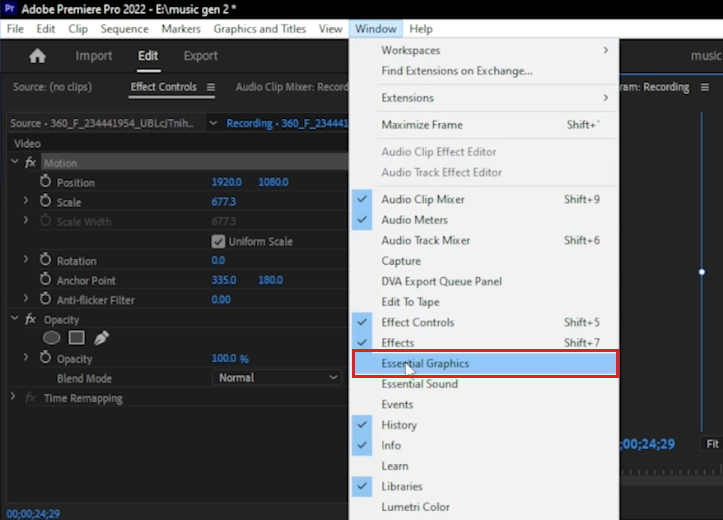
Premiere Pro > Window > Essential Graphics
Click on the "Browse" button in the "Essential Graphics" panel. This will trigger your file explorer to open up.
Navigate your way to the previously downloaded “100 minimal titles” template for Premiere Pro and elect to open it.
Proceed by selecting the "Premiere Pro (Essential Graphics)" file. From here, you can choose any folder that houses the animated titles - let's say the "Modern Titles" folder.
Open up your chosen folder, select any title of your liking, and click "open."
Congratulations, your preferred title is now part of the essential graphics collection.
To locate it, either use the search bar by typing its name or manually scroll through until you spot it.
Once you've found the title, simply double-click or drag and drop it onto the timeline.
Your project is now enhanced with a professional title and ready for further refinement!

Open the title template you wish to use
Customize Your Project's Title
Once the title file is added to your timeline, double-click on it. This action will open the settings window for the animated title, allowing you to begin customization.
Here's a quick guide on how to edit the title:
Under the “Edit” section, look for the "Source Text" fields - usually, there are three.
Fill each field with your preferred text. For instance, the first field could say "Innovation Tech," the second "Reliable Solutions," and the third "Guides and Tutorials."
Following this, you can manipulate the size of the text. Adjust the scale slider until your text size aligns with your vision or design preference.
Another customization feature available is the color modification option. By clicking the color picker associated with each text field, you can select a unique color for each part of your text. Say, choose a bold blue for the first, a subtle grey for the second, and a striking red for the third.
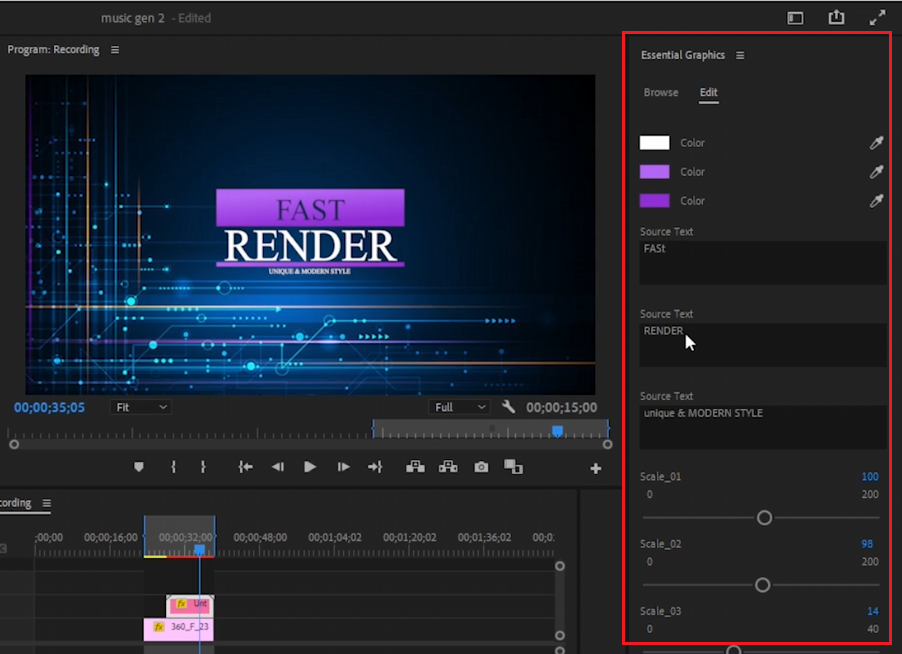
Edit the title template colors and text
Finalize and Export Your Project
Once you're satisfied with your edits, you can render your project for a flawless preview. To finalize your creation and share it with the world, simply hit "export" or use the shortcut Ctrl+M on your keyboard, and your professional-grade video is ready for publication.
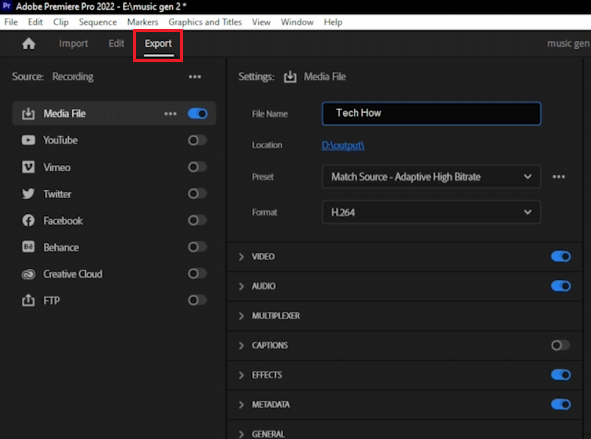
Export your Adobe Premiere Pro Title Project
-
You can download the templates from the Envato Elements page. Simply sign up for a 7-day free trial, and gain access to thousands of Premiere Pro templates along with other add-ons and plugins.
-
Yes, the templates have editable "Source Text" fields. You can enter your preferred text in these fields to customize your title.
-
Absolutely. You can scale the text in the title templates to suit your design preferences or to achieve a specific visual effect.
-
Yes, you can alter the color of the text using the color picker option available in the editing section of the title templates.
-
After completing your edits and adding the title, you can either render the project for a smooth preview or click on "export" or use the shortcut Ctrl+M to export the video.