Best Transition Pack for Premiere Pro - Install Guide
Introduction
Elevate your video projects to a professional level with our comprehensive guide about the best transition pack you can find for Premiere Pro. Learn how to seamlessly download, install, and incorporate the feature-rich transition pack available on Evanto Elements. Gain access to a plethora of Premiere Pro templates, transition packs, and additional creative assets. Embark on a journey towards refined editing by understanding the intricacies of importing, using, and customizing diverse transition options, such as Zoom In and Zoom Out, on your timeline. Make your videos captivating and expertly polished, regardless of the nature of your project, with just a few simple steps.
Get Started with the Transition Pack
For transforming your video editing game, download the Evanto Elements Transition Pack linked here. Begin with a 7-day free trial and gain immediate access to Premiere Pro templates, specialized transition packs, and an array of extra add-ons, plugins, and templates for Adobe Premiere Pro and other creative software applications.
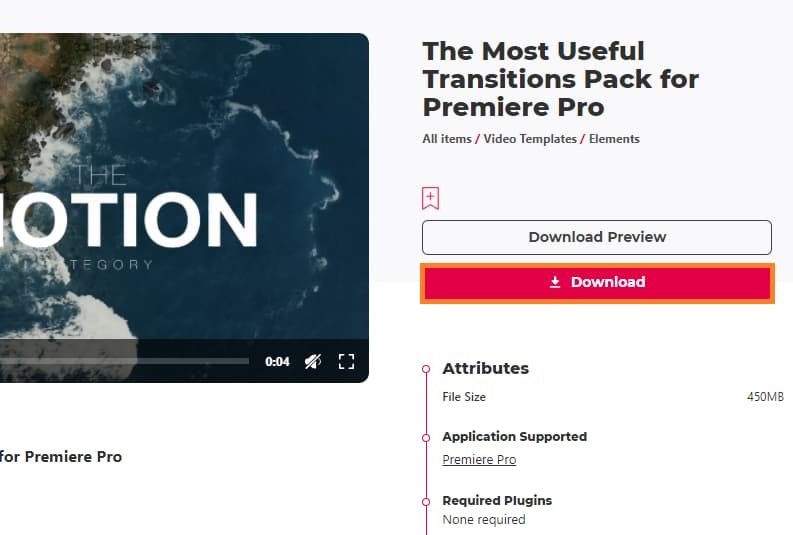
Download the Transitions Pack
The download process is swift, and upon completion, the file can be found in your "Downloads" folder. Like most files from Evanto Elements, the transition pack will be compressed. To decompress this file, simply right-click on the .zip file and opt to extract the entire contents within your "Downloads" folder. Mac users can follow an identical procedure.
After unzipping, you'll notice a new folder. Open this, and then proceed to launch Premiere Pro. Now, you're ready to incorporate project files into the timeline, these could be videos or images, setting the stage for professional-level editing with the Transition Pack.
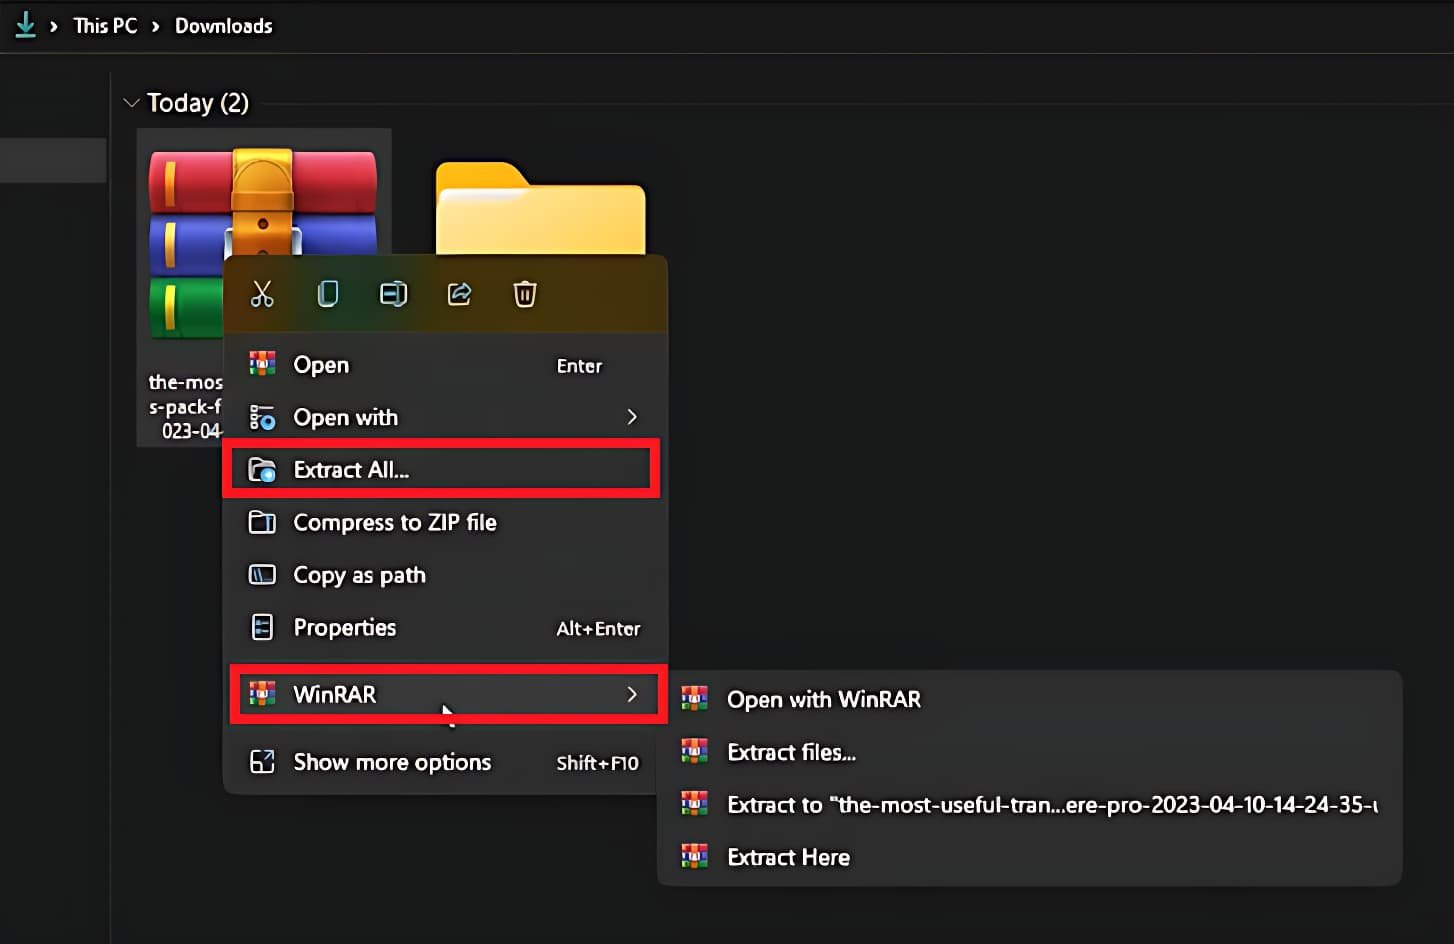
Unzip the downloaded transitions pack .zip file
Incorporate the Transition Pack into Premiere Pro
With your project files in place on the timeline, it's time to bring in the power of the Transition Pack. In the "Project Panel" window, simply right-click and select "import". This action will trigger the opening of your file explorer.
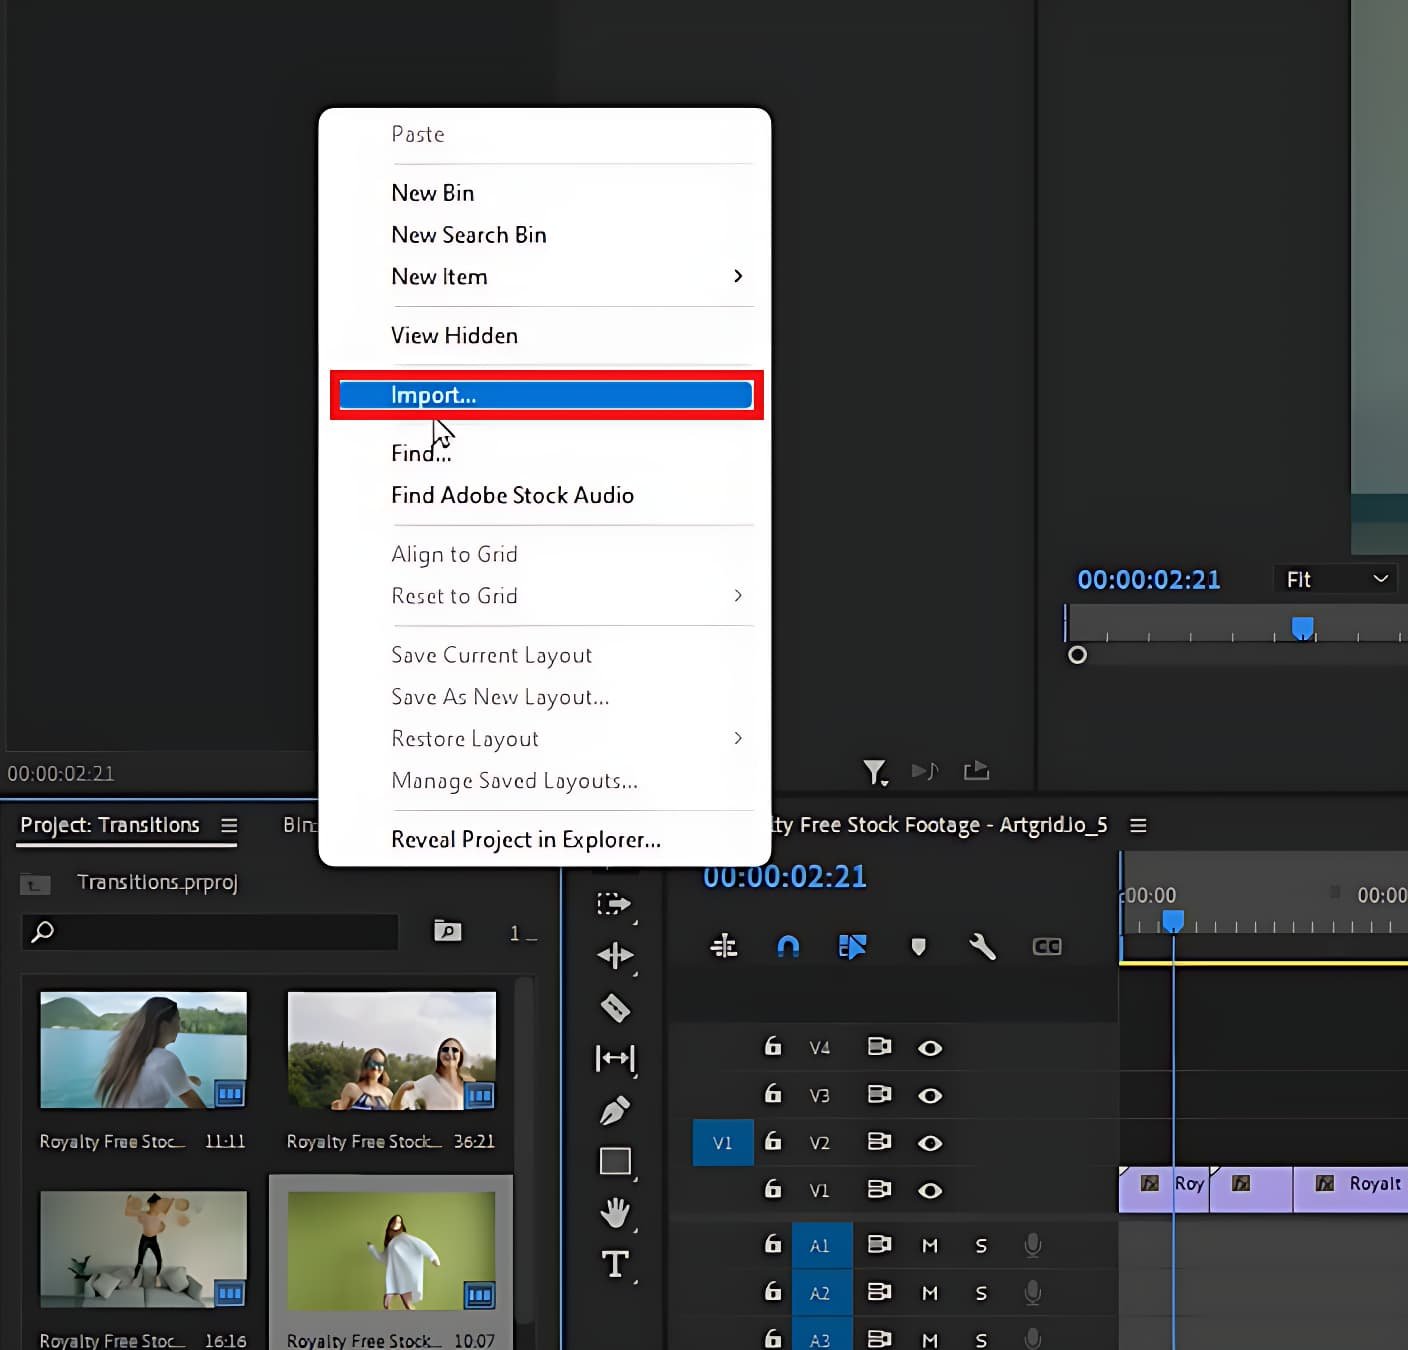
Premiere Pro > Project (Right-Click) > Import…
Here, navigate to your "downloads" folder or your chosen default location and locate the downloaded transition pack. Open the pack by double-clicking it. Within this, access the "Most Useful Transitions" folder and then choose the "Premium Transitions Pack".
From here, you have the liberty to import either all transitions or pick individual ones that cater to your project's specific needs. For instance, you may want to use the "Zoom" transition for an engaging effect.
Upon your selection, click "Open". This action will bring up a dialogue box. Here, ensure the "Import Entire Project" option is selected. Also, mark the checkboxes for "Create folder for imported items" and "Allow importing duplicate media". Click "OK" and allow a few seconds for the transition files to load into your project.
Import Project > Import Entire Project & Allow Importing duplicate media
If the system prompts about missing media files, fear not. Simply click on the "Locate" button. This action will present a new window where you can navigate to the “downloads” folder. From there, trace the path back to the "Premium Transitions Pack" folder inside the "Most Useful Transitions" folder. Click "Search" and once the system finds the matching files, confirm by clicking “OK”.

Link the missing Premiere Pro media
Access and Customize a Transition
On the project panel, you'll notice a folder titled "Zoom". This folder is your gateway to the Zoom transitions. To access these transitions, double-click on the folder. Inside, you'll find the premium transitions that can enhance your video projects significantly.
Each Zoom transition offers a unique effect. Simply hover over a transition to preview its effect. These Zoom transitions, with their distinct features, can significantly elevate the look and feel of diverse projects.

Edit the “Zoom” transition in your project
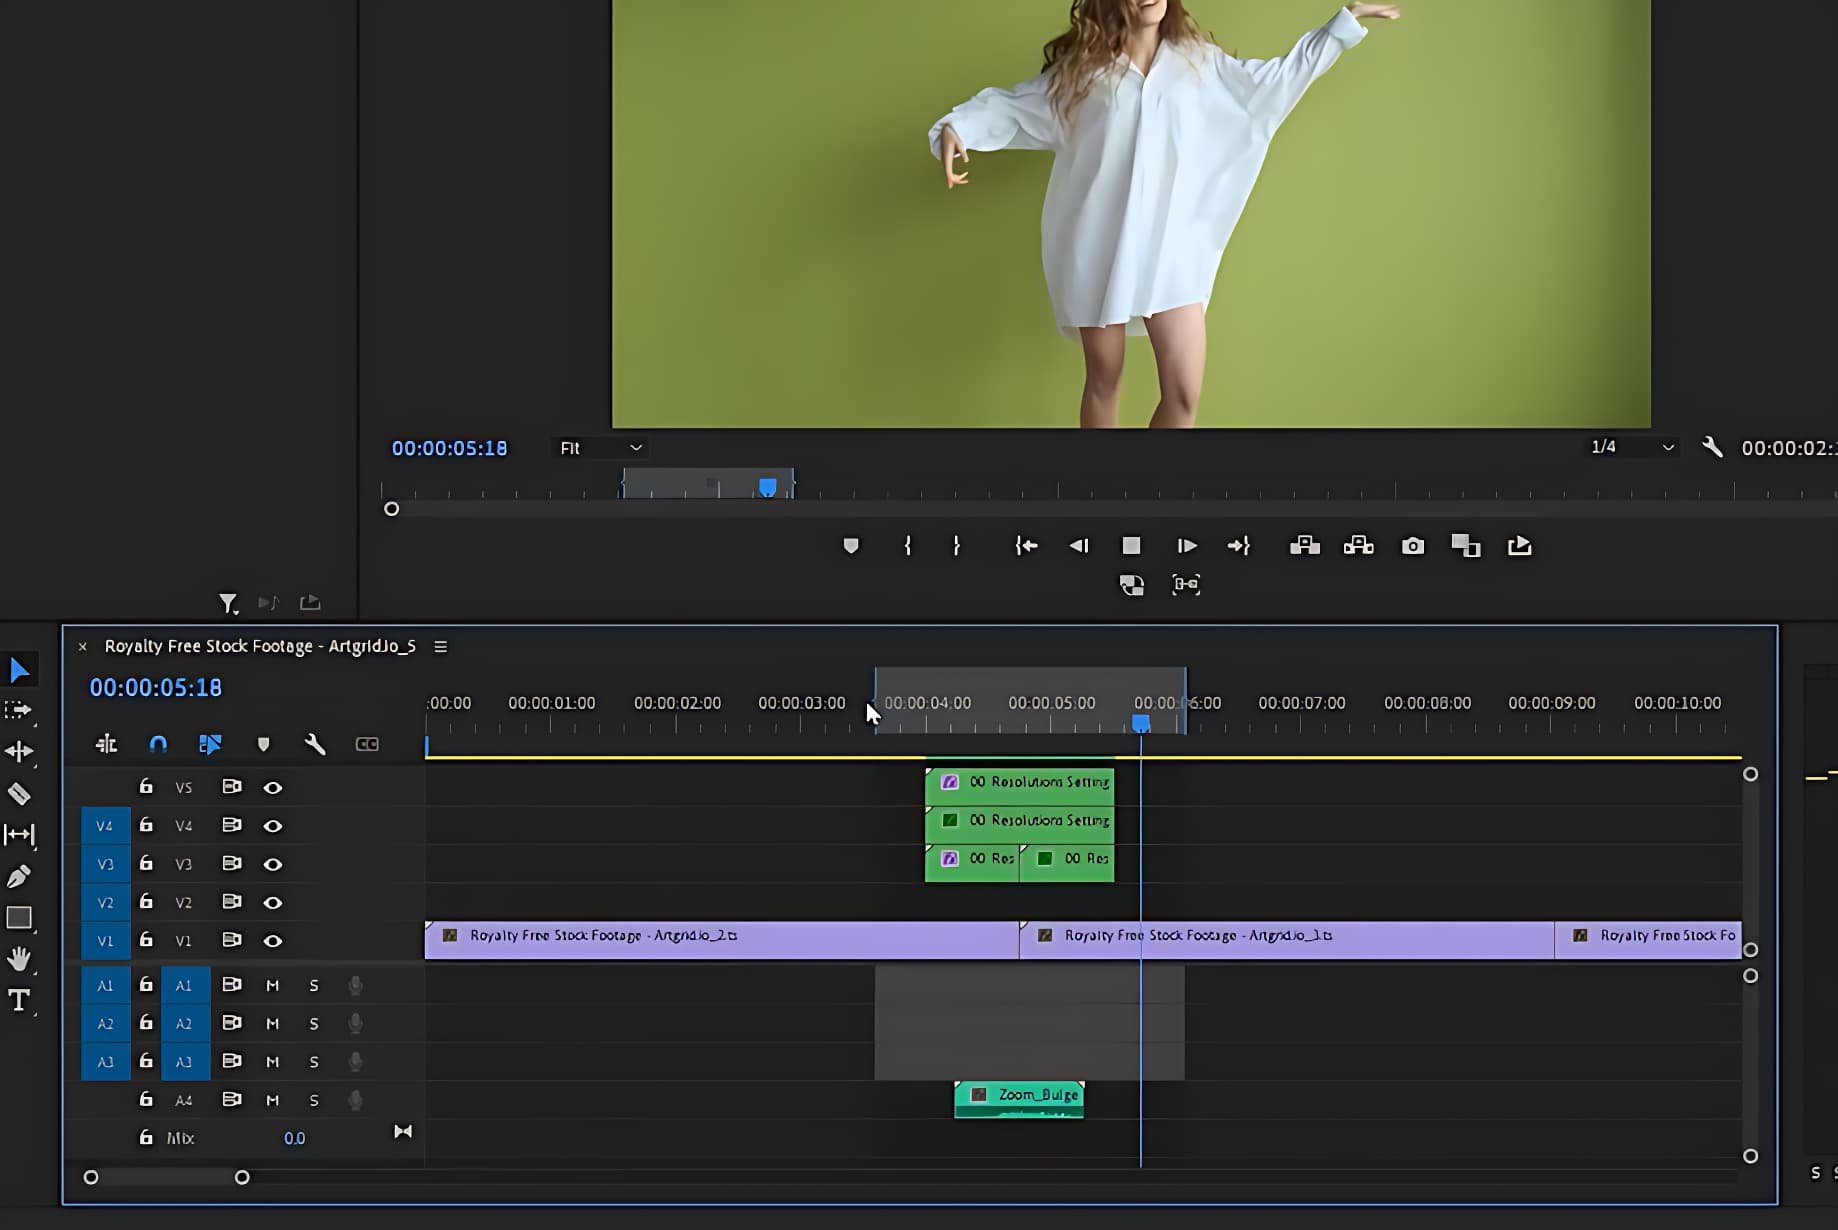
Now, let's put these transitions into action. Firstly, expand your timeline for a clear view - you can do this by pressing the plus key on your keyboard. Then, it's as simple as dragging and dropping your chosen transition onto your video clips.
Before proceeding, ensure you've disabled the "Nest" option by clicking on it - it will turn grey once deactivated. Similarly, remember to disable video track one as this is where the preview video is situated. This easy process is a quick way to infuse professionalism into your video projects.
Render your project to preview the transition
Apply a New Transition and Export Project
Let's dive into applying another exciting transition - the "Zoom in" effect. To do this, simply drag the chosen transition to the timeline's point where your next scene starts. For better visualization, expand your timeline.
Next, remove the existing image from the transition as demonstrated. Once eliminated, the transition effect will apply across your entire video clip. To render the selected area for previewing the transition, mark the in/out area on your timeline using "I" and "O" keys. The rendering process might take a few seconds.
Once rendered, press the spacebar to witness the captivating effect of the "Zoom in" transition on your video. Next, you can experiment with the "Zoom out" transition following the identical procedure to add more depth to your project.
With the professional-looking transitions applied, your videos will certainly leave a lasting impression.
When you've finished editing your project, exporting the video is the final step. Simply click on "export" or use the keyboard shortcut Ctrl+M. This action will seamlessly export your video, ready for viewing and sharing.
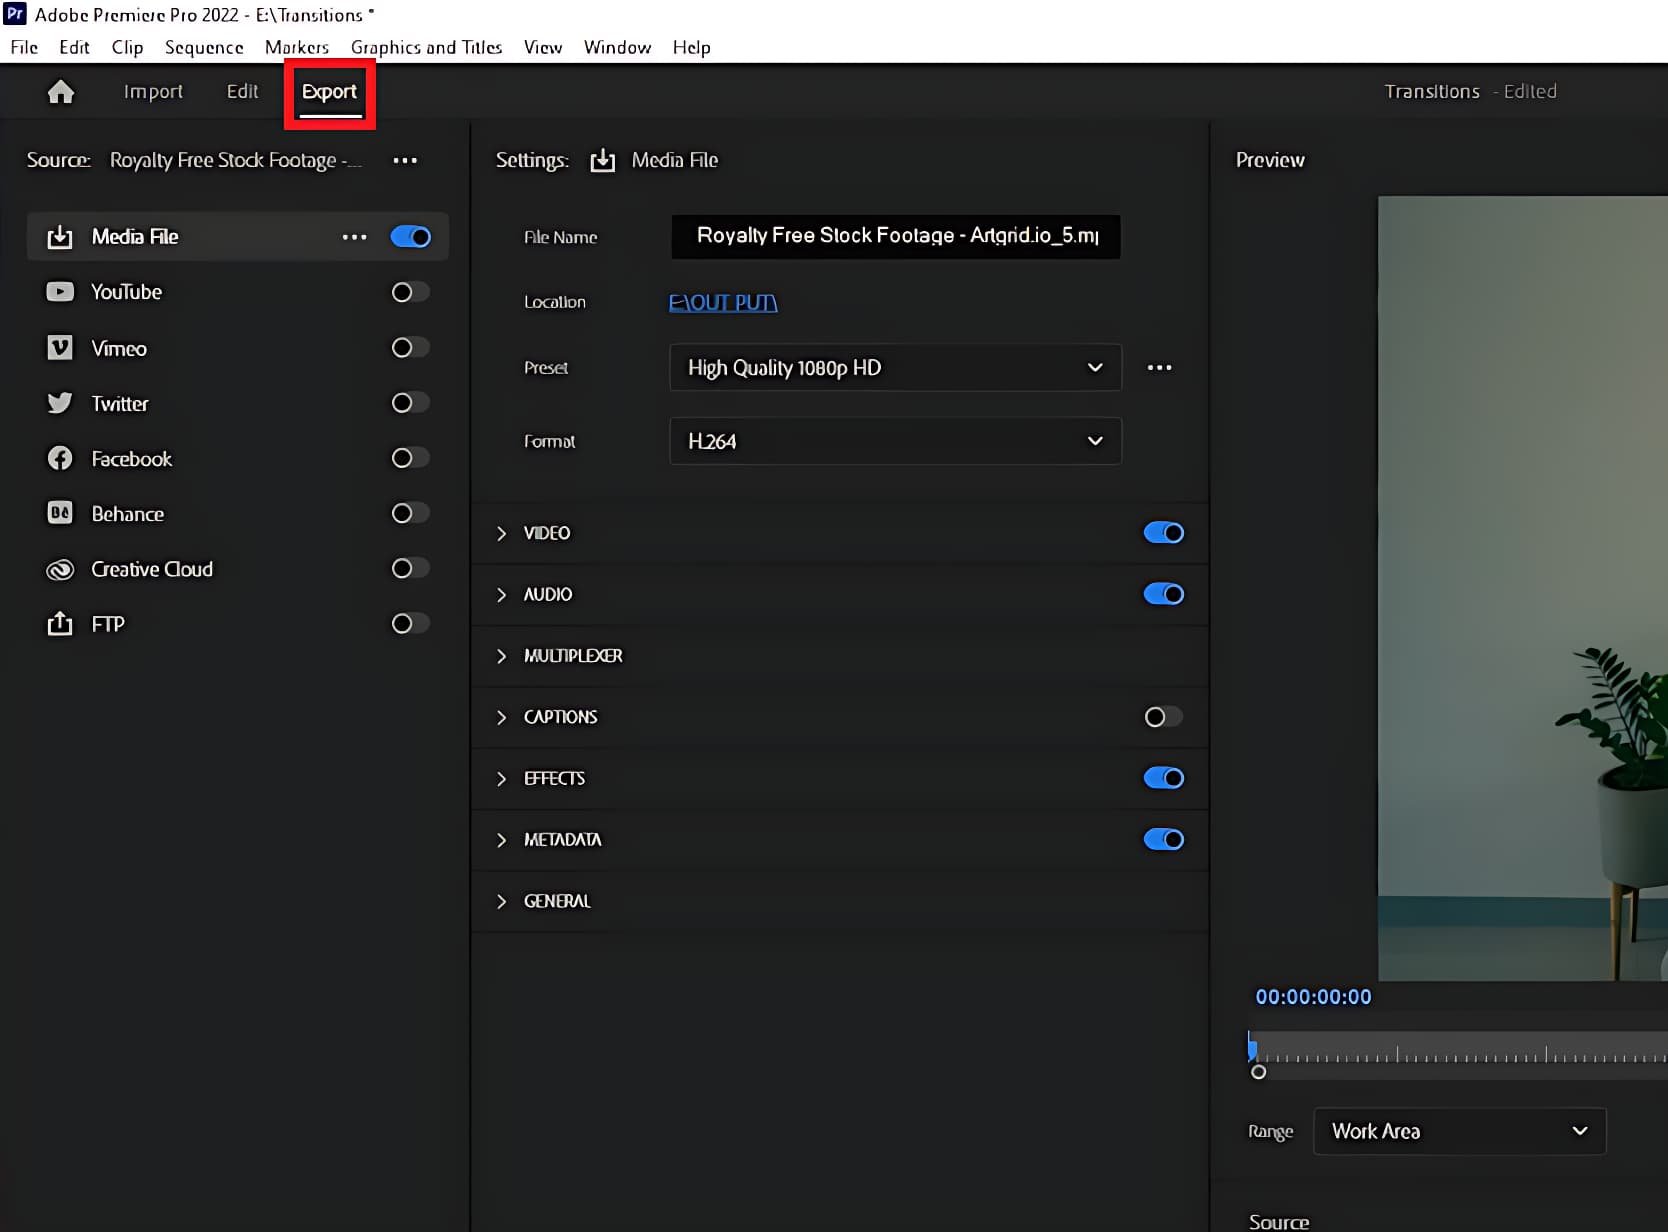
Export your project in Adobe Premiere Pro
-
The 'Zoom' transition in Premiere Pro is an effect where one shot changes to another with a dynamic zooming motion, bringing a more cinematic and professional touch to your video projects.
-
You can download a wide variety of transition packs from the Envato Elements page, offering access to thousands of addons, templates, and plugins for Premiere Pro and other creative apps.
-
Importing a transition pack into Premiere Pro involves opening the Project Panel, selecting 'Import', and then browsing and selecting your downloaded transition pack. You can then open and import the pack, making sure to select 'Import Entire Project' in the dialogue box.
-
Applying transitions in Premiere Pro involves selecting the desired transition, dragging and dropping it onto the timeline where you want the transition to occur. Make sure to adjust your timeline for accurate placement and render the area to preview the transition.
-
To export your project in Premiere Pro, you can either click on 'export' or use the keyboard shortcut Ctrl+M. This action will convert your project into a shareable video format.