How To Fix “Can’t Connect To Server” & “Connection Timed Out” Minecraft Server Error

If you're an avid Minecraft player, you may have encountered the frustrating "Can't connect to server" or "Connection timed out" error message while trying to join a server. This error can occur due to various reasons, including server overload, internet connectivity issues, or incorrect server settings. But fear not, as in this article, we'll guide you through the steps to fix the Minecraft server error and get you back to playing the game in no time. Whether you're a seasoned player or just starting, this guide will provide the necessary information to troubleshoot and resolve the "Can't connect to server" and "Connection timed out" error messages for Minecraft on your PC.
Use an Ethernet Connection
Ensure you are using a reliable network connection with which you want to connect to the server. I recommend using a hard-wired (Ethernet) connection, which will reduce your packet loss, your latency and prevents your session from timing out.
Verify the Minecraft Server Status
After verifying your connection click here to test the server status of the Minecraft server, you’re trying to connect to. Enter the server IP address into the dialogue box, and select “Get server status”. You will be able to preview the number of players currently on the server, the Minecraft version the server is running on and some debugging information.

2b2t.org’s Server Status and Information
Use the Correct Minecraft Version
Now that you have the relevant server information, ensure your game is loading up the same Minecraft version on which the server is running. Open up your Minecraft launcher and navigate to Installations. Select to add a new install, and you can add the server version in the Versions section.
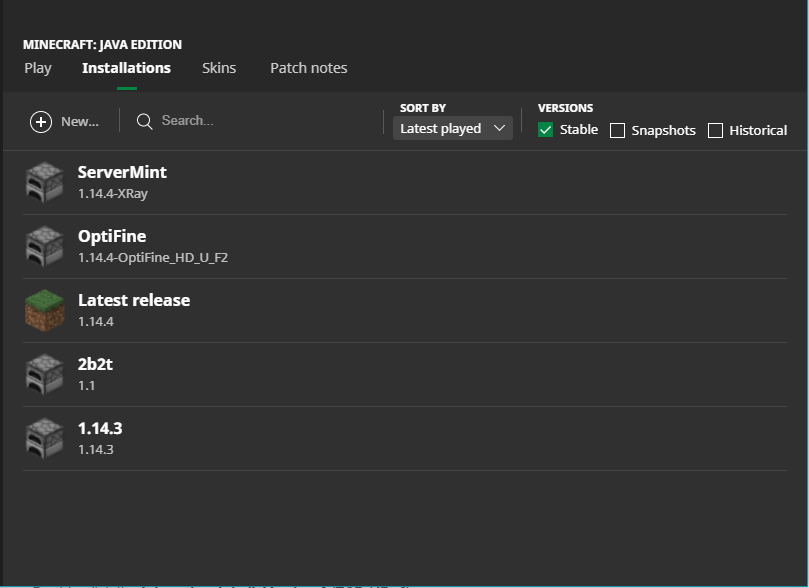
Minecraft Launcher > Installations
Change DNS Server Addresses
If you still have issues connecting to the server, you must change your DNS server address to open in your OS settings.
Open up your Control Panel
Navigate to Network and Internet, Network and sharing centre, click on your connection
On the new window, select Properties
Double-click the Internetprotokoll, Version 4 (TCP / IPv4)
On the new window, select to Use the following DNS server addresses
As you preferred DNS server, use: 8 8 8 8
As your Alternative DNS server, use: 8 8 4 4