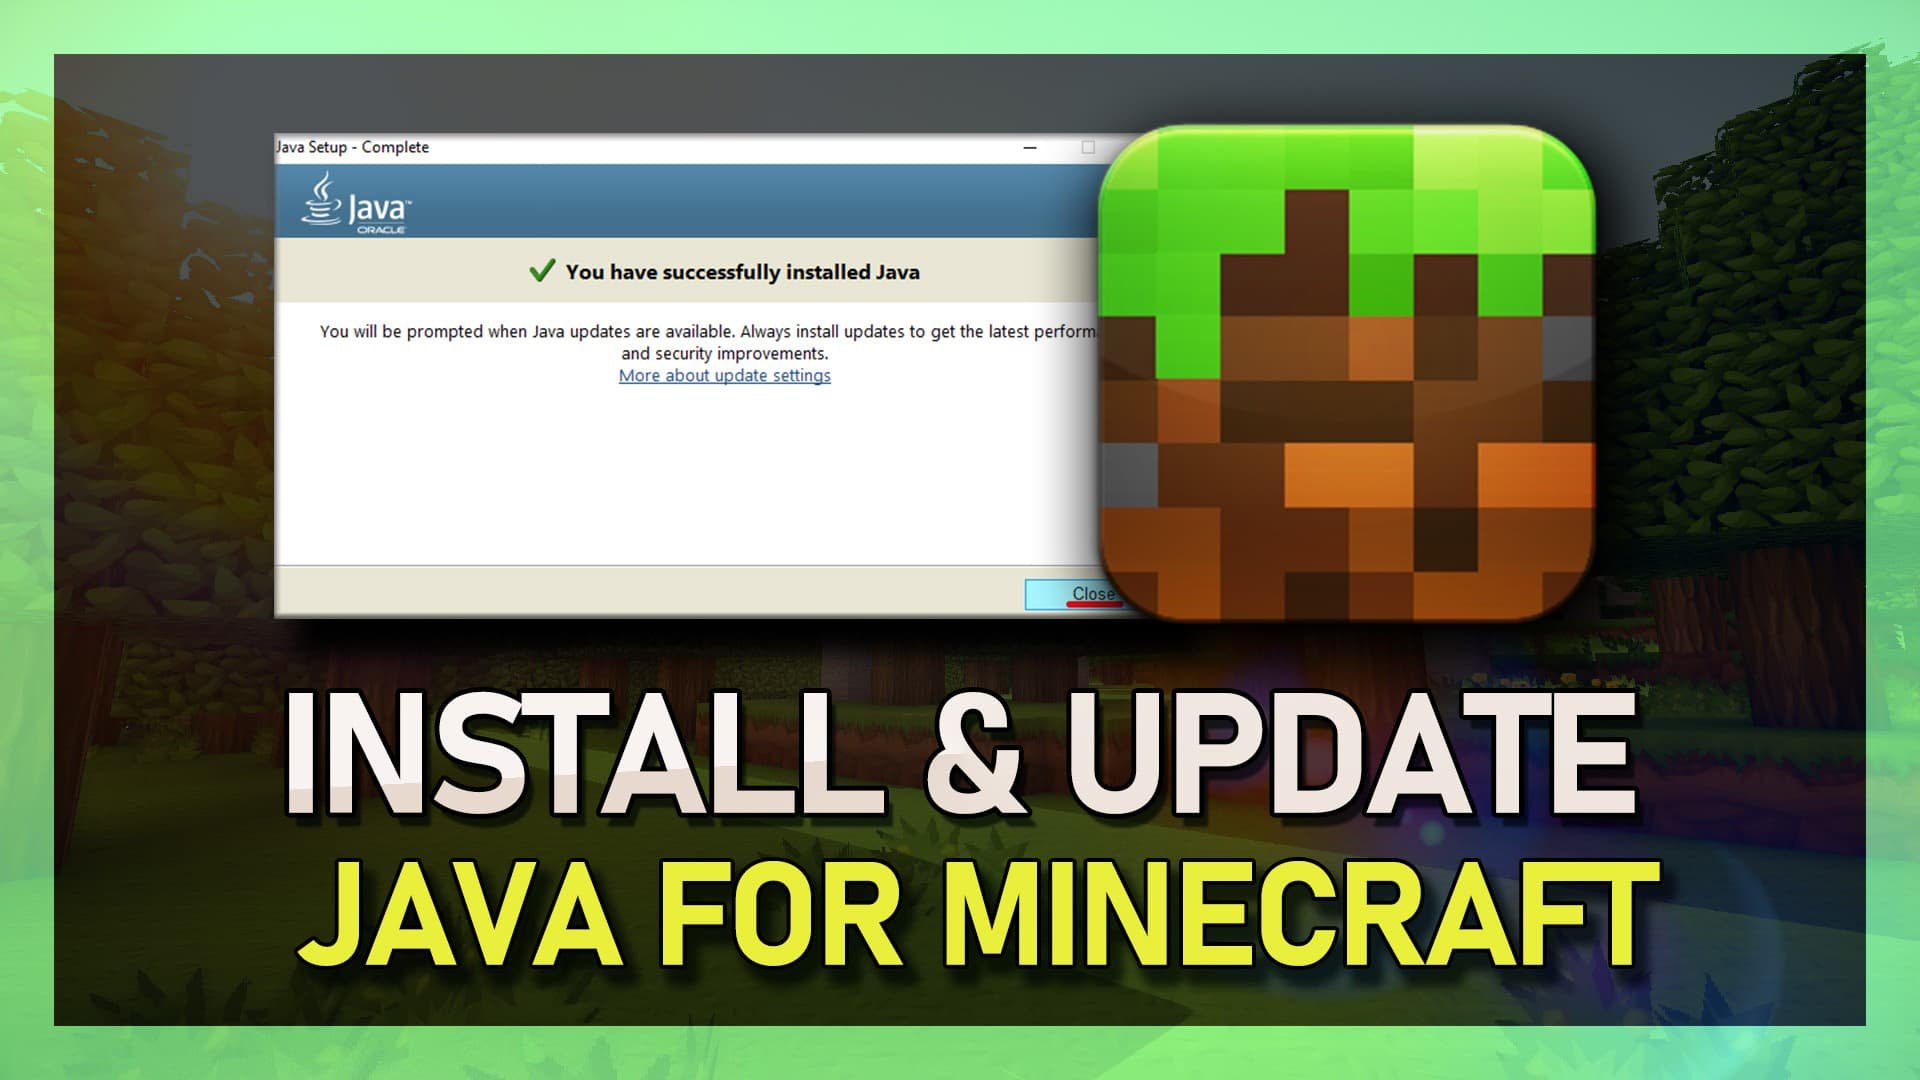
How To Install & Update Java for Minecraft - Tutorial
Introduction
Ready to enhance your Minecraft experience? This tutorial guides you through installing and updating Java on your PC, a crucial step for Minecraft players. Java, the backbone of many applications including Minecraft, ensures that your game runs optimally. We'll walk you through the simple steps of downloading Java from its official site, executing an effortless installation, and even delve into the Java SE Development Kit (JDK) for those interested in Minecraft modding. Additionally, we'll cover how to keep Java up-to-date, ensuring a secure and smooth Minecraft gameplay. Perfect for both new and experienced players, this tutorial simplifies Java setup for an improved Minecraft journey.
Downloading and Installing Java for Minecraft
Java plays a crucial role in running Minecraft, a popular game developed in the Java programming language. To ensure a seamless gaming experience, it's essential to have the latest Java version installed. Here's a straightforward guide to downloading and installing Java:
Step-by-Step Guide to Install Java
Navigating to Java's Official Website:
Open your preferred web browser.
Visit Java.com/download to find the official Java download page.
Initiating the Download:
Look for the “Download Java” button on the website.
Click on this button to start downloading Java.
The download time may vary based on your internet speed.
Download Java for Windows
Locating the Downloaded File:
After the download is complete, find the Java setup file.
Typically, it's located in your computer's “Downloads” folder.
Access this folder directly from your browser's download history.
Installation Process:
Double-click the Java setup file to initiate installation.
The installation process is designed to be user-friendly.
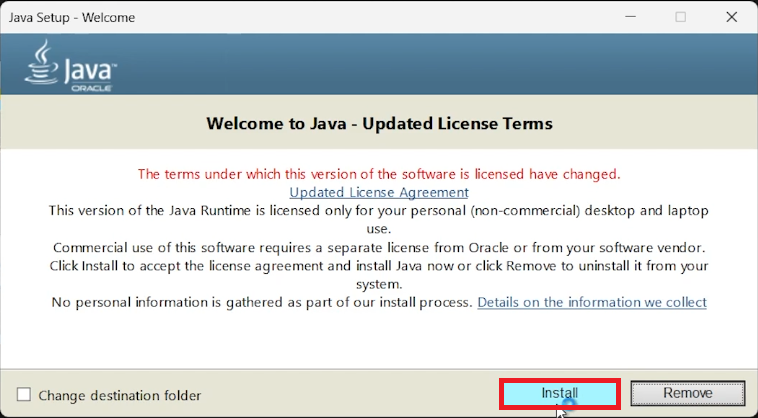
Follow the on-screen instructions, mainly clicking the “Install” button.
Ensuring Smooth Minecraft Gameplay
Having Java installed is key for a smooth Minecraft experience. By following these steps, you can effortlessly set up Java on your computer, paving the way for uninterrupted gameplay and access to a wide range of Java-based applications.
Follow the Java Setup installation wizard
Installing the Java SE Development Kit for Minecraft
For Minecraft enthusiasts, especially those interested in modding or using tools like Optifine, installing the Java SE Development Kit (JDK) is a vital step. Here's a simple guide to help you through the process:
Steps to Install Java SE Development Kit (JDK)
Finding the JDK Download Page:
After installing Java, reopen your web browser.
Search for “Java SE Development Kit”.
Click on the first link in the search results, leading to the official JDK download page.
Selecting the Correct JDK Version:
On the JDK download page, ensure to choose the version compatible with your operating system.
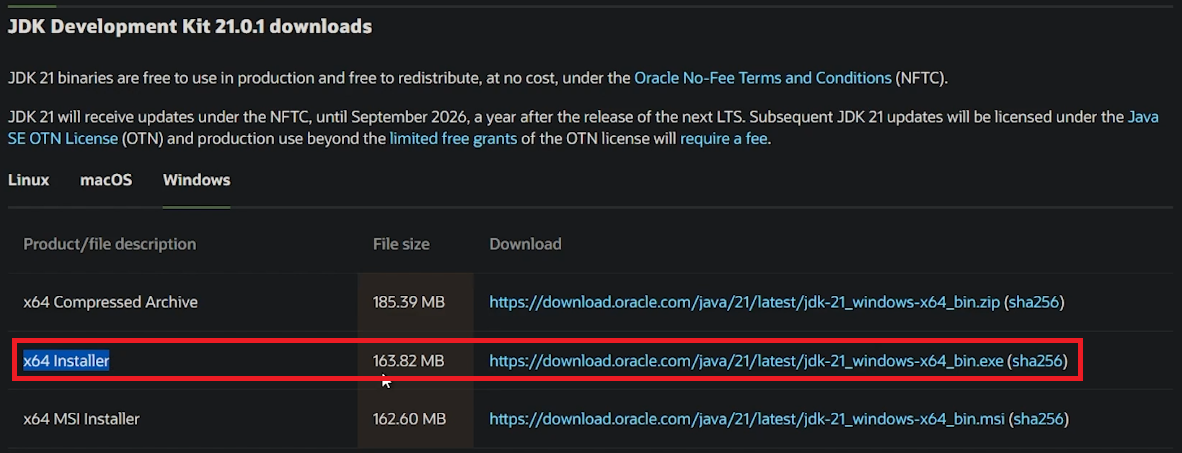
For Windows users, look for the “x64 Installer” and download it.
Downloading and Installing JDK:
Once the download is complete, locate the JDK setup file, typically found in the “Downloads” folder.
Run the setup file to begin the installation.
The installation process is intuitive, resembling the Java installation steps.
Follow the on-screen instructions, mostly clicking “Next” to proceed through the steps.
Allow the Installation Wizard to complete the setup.
Enhancing Minecraft with JDK
Installing JDK not only enriches your Minecraft gaming experience with advanced functionalities but also opens up possibilities for modding and utilizing sophisticated Minecraft tools. This straightforward installation process ensures you have the necessary Java environment set up for an enhanced Minecraft adventure.
Download & Install Java SE JDK Development Kit
Troubleshooting Java-Related Issues for Minecraft
After installing Java and the Java SE Development Kit (JDK), you're set to run Java-based applications like Minecraft. However, you might occasionally face some Java-related problems. Here’s how to resolve them:
Running Java-Based Applications
Identifying Java Applications:
Java applications usually display a “coffee cup” icon.
Opening Java-Based Apps:
If a Java app doesn’t open with Java by default:
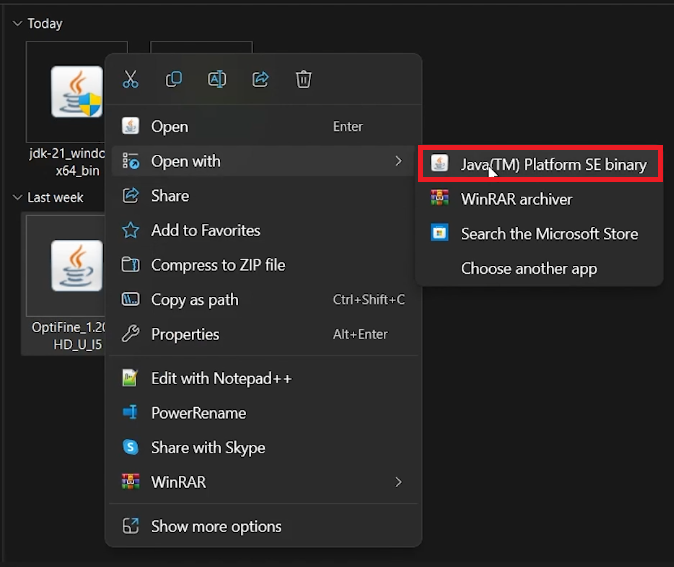
Right-click on the file.
Select “Open With”.
Choose “Java Platform SE binary” from the list.
Java Application > Open With > Java (TM) Platform SE binary
Keeping Java Updated
Maintaining the latest version of Java is critical for both security and compatibility, especially with new Minecraft updates.
Updating Java:
Search for Java in your Start Menu and open the Java application.
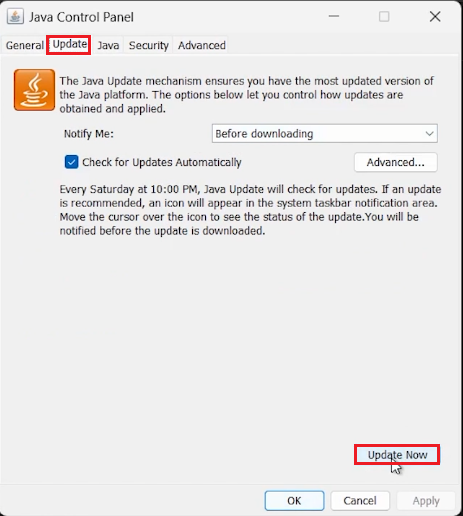
In the Java Control Panel, go to the “Update” tab.
Click on “Update Now” to download and install the latest Java version.
Automatic Updates:
Enable the “Check for Updates Automatically” option.
This feature ensures Java is always up-to-date by automatically checking and installing updates.
By following these troubleshooting and update steps, you can enhance your Minecraft gaming experience, ensuring it runs smoothly and securely with the latest Java updates.
Java Control Panel > Update > Update Now
-
Java is essential for Minecraft as the game is developed in the Java programming language. Having the latest Java version ensures smooth gameplay and access to all features.
-
Check your Java version by opening the Java Control Panel. Minecraft requires the most recent version for optimal performance.
-
Minecraft requires Java to run. Without it, the game won't launch or work correctly.
-
Regularly updating Java is crucial. Enable automatic updates in the Java Control Panel to always have the latest version for security and compatibility.
-
The Java SE Development Kit (JDK) is used for advanced Minecraft functionalities, especially in modding. It's recommended for an enhanced gaming experience.


