Create Neon Sign Logo in Photoshop - Tutorial & Template
Introduction
Light up your design skills with the electrifying art of neon logo creation in Photoshop! In our newest tutorial, we guide you through each step to transform a simple text or logo into a radiant neon masterpiece. Dive into the vibrant world of neon sign graphics, where every design shines brightly. Join us to learn, experiment, and let your creativity glow!
How to Download and Use the Neon Sign Effect Template
Illuminate your designs with the Neon Sign Effect template available on Envato Elements. Here’s how to get started:
Accessing the Template:
Navigate to the Envato Elements page (as mentioned in our video).
By registering on Envato Elements, you not only unlock this neon magic but also a treasure trove of add-ons, plugins, and templates suitable for Photoshop and various other design tools.
Simple Download Steps:
The download is a breeze, taking just moments.
Once done, locate the downloaded .zip file, typically in your 'downloads' folder.
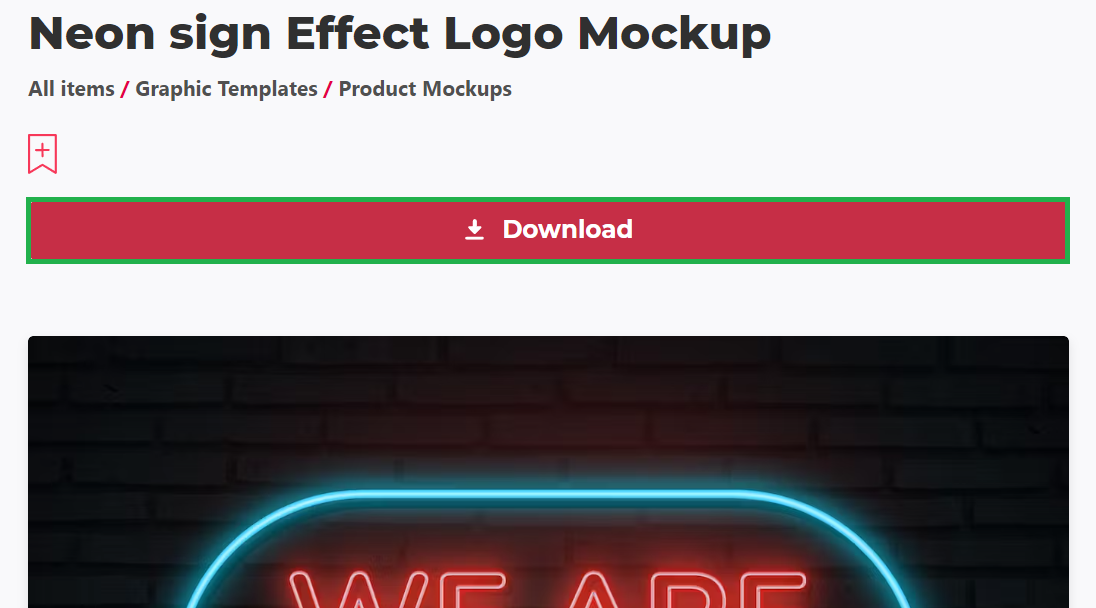
Download Neon Effect Logo file
Extracting the Template:
For Windows users: Right-click on the .zip file and choose 'Extract Here' within the downloads folder.
Mac users, you've got a similar process!
Opening in Photoshop:
Post extraction, a fresh folder pops up showcasing the template file.
Fire up Photoshop, and simply drag the "Neon sign Effect Logo Mockup" file into the program to get glowing!
Now, you're all set to electrify your designs with the neon vibe! Happy designing!
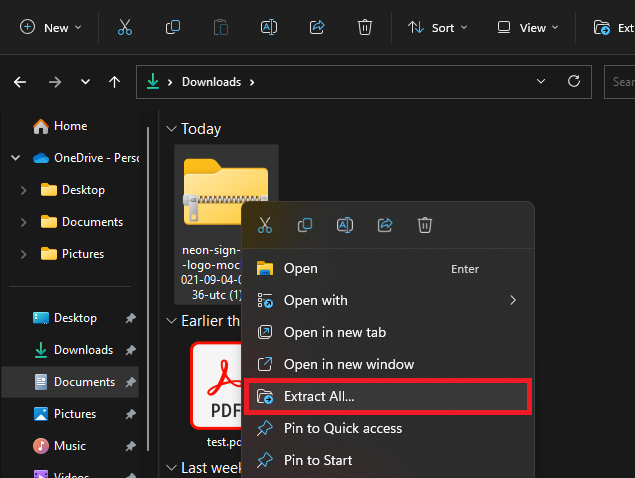
Extract the downloaded template file
Customizing Your Neon Design in Photoshop
Want to give your designs a neon twist? Here's a step-by-step guide to make it easy:
Preview and Prep:
As you launch, give it a moment to load and reveal the neon glow.
Clear the stage by hiding the 'Background' layers, giving you a clean slate.

Toggle the background layers ON or OFF
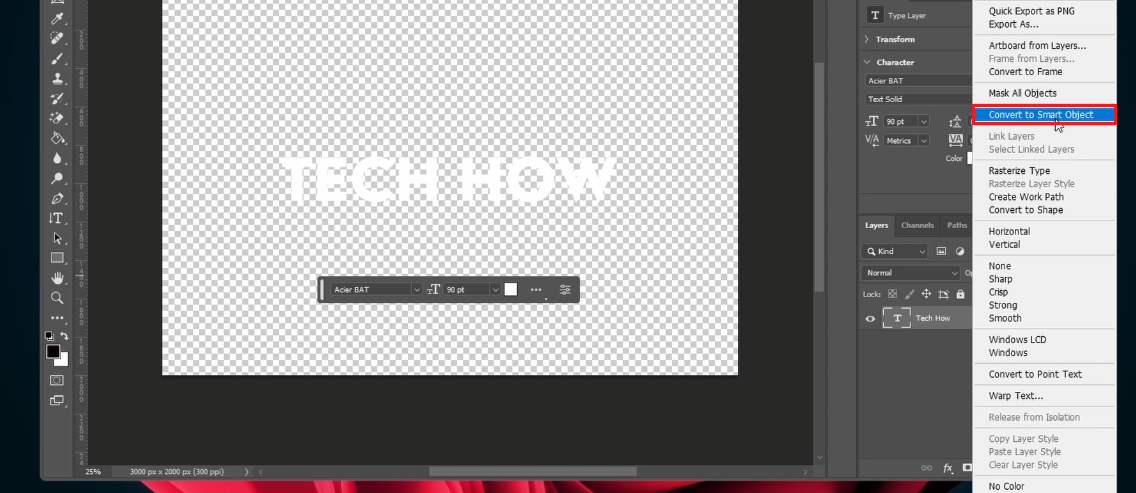
Editing Neon Text:
Find the “We Are Text” thumbnail within the layers panel and give it a double-click.
Once the next Photoshop tab unveils itself:
Swap out the default text with your chosen words. For example, I've chosen "Tech How".
Adjust to your preferred text size and font style.
To preserve your changes, right-click the layer and pick “Convert to smart object”.
Importing Logos:
Got a logo to showcase? Drag in your PNG logo file (make sure it has a transparent background).
This ensures your logo shines brightly with the neon effect.
Quick Save Tips:
For a swift save, use CTRL + S on a PC or CMD + S on a Mac. This will reflect all changes in your main neon design project.
Refining Text Details:
Spot any changes in your text? Just double-click on the “Open Text” layer and adjust.
For instance, I've inputted "Tutorials" and saved it.
If your text feels out of place in size, resize with CTRL + T on PC or CMD + T on Mac. Once content, switch back to your main Photoshop design.
Now, your neon design is all jazzed up and ready to glow! Don't forget to explore and experiment with different text or logos to create your unique neon masterpiece.
Adjust your template text or logo image and save your changes
Perfecting Your Neon Glow in Photoshop
Creating a mesmerizing neon effect is all about finetuning details. Here's a simple guide to help you achieve the ultimate neon glow:
Tweak Your Neon Colors:
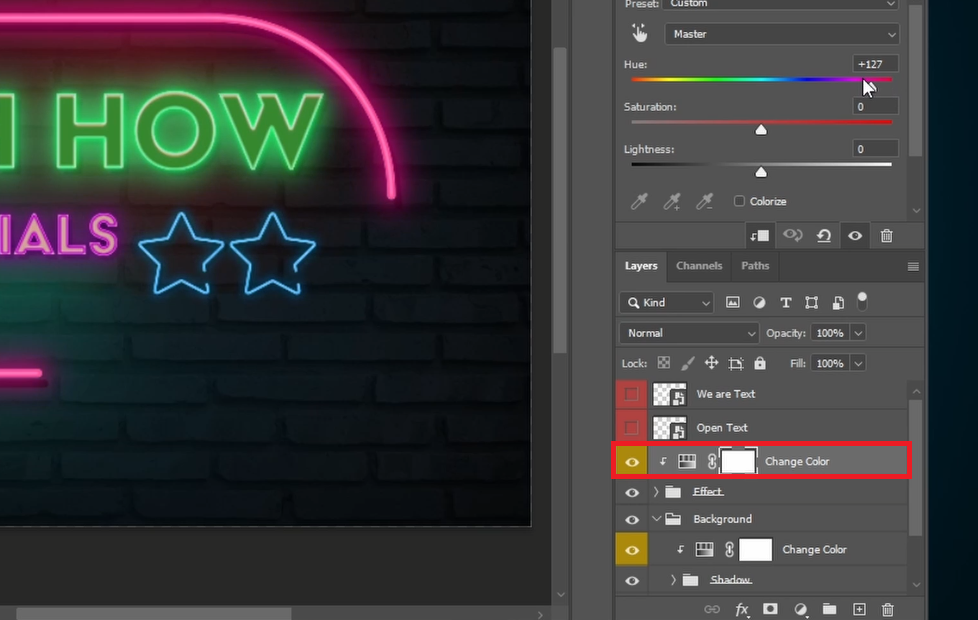
Begin by choosing the “Change Color” layer.
Adjust elements like:
Hue: This changes the color itself. For example, from blue to red.
Saturation: This makes the color more vibrant or muted.
Lightness: I recommend setting this to 0 for an optimal neon shine.
Optimizing Background:
To focus on the neon effect, you can hide the background layer.
Alternatively, try a different color background to see which complements your neon the best.
Fine-Tuning the Neon Details:
Dive into the “Effect” layers folder.
Here you can:
Switch off the star shapes or modify their appearance.
Alter their colors and sizes.
Or even substitute them with another cool design asset.
Change Neon Colors
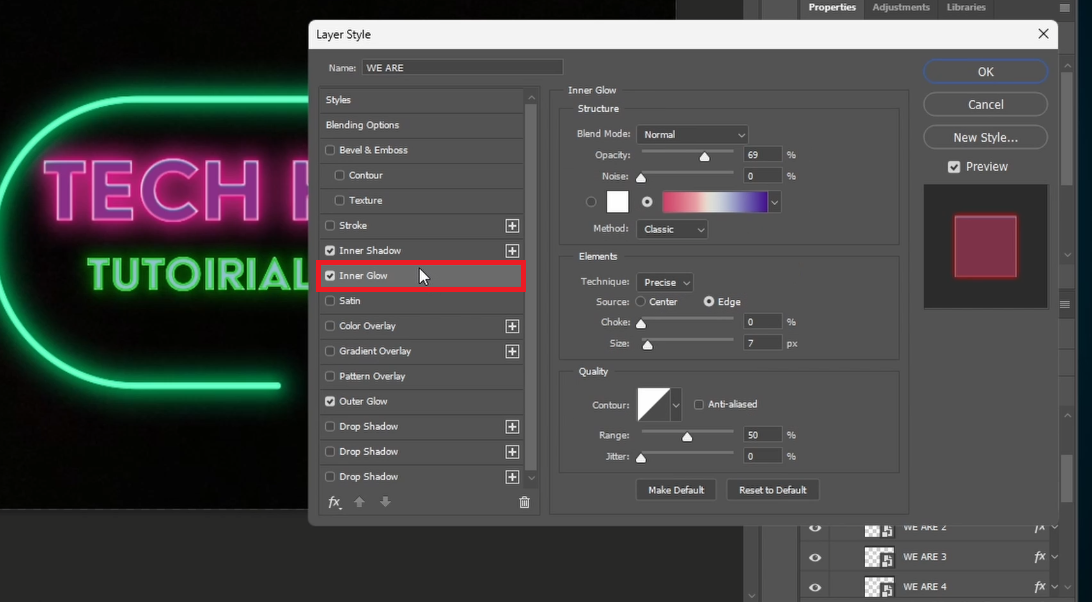
Boost Your Neon's Glow:
Eager to adjust your neon sign's radiant glow? Just double-click the smart object thumbnail.
A “Layer Style” window will pop up.
Play around with the “Outer Glow” and “Shadow” sliders to get the desired luminescence.
Change the glow settings of your neon effect Photoshop file
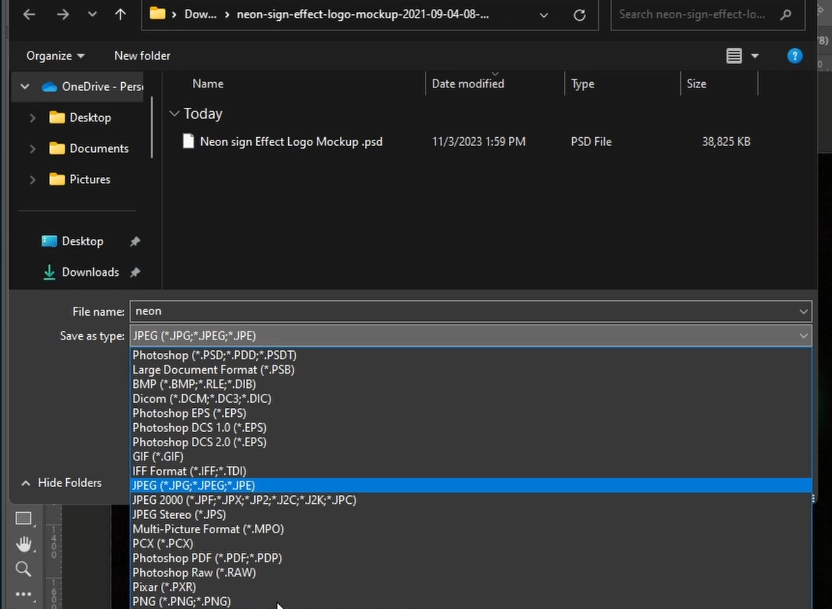
Seal the Deal:
Ready to share or use your design? Navigate to “File” on the toolbar.
Click “Save a Copy”, rename it and choose the right format.
Go for .PNG if you want to keep the background transparent.
Pick JPEG if you're retaining the backdrop.
Now, with these simple steps, your neon design is all set to light up any digital space! Dive in, play around, and let your creativity shine.
Export Photoshop Neon file
-
The "Change Color" layer lets you modify the hue, saturation, and lightness of your design. It's especially useful when adjusting the neon effect to achieve different color variations.
-
In Photoshop's layers panel, you can click the 'eye' icon next to the background layer to hide it. To replace it, simply introduce a new color or design layer behind your neon object.
-
Absolutely! Within the “Effect” layers folder, you can toggle the visibility of star shapes, change their colors, sizes, or even substitute them with other design elements.
-
By accessing the “Layer Style” window, you can tweak settings like “Outer Glow” and “Shadow”. This allows you to control the intensity and spread of your neon's illumination.
-
If you want a transparent background, save your design as a .PNG. If you wish to keep the background, choose the JPEG format.
-
It's suggested to set the lightness level at 0 to achieve the most authentic neon shine.
Affiliate Disclosure: Some of the links on this page are affiliate links, which means that we may earn a commission if you click through and make a purchase from our recommended template providers. This doesn’t affect the price you pay and helps us maintain this site to continue providing you with the best template recommendations.