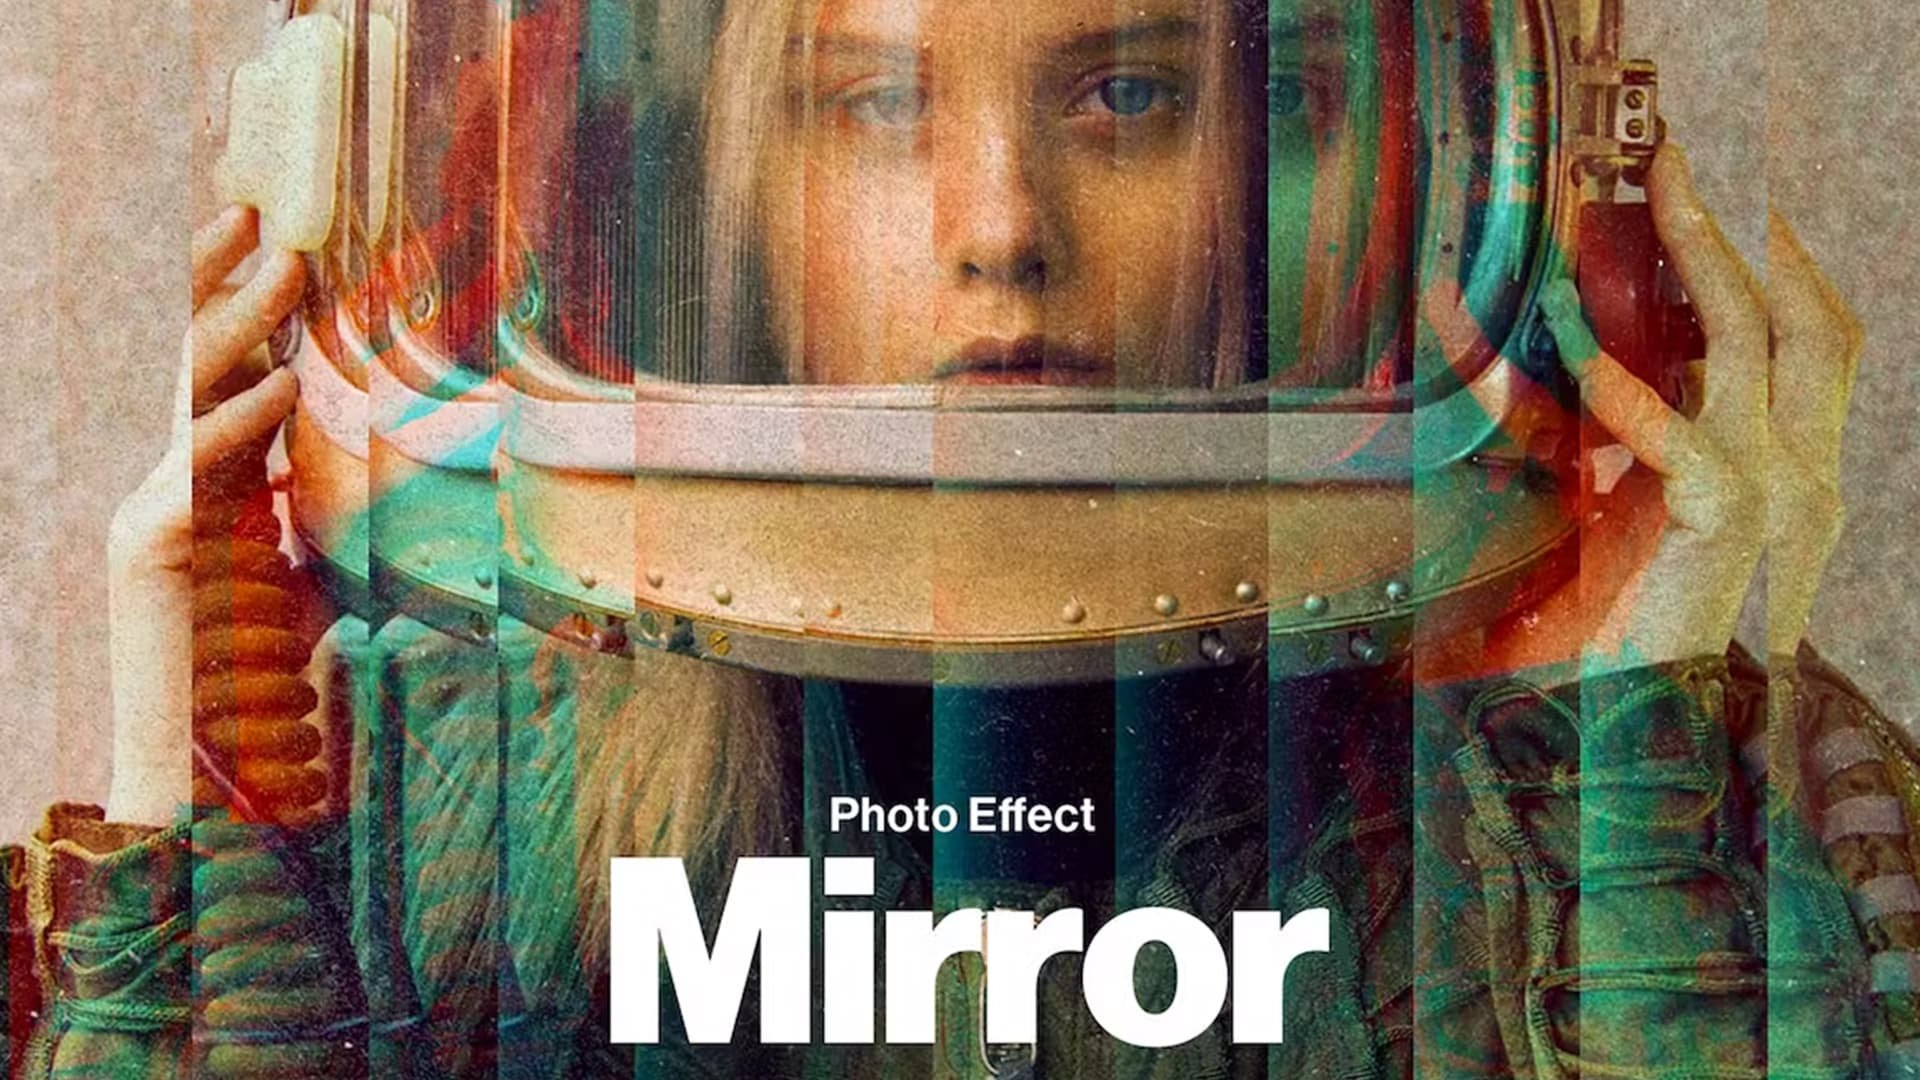
Create Retro Effect Logo in Photoshop - Tutorial & Template
Introduction
Dive into the design world with our latest tutorial on crafting a unique retro effect logo in Photoshop. Using simple steps and the impeccable template from Envato Elements, you'll be able to transform any text or logo into a vintage masterpiece. Perfect for beginners and seasoned designers alike, this guide offers a streamlined process to achieve that nostalgic charm. Let's get started and add a touch of retro to your brand!
Getting Started with the Retro Effect Template
1. Accessing the Template
To begin, head over to Envato Elements where you can easily download the "Retro Text Effect Logo Mockup" template. With a subscription to Envato Elements, not only do you gain access to this specific template, but you also unlock thousands of additional:
Add-ons
Plugins
Templates for Photoshop and many other creative tools.
2. Simple Download Process
Downloading is a breeze! Upon completion:
The file will be in your 'downloads' folder.
Typically, it's compressed into a
.zipformat.

Download Retro Effect Logo file
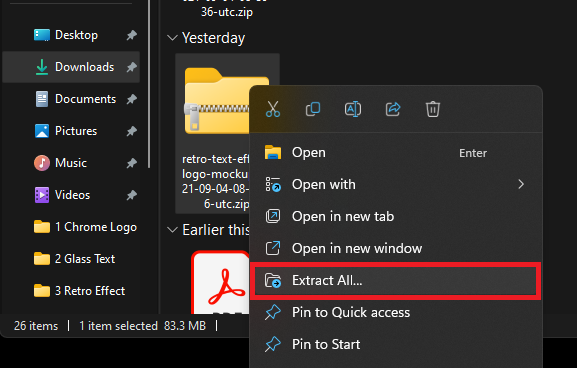
3. Extracting the File
Right-click the
.zipfile.Opt to 'extract' it in your downloads folder.
4. Using the Template in Photoshop
Once you've extracted the file:
A new folder pops up with the template inside.
Simply launch Photoshop.
Drag and drop the "Retro Text Effect Logo Mockup" file into the program.
Extract the downloaded template file
Modifying Your Retro Effect Template
1. Previewing the Design
Once you open the template in Photoshop:
Give it a moment to load.
You can then see the current retro design.
2. Adjusting the Background
Easily change the look by:
Clicking on the "Background" and "Circle" layers.
Toggle them on or off to hide or show the background.
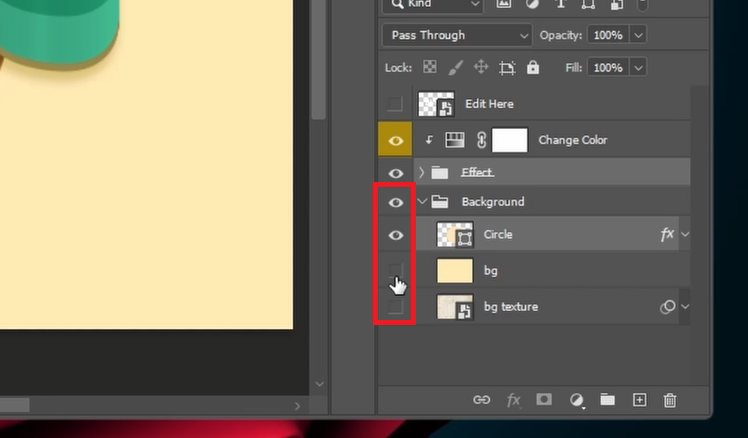
Toggle the background layers ON or OFF
3. Editing Text or Adding a Logo
Want to make it personal? Follow these steps:
Double-click on the "Edit Here" thumbnail in the layers area.
Wait a short moment for a new Photoshop tab to appear.
Use the type tool to write your text. For instance, you might type "Tech How".
Tip: If you prefer a logo over text:
Ensure it's a PNG image with no background.
Simply drag and drop it in.
4. Tailoring Font Details
Make the design truly yours by:
Changing the font style and size.
Adjusting settings like "Bend", "Horizontal Distortion", and "Vertical Distortion".
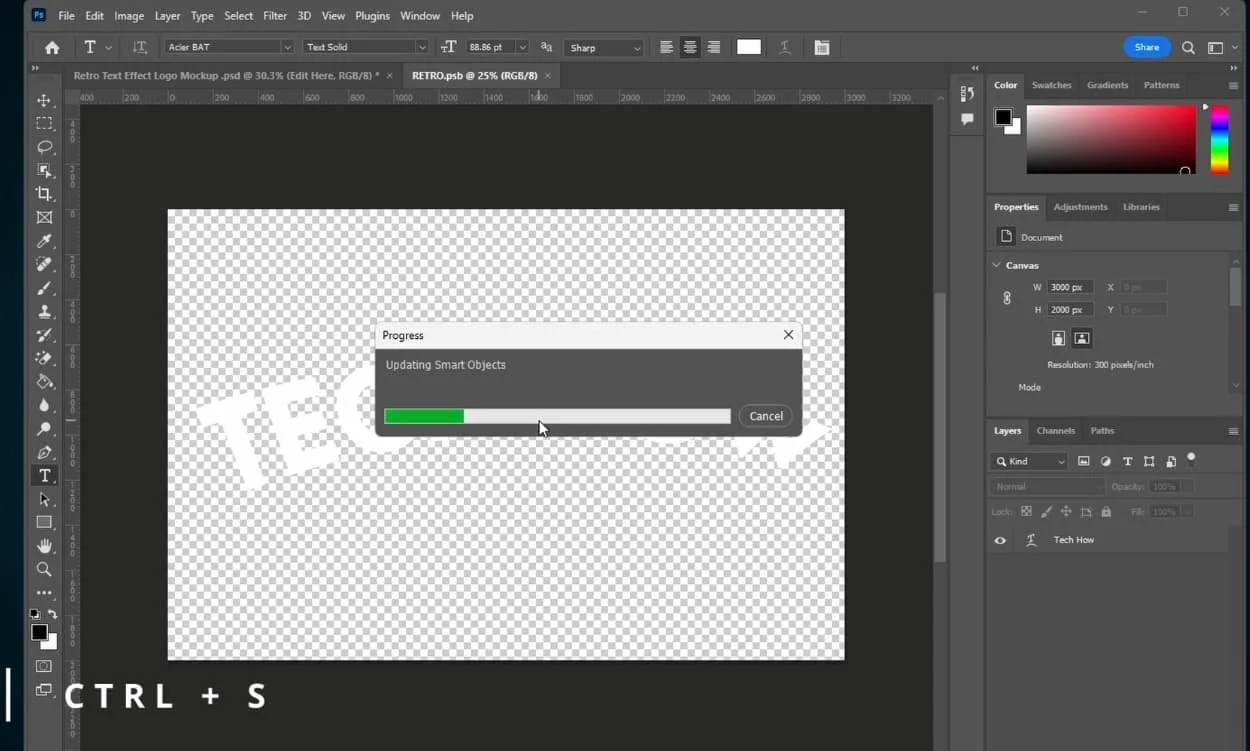
5. Saving Your Changes
Remember to store your edits:
Press
CTRL + Son a PC orCMD + Son a Mac.This action will save and apply the changes to the retro template.
Return to the original file to admire your updated design.
With these steps, customizing your template becomes a walk in the park, even for beginners. Check back on our tech solutions site if you need more guidance.
Adjust your template text or logo image and save your changes
Perfecting Your Retro Design's Look
1. Tweaking the Colors
Once you're satisfied with your edits:
Click on the “Change Color” layer.
Here, you can play around with:
Hue: Adjusts the overall color.
Saturation: Changes color intensity.
Lightness: It's best to keep it at 0 for an authentic retro vibe.
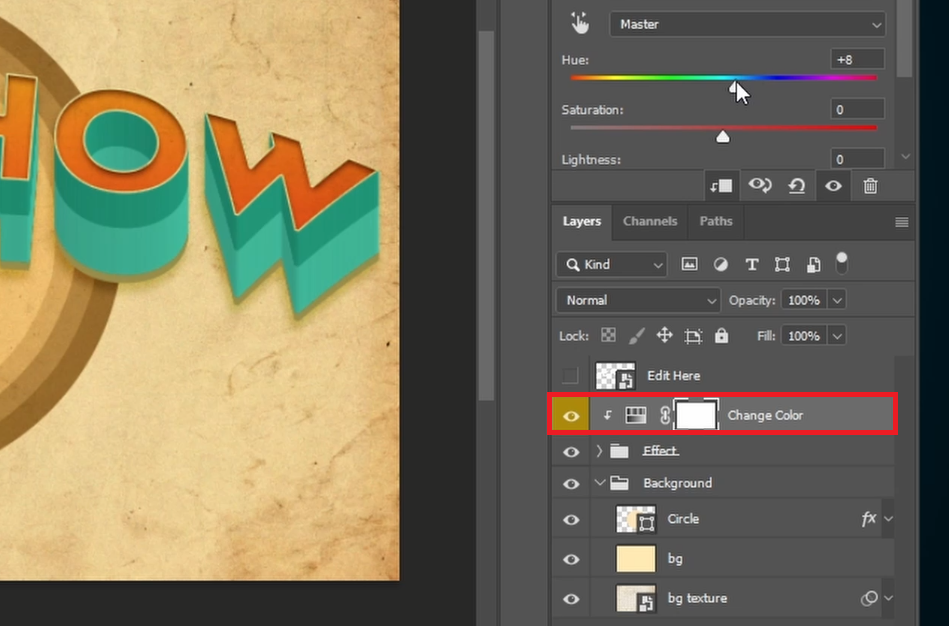
Adjust the template color settings
2. Refining the Background
To visualize different moods:
Turn off the background layer.
Alternatively, swap it with another color to see the retro design in a new light.
3. Altering Textures
For an added touch:
Open the “Effect” layers folder.
Double-click the “Texture” layer. This allows you to choose a different texture.
Explore Envato for a variety of texture graphics. Pick and download your favorite!

Change the template texture layer
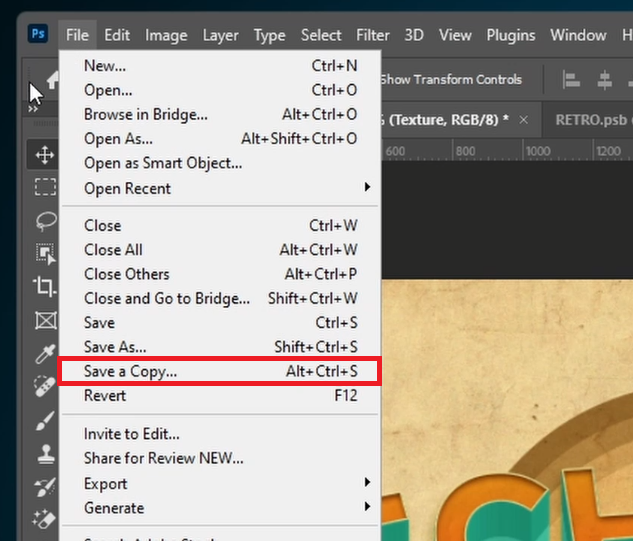
Saving & Exporting Your Design
1. Storing Your Work
When you're ready:
Go to the “File” option in the toolbar.
Choose “Save a Copy”.
2. Naming & Selecting File Type
Before finalizing:
Rename your project.
Decide on the format:
Use
.PNGfor images without a background.Opt for
.JPEGif you've retained the background.
With these simple steps, you can effortlessly tailor and save your retro designs. If you ever need a refresher, our tech solutions site is here to guide you!
Save your Photoshop file
-
You can easily find and download the "Retro Text Effect Logo Mockup" template from Envato Elements, which offers a vast collection of creative tools and templates for Photoshop users.
-
Absolutely! The template allows you to either type in your desired text or import a PNG logo image. Ensure your logo has a transparent background for the best results.
-
The “Change Color” layer in Photoshop enables users to adjust various aspects like hue, saturation, and lightness. For a genuine retro feel, keeping the lightness at level 0 is recommended.
-
Yes, you can! By accessing the “Effect” layers folder and selecting the “Texture” layer, you can replace the current texture with numerous options available on Envato.
-
For images with a transparent background, it's best to use the .PNG format. If you've kept or added a background, the .JPEG format will work best.
Affiliate Disclosure: Some of the links on this page are affiliate links, which means that we may earn a commission if you click through and make a purchase from our recommended template providers. This doesn’t affect the price you pay and helps us maintain this site to continue providing you with the best template recommendations.