

How To Fix Premiere Pro Render and Export Errors
Introduction
Ever grappled with the nagging Adobe Premiere Pro rendering and exporting errors that seem to halt your video editing process in its tracks? Welcome to your easy, practical guide for overcoming these challenges on your Windows PC. By tweaking your sequence settings, managing your system's resources, and ensuring your software is up-to-date, we'll guide you to smoother video editing experiences. Whether you're a budding filmmaker or a seasoned editor, this guide is designed to help you troubleshoot and fix those persistent Premiere Pro rendering and export issues that can slow your productivity to a crawl. Let's dive in and start streamlining your video editing workflow.
Modify Premiere Pro Sequence Settings
Within your Adobe Premiere Pro interface, locate the "Sequence" option in the top menu bar. By clicking on it, a dropdown menu will emerge. Here, select "Sequence Settings".
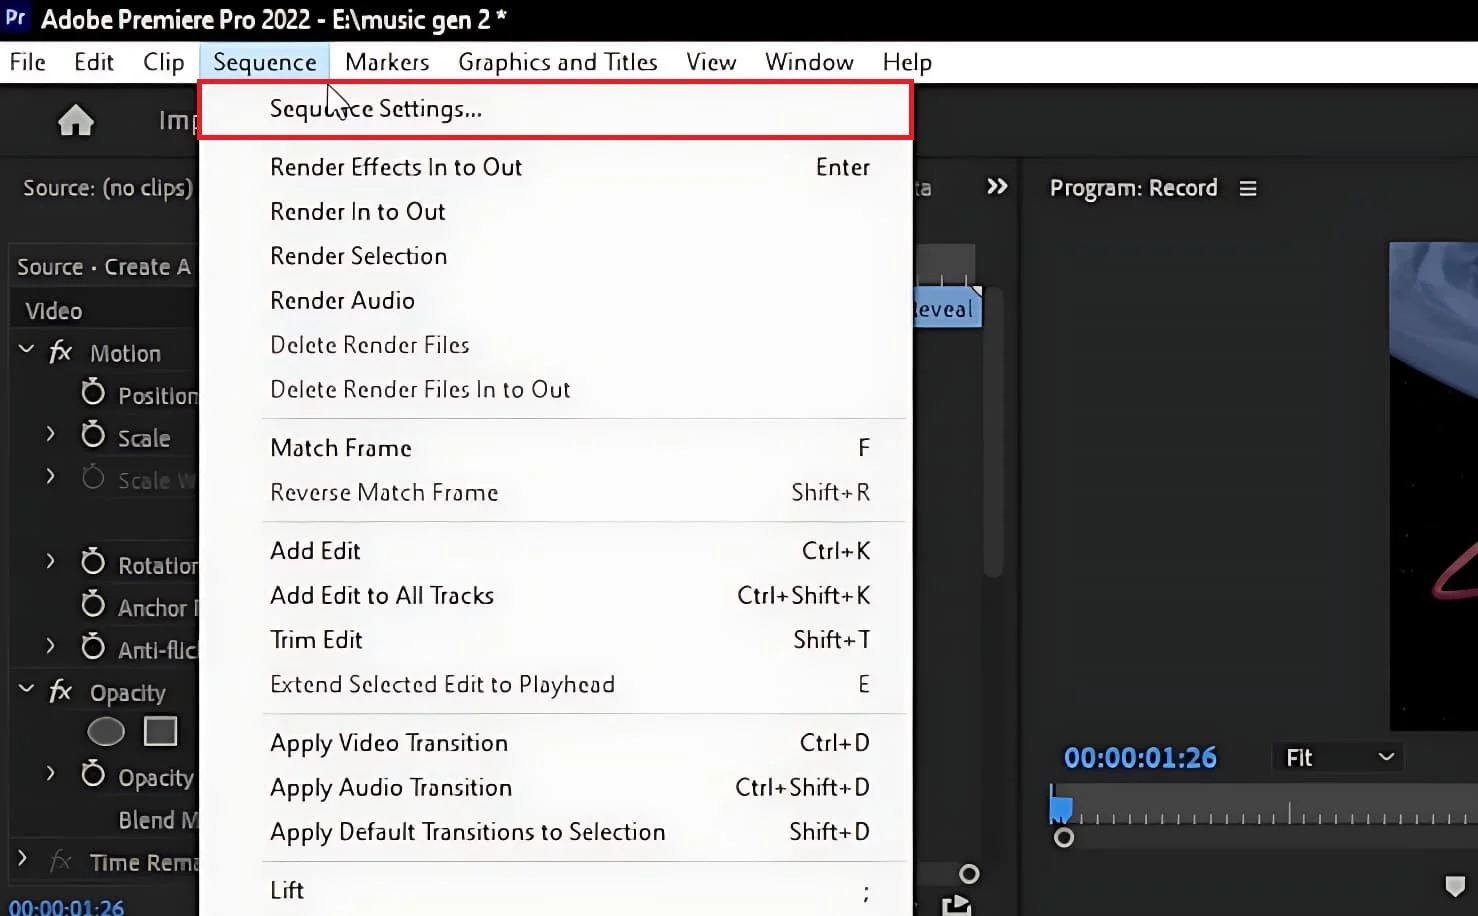
Adobe Premiere Pro > Sequence > Sequence Settings
Under the "Video Previews" section, find "Preview File Format". Alter this setting from "Microsoft AVI" to the recommended option. After making these changes, hit "OK" to save.
For numerous users, this adjustment alone can rectify rendering or export issues in Premiere Pro. Hence, after applying these changes, attempt to re-render your project.
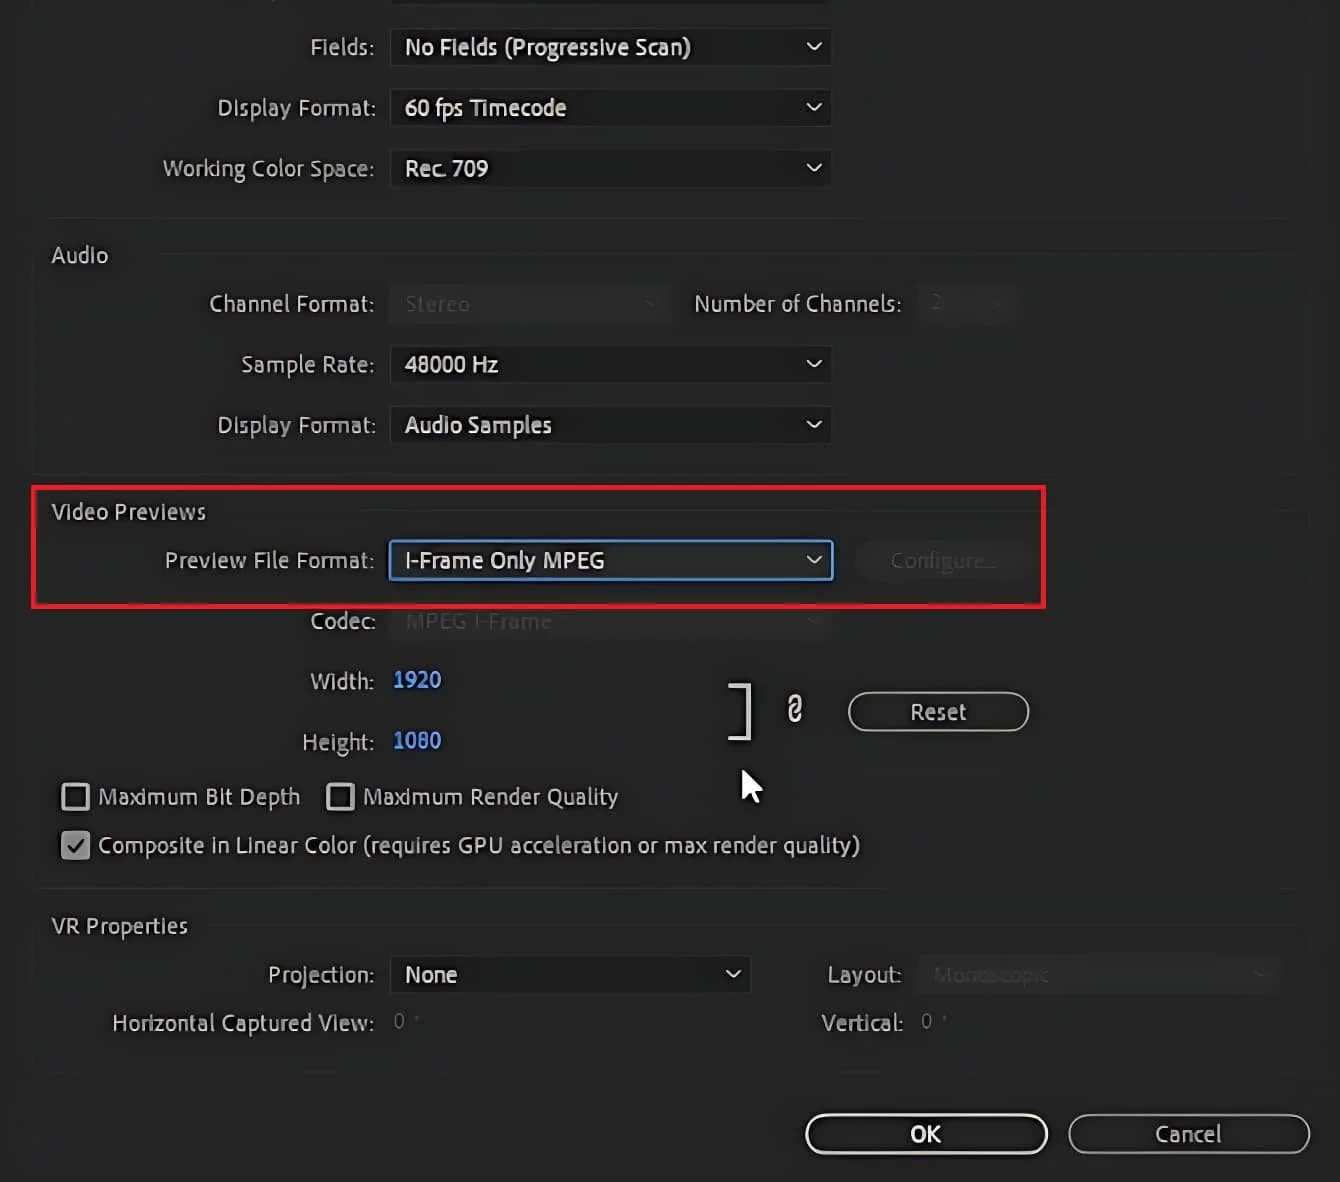
Change the “Video Previews” file format
Manage System Resources
If you're still experiencing difficulties, ensure there aren't any resource-intensive programs operating in the background. You can utilize your Task Manager to close any applications that may be using up your GPU or processor resources.
Keep your Software Updated
Another pivotal step is ensuring both your graphics card and operating system are updated. If you're a GeForce user, you can update your graphics card by using the GeForce Experience application. Navigate to the "Drivers" section and download the latest update if available. The application will then automatically install the latest GPU driver.
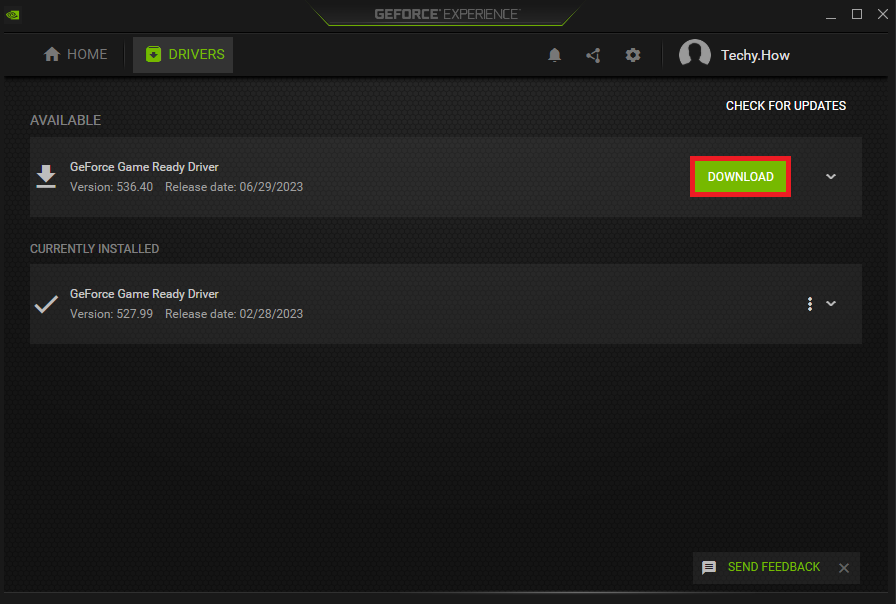
GeForce Experience > Drivers > Download
For updating your Windows OS, head to your Windows settings. Locate the Windows Update section and select "Check for Updates", following which, download and install the latest Windows version.
Lastly, ensure Adobe Premiere Pro is up-to-date before trying to render or export your project again.
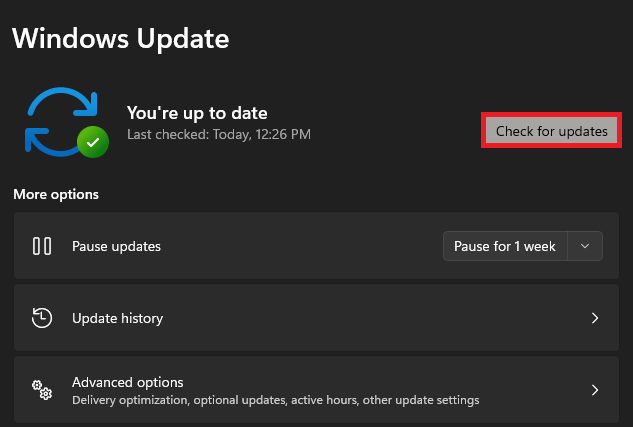
Windows Settings > Windows Update
-
Start by adjusting the 'Preview File Format' under 'Sequence Settings'. Switch it from 'Microsoft AVI' to the recommended option.
-
These programs can utilize significant GPU or processor resources, which might interfere with the rendering or exporting process in Premiere Pro.
-
Up-to-date software ensures optimal compatibility and performance. This includes your operating system, graphics card drivers, and Premiere Pro itself.
-
If you're a GeForce user, use the GeForce Experience application. Navigate to the 'Drivers' section and download the latest update if available.
-
For Windows users, head to your Windows settings, locate the 'Windows Update' section and select 'Check for Updates'. Download and install the latest version.


