How To Add Printer to iPhone - Tutorial
Introduction
Unlock the convenience of mobile printing with your iPhone! In this tutorial, we'll guide you through the simple steps to add a printer to your iOS device, transforming your phone into a powerful tool for printing documents, photos, and more. Whether it's for work or personal use, connecting your printer to your iPhone eliminates the extra steps of transferring files to a PC. Learn how to easily select and configure your printer using your iPhone’s built-in features, making printing tasks more efficient and hassle-free. Ideal for anyone looking to streamline their printing process directly from their iPhone.
Preparing to Print from Your iPhone
Selecting a File to Print
Before you can add a printer to your iPhone, start with a file you wish to print:
Locating a File to Print
Choosing Your File: Find a file to print, like a photo or a document, on your iPhone.
Accessing Share Options: Open the file and tap the 'Share' button. This button can be found at different screen locations depending on the app – usually, it's at the bottom left or right.
Initiating the Print Process
Using the Share Sheet: After tapping 'Share', a 'Share Sheet' window appears. Swipe up in this window to view more options.
Selecting Print: Among the various options, find and tap the 'Print' button to start the printing process.
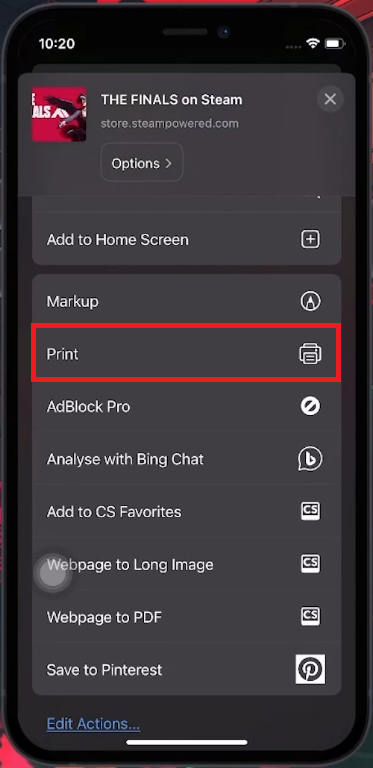
iPhone Share Sheet > Print
Configuring Printer Settings on iPhone
After selecting a file to print, you need to configure your print settings:
Adjusting Print Preferences
Opening Printer Configuration: Once you tap 'Print', the printer configuration page appears.
Selecting Pages: If you don't need to print the entire document, deselect the pages you don't require.
Adding a Printer to Your iPhone
Selecting the Printer: Tap on the 'Printer' option within the configuration page. Your iPhone will start searching for available printers.
Ensuring Connectivity: Check that your printer is Wi-Fi enabled and properly connected to the same network as your iPhone.
Troubleshooting Connection Issues: If your iPhone doesn't find the printer, verify the printer’s connection. Try unplugging and replugging the printer cables if necessary.
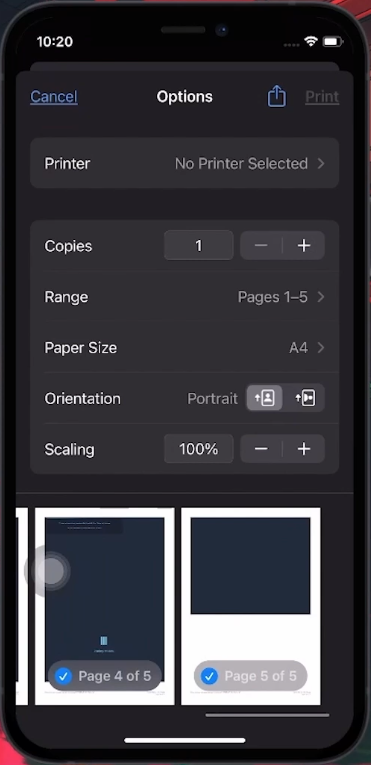
iPhone Pritner Configuration Page
Finalizing the Print Process
Choosing Your Printer: Once your iPhone detects the printer, tap on it to add it to your device.
Setting as Default: Your iPhone will then set this printer as the default option for future print jobs.
Printing the Document: Tap 'Print' to start printing your selected file.
By following these steps, you can easily configure and connect your printer to your iPhone, allowing for convenient and quick printing of your documents or photos.

Add finable printer
-
Open the document, tap the 'Share' button, swipe up in the Share Sheet, and select 'Print' to access printer settings.
-
No special app is needed. iPhones have built-in capabilities to print directly via AirPrint-enabled printers.
-
Most apps with a 'Share' function support printing, including Photos, Safari, Mail, and supported third-party apps.
-
Check if your printer supports AirPrint, Apple's wireless printing technology, for compatibility with iOS devices.
-
Ensure your printer is Wi-Fi enabled, connected to the same network as your iPhone, and check for any connectivity issues.