How To Change Video Background without Green Screen - CapCut
In video production, having the right tools and techniques can make all the difference. If you're looking to change your video background without using a green screen, CapCut is the perfect solution for you. This innovative software is designed to make the process of changing your video background simple, easy and affordable. In this article, we'll explore how you can use CapCut to change your video background without using a green screen and all the tips and tricks you need to make the most of this powerful software.
Create CapCut Project & Import Video
Open up CapCut and select create a new project. You can then import the video on which you want to remove the background. Having the person or main object in the middle of the video is suggested to make it easier for the app to automatically figure out what to remove.
Import Video to CapCut Project
Select Cutout Tool
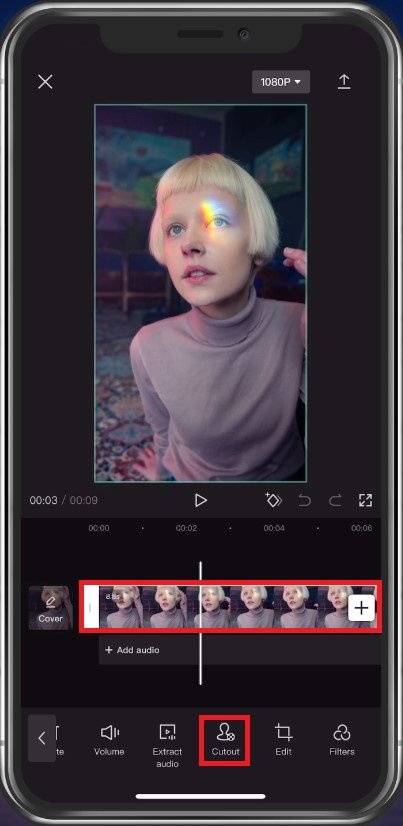
After importing the video, make sure to select it in your timeline. This will show you various options and effects in your toolbar at the bottom of your screen. Tap on Cutout.
CapCut Effects > Cutout
Remove Video Background Automatically
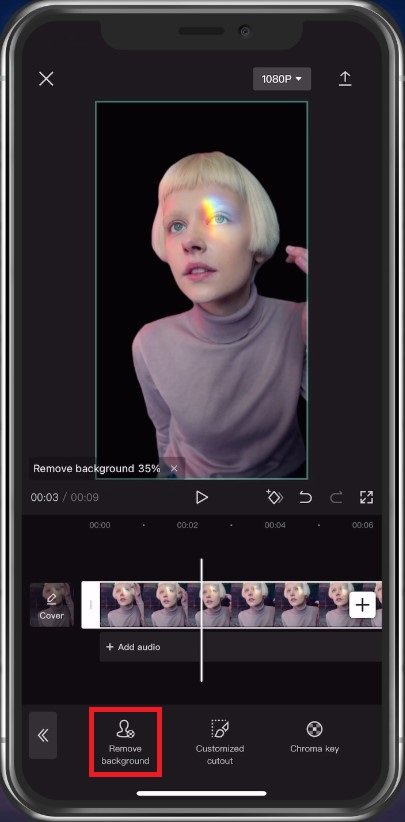
You will then see a couple of options. Select Remove Background. This will take a couple of seconds to process the video and remove the background. It may not be perfectly cut out for now. If this is the case, you can manually remove the background.
Remove Video Background in CapCut
Remove Video Background Manually
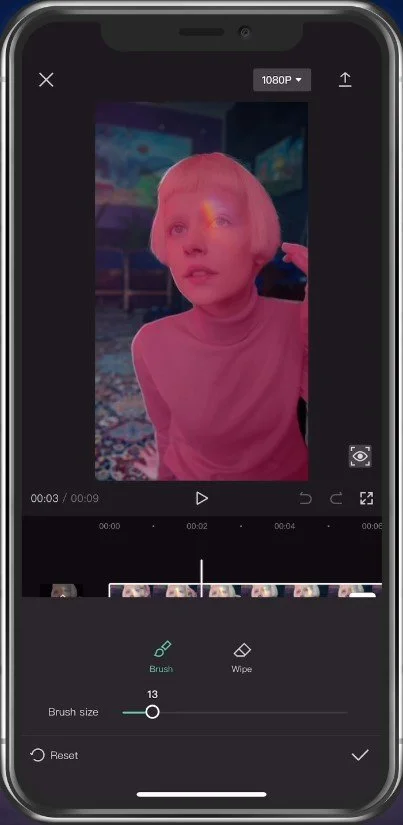
Select Customized cutout. Change the brush size to cut out larger or smaller portions of the video.
Manual Background Removal
Add Video Background & Effects
When this is done, you can change the background to your new video and its effects. When selecting Style, you have the option to choose from professional effects. These can take a couple of seconds to apply to your new video.
Add New Video Background and Effects
Change Video Filters
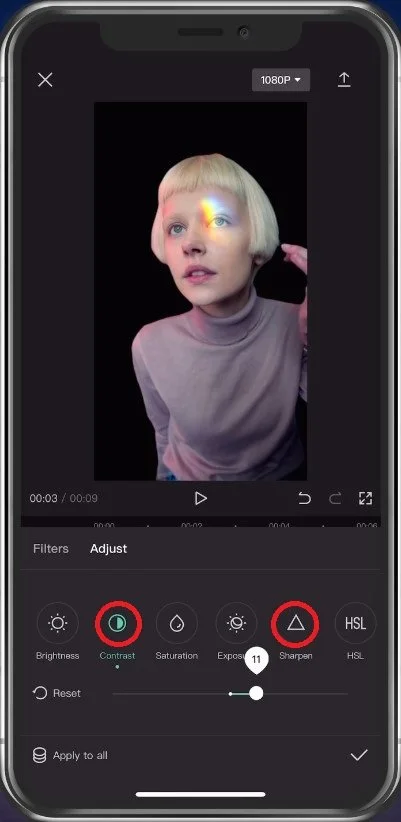
Under Filters, choose a filter that works best with your video. You can use preset filters or when tapping on Adjust, you can manually adjust the Brightness, Contrast, Saturation, and so on. In a lot of cases, you will want to increase the Sharpen and Contrast options by a bit to make the video look a bit better. After making your changes, you can proceed to play the video before making any last adjustments.
Change Project Resolution & Frame Rate
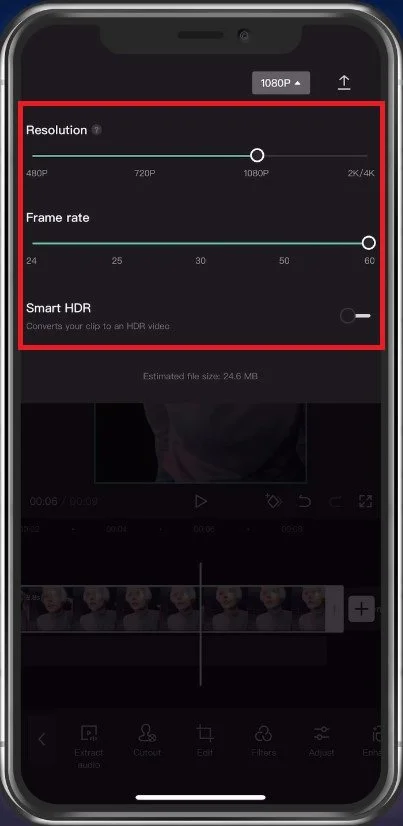
Before exporting your video, tap on the button next to the export arrow at the top of your screen. Here, increase the Resolution and Frame rate to ensure that your video resolution matches your original video. After exporting the video, you can preview the estimated file size at the bottom of this window.
Change Project Resolution and Frame Rate
Export CapCut Project
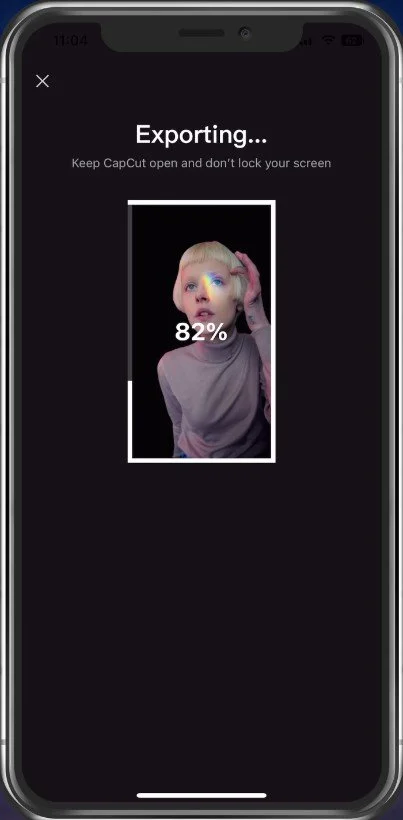
Lastly, tap on the arrow icon to start exporting your project. Depending on your selected videos and device performance, this can take anywhere from a second to a couple of minutes.
Export CapCut Project
-
CapCut is a video editing software that makes it easy to change your video background without using a green screen. The software uses a range of advanced algorithms and image manipulation techniques to replace your existing background with a new one.
-
No, CapCut is designed to be user-friendly and easy to use. Whether you're a seasoned video editor or just starting out, you'll be able to change your video background in no time with CapCut. The software features a simple, intuitive interface and a range of helpful tutorials and resources to help you get started.
-
Unfortunately, CapCut is not designed to change the background of live video. It is only capable of changing the background of pre-recorded video. If you're looking to change the background of live video, you may need to consider using other software or hardware solutions.
-
CapCut offers a free version of its software, which includes all of the basic features you need to change your video background. If you're looking for more advanced features and functionality, you can upgrade to the paid version of the software, which offers a range of additional features and capabilities.


