Fix Instagram Story Bad Video Quality After Upload (Highest Quality Guide)

In today's world, where social media dominates our lives, Instagram is one of the most popular platforms to share memories and showcase our creativity. However, while uploading a video story on Instagram, sometimes the video quality decreases, ruining the overall look of the story. Don't let bad video quality ruin your memories and creativity, as this guide will help you fix the bad video quality in your Instagram story after upload. Here, we'll provide you with the highest quality guide to ensure your videos look stunning on the platform.
Disable Instagram Low Data Setting
First, open up your Instagram application and navigate to your profile. From here, tap the burger menu icon on the top right and select Settings.
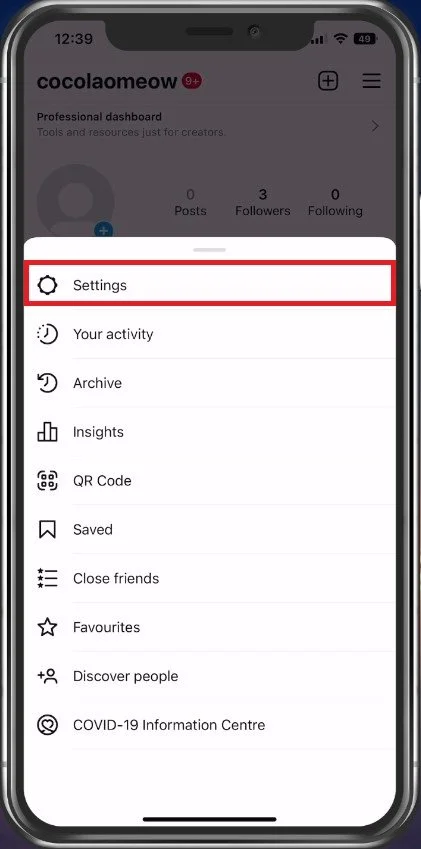
Instagram > Settings
Enable High-Quality Uploads
Under Account, select Data usage. These two options can have a lot of impact on the quality of your uploads but also your cellular data usage. When disabling the Use less mobile data option, the videos and images you see on Instagram can appear in a higher resolution and overall image quality.
I’d suggest watching the low-quality video you have issues with to ensure that the video is of low quality and not simply loaded by the app in a lower resolution.
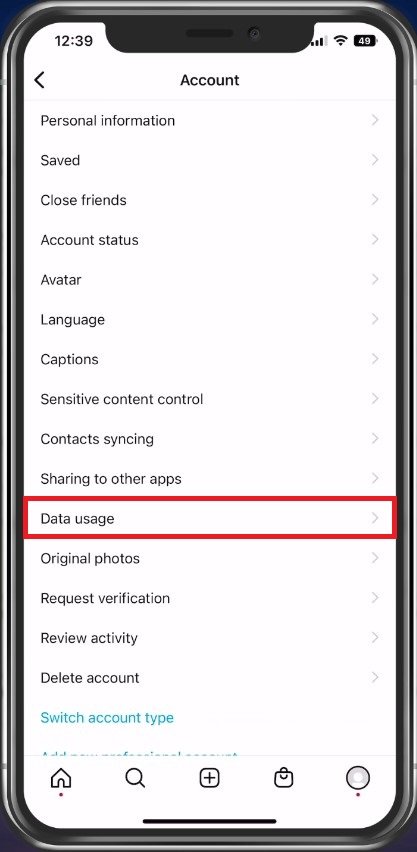
Account Settings > Data usage
Enable High-Quality Uploads
Enable the High-quality uploads option below when looking to upload videos of higher quality. Your uploads might take a couple of seconds longer, and the app will use more of your network connection to upload a higher-quality version to Instagram.
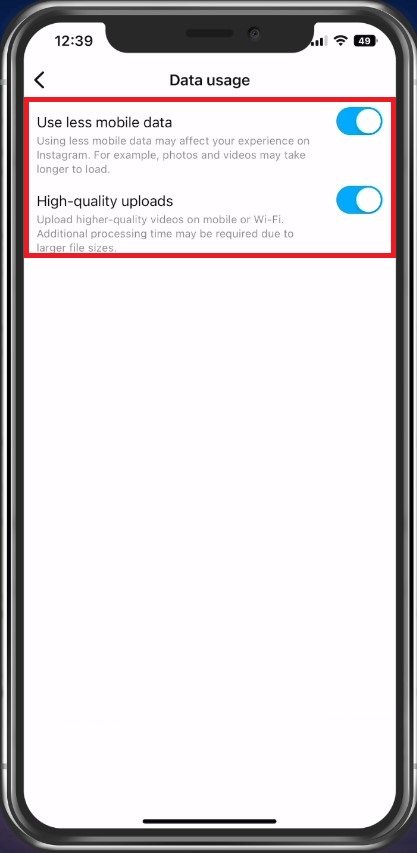
Data Usage Settings > High-quality uploads
Change Camera Settings
Next, there are some camera settings you should look at to make sure that you’re not losing out on video quality from your device. On your iPhone, open up your settings application. You can also follow along on your Android device. Scroll down and tap on Camera.
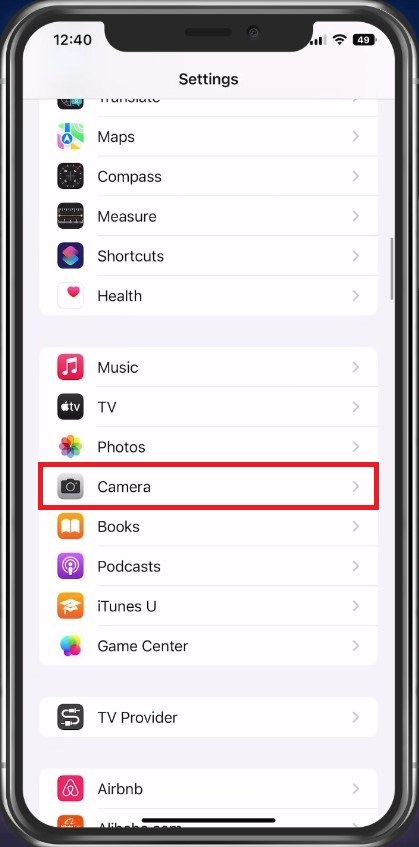
iOS Settings > Camera
Under Formats, make sure that the High-Efficiency option is checked. This will ensure that your iOS device can record in 4k and 60FPS, which is large enough for any Instagram video.

Camera Settings > Formats
In the Record Video settings section, you can choose your baseline resolution and frame rate when recording videos. You can then try to upload a new video to Instagram to see if this fixed your low video quality problem.
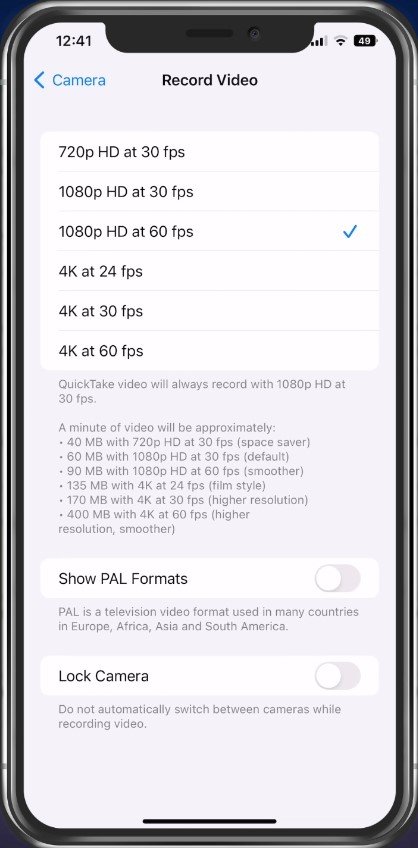
Camera Settings > Record Video
Update Instagram Version
If the issue persists, you should ensure that you’re running the latest Instagram version. In your Google Play or App Store, look up Instagram and download any update there might be available to you. As a last resort, you can try only to upload videos using your cellular data, as this has weirdly fixed low video quality issues with many users.
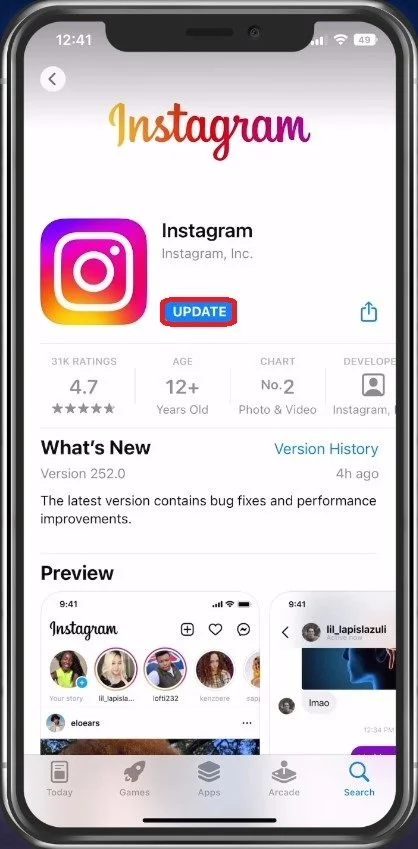
App Store > Instagram > Update
-
There are various reasons why this might happen, including low-quality source footage, compression by Instagram, or problems with the device used to record the video.
-
The best format to upload videos to Instagram is in MP4 format with H.264 video codec and AAC audio codec. The recommended aspect ratio is 9:16 and the minimum resolution should be 720 pixels.
-
Unfortunately, no. Once the video is uploaded, the quality cannot be improved. The best option is to delete the post and re-upload the video with improved quality.
-
To avoid bad video quality in the future, make sure to record videos in the highest quality possible, using proper lighting, and upload the video in the recommended format. Additionally, using a video editing tool to enhance the video before uploading can also help improve the quality.