Get Highest Video Quality in CapCut - Edit & Export Tutorial

Are you tired of blurry and pixelated videos when you edit in CapCut? Do you want to showcase your creative editing skills to the world with high-quality videos? Look no further! This article is here to guide you through the process of getting the highest video quality in CapCut. From setting up the right video resolution to exporting your edited video, this tutorial will provide you with all the essential tips and tricks to make your videos stand out. So, let's dive into the world of high-quality video editing in CapCut.
Import Video to CapCut
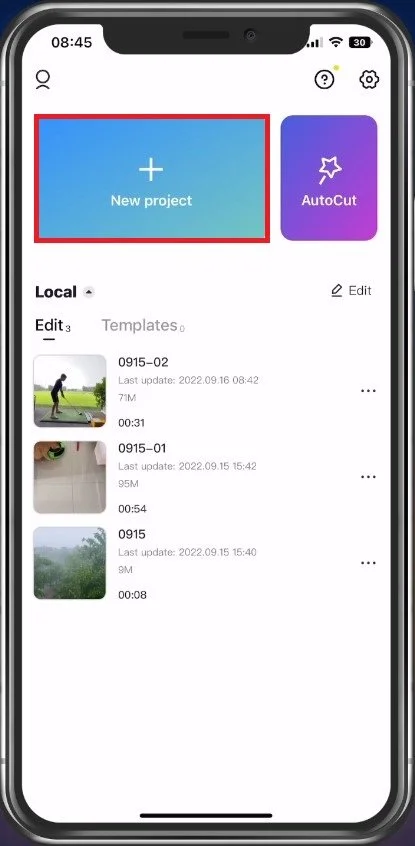
Launch the CapCut application on your device. You can edit any previous video by selecting it from the Edit section on the home screen or start a new project by tapping the New project option at the top.
Import Videos to CapCut Project
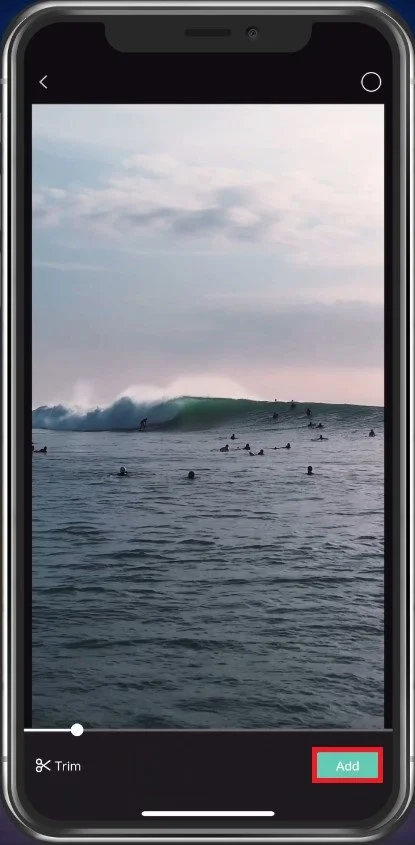
In the latter, you'll be taken to the Gallery. Here, select the video you want to edit and choose Add at the bottom-right corner of the screen. CapCut will then compress the selected video.
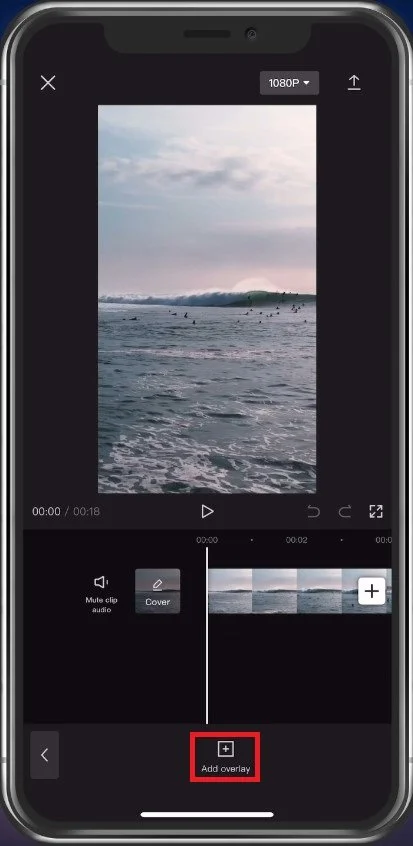
Add Overlay to Video
After selecting the project video, you'll land on the tool's editing interface. You'll find the Overlay option in the app's lowermost panel. To add an overlay, tap the Overlay option and select Add overlay.
Adding an overlay to the video is essential since it gives your video additional light layers from various angles, thus, providing even more depth.
Add Overlay to Video in CapCut
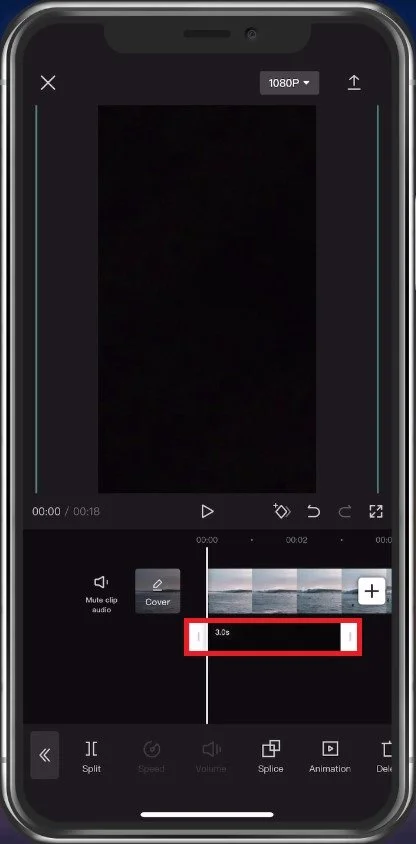
Next, choose any black image from your gallery. And hit the Add option at the bottom-right corner of the screen. Don't forget to zoom this black picture until your video hides it.
Add Black Image to CapCut Project
Adjust Video Overlay
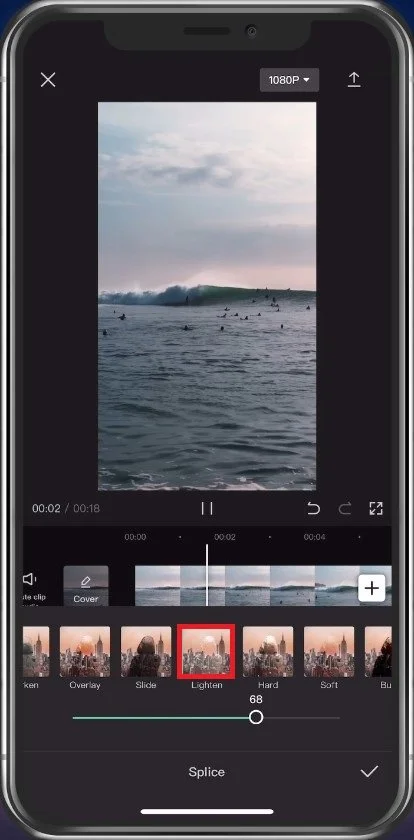
Select the Splice option from the bottom of the screen to connect the black overlay with your video. Again, ensure the black image has fully covered your video before proceeding. On the next screen, there will be a Filter option. It'll show an Opacity filter. For best results, set the video opacity property to 40.
Change Video Overlay
Adjust Video Contrast, Saturation & Sharpen
Let's now adjust a few properties to increase the video quality. To do so, go back to the video. At the bottom, you'll find the Adjust option. Tap on it.
On the next screen, several properties, such as Brightness, Contrast, Saturation, Exposure, Sharpen, etc., will appear. However, our primary concerns would be Contrast, Saturation, and Sharpen. Adjust each of these properties by sliding their respective slider toward the right. Set Contrast and Saturation to 20 and Sharpen to 40.
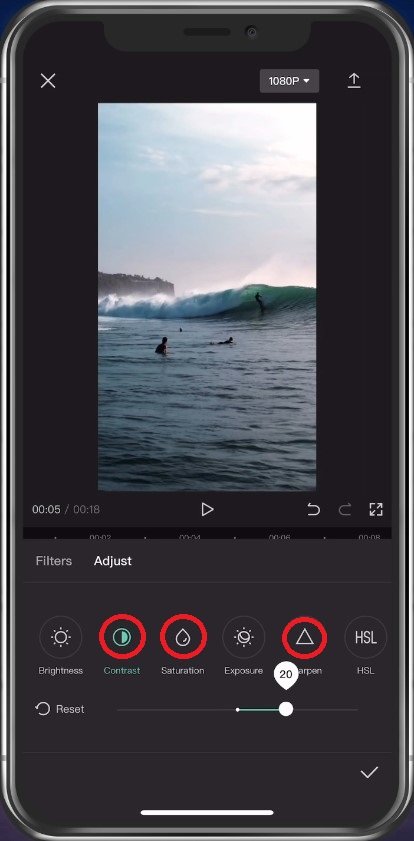
Video Sharpen, Contrast & Saturation
Change Video Resolution & Frame Rate
Before you export your video, I suggest changing the video resolution and frame rate to avoid losing video quality. To do so, hit the button next to the Export button at the top. You'll find the Resolution and Frame rate options. Adjust the video Resolution to 1080p from 480p/720p and the Frame rate to 60FPS. Making these adjustments will alter the file size, which can be viewed below the Frame rate.
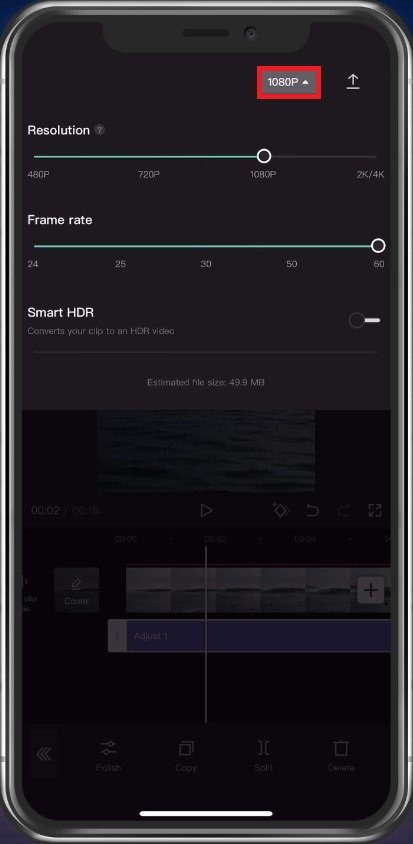
CapCut Project Resolution and Frame Rate
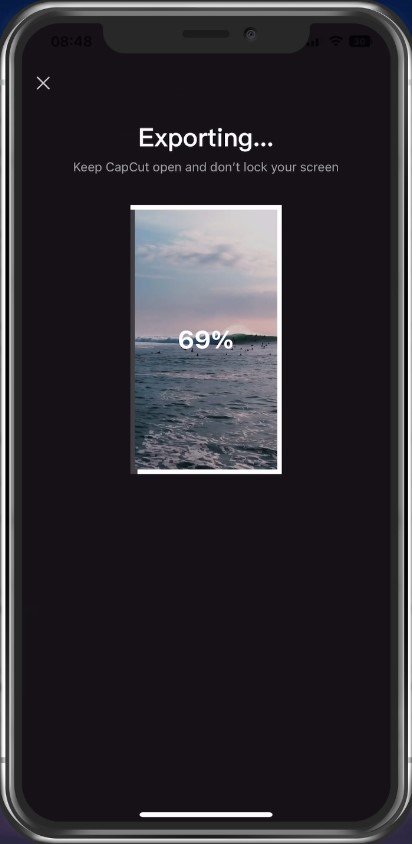
Export Video
Lastly, tap the Export button at the top-right corner of the screen. The Export button looks like an upward arrow. Wait for CapCut to export the video, and don't exit the app or lock the screen during the process. You'll be notified that your video has been exported and saved to your Gallery and CapCut projects.
Save CapCut Video Project
-
The best video resolution for CapCut is 1080p. This resolution provides a balance between file size and video quality. However, if you have a more powerful device and want to showcase your videos in the best quality possible, you can opt for 4K resolution.
-
To export your edited video in the highest quality in CapCut, go to the 'Export' tab, select 'Video,' and choose the resolution and quality that you desire. Make sure to select the highest possible option, such as Full HD or 4K, to get the best output quality.
-
Not necessarily. You can use CapCut on a basic device, but you may need to compromise on the video resolution and quality. If you want to edit and export high-quality videos, it's recommended to have a powerful device with a good graphics card.
-
Yes, you can! By following the guidelines mentioned in this article, you can avoid losing quality while editing and exporting your videos in CapCut.
-
Yes, you can use third-party plugins to enhance the video quality in CapCut. However, be careful while choosing these plugins, as some of them may reduce the quality of your video or cause compatibility issues with CapCut.