How To Download & Install Minecraft on Windows 11

Are you excited to play Minecraft on your new Windows 11 computer but don't know how to download and install it? Look no further! In this article, we'll guide you through the step-by-step process of downloading and installing Minecraft on your Windows 11 operating system. Minecraft is a popular game enjoyed by millions of players worldwide, and with the latest Windows 11 update, the game's performance is better than ever.
Download Minecraft
Click here to get to the official Minecraft page, or enter minecraft.net in your favorite browser and hit enter. In case you haven’t already created an account, then make sure to do so. Select Log In, and you can create a new account for free here. You can also use your Microsoft login information to bypass creating a new account. After creating an account and login in, navigate to Games and select Minecraft.
Click on Get Minecraft, and select Computer. Lastly, select PC for Windows 11 users. You can also select Mac or Linux using any of these operating systems. Select your edition. eW prefer to use the Java Edition, but you might be used to playing the Windows 10 edition. After selecting the version, you wish to play, click on Download and then Download for Windows. After a second your download will start and should only take a few seconds.

Minecraft.net > Get Minecraft
Minecraft Installation
Find your Minecraft installer, double-click it, and a new window will open up. Follow the install wizard. Click on Next, and you will be asked where to install Minecraft to. Depending on how you use the game, you might want to save it to your hard-disk drive and not your SSD, as maps, resource packs, and mods can quickly take up a lot of space. Select whether you want to create a shortcut on your desktop, and then click Next.

Install the Minecraft launcher
When the installation is done, double-click the Minecraft shortcut on your desktop, or search for Minecraft in your start menu search and open it up. You might need to log in to your Minecraft account again before proceeding. When you’re done, navigate to Installations. Click on New Installation.
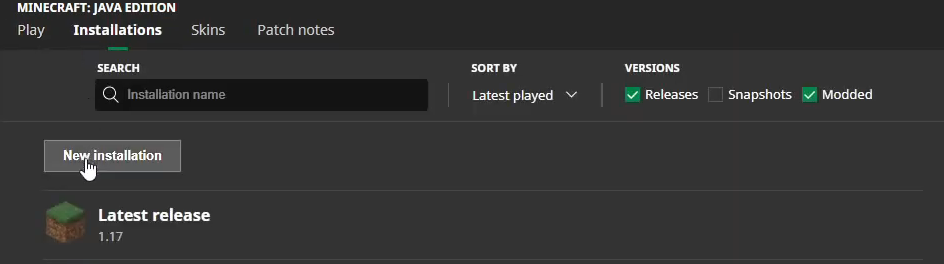
Create a new Minecraft installation
Select an icon, and name your installation. In most cases, you will want to use the latest version to enjoy the newest updates and play on the most up-to-date servers. Below, use the Default Directory and click on Create. This might take a minute to download the Minecraft version. Back in your Play tab, you can choose the correct version and then click on Play.

Play Minecraft on your Windows 11 PC