How To Fix Mail App Not Working on iPhone
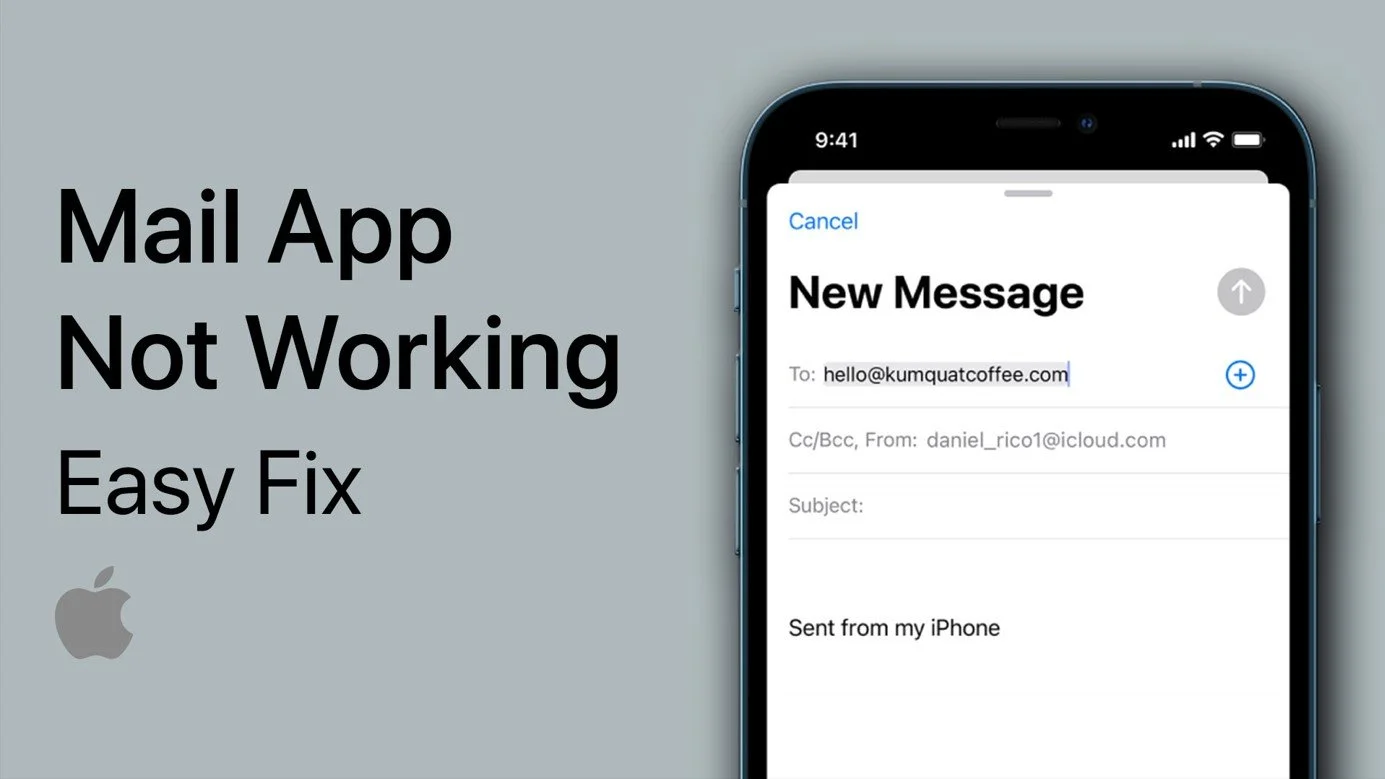
Are you struggling with the Mail app on your iPhone? It can be frustrating when the app is not working properly and you can't access your emails. But don't worry, we've got you covered! This tutorial will guide you through the steps to fix the Mail app not working on your iPhone. Whether it's an issue with the app or your device settings, we've got the solutions to get your Mail app back up and running. So, let's dive in!
Test your Network Connection
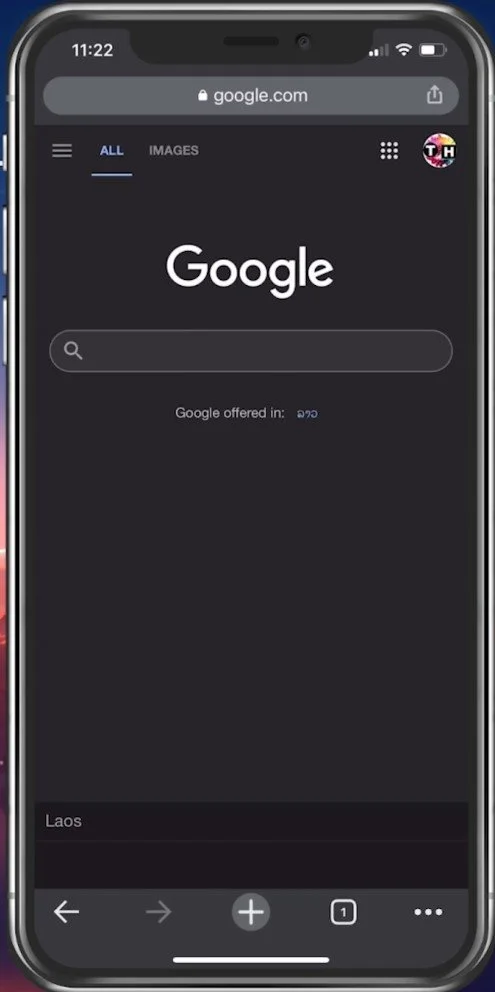
First of all, ensure that you’re using a reliable network connection. Open up your preferred browser and try to access a website of your choice. A slow connection can be the culprit for not sending or receiving mail from your iOS device. Try switching your connection from cellular to WiFi or vice versa to troubleshoot if this fixes your mail issues quickly.
Make sure you use a reliable internet connection with your iPhone
Disable VPN Connection
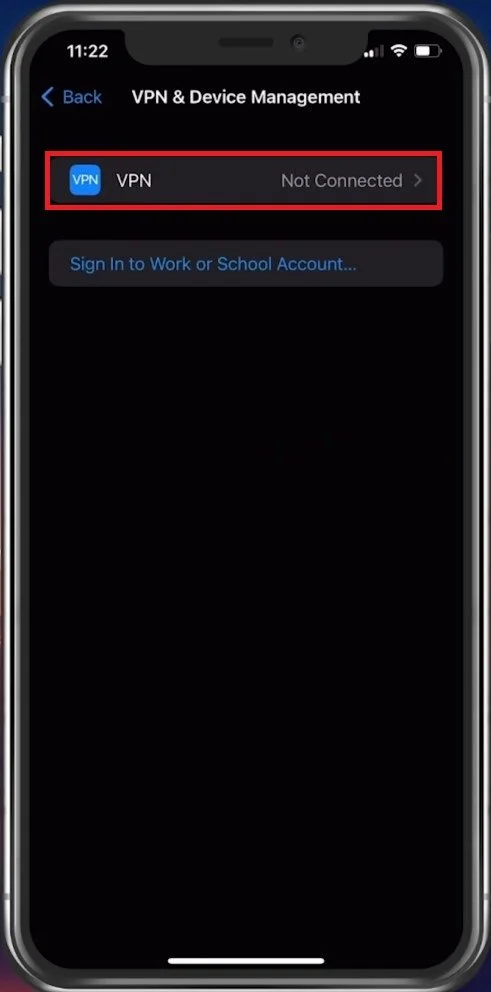
If you’re using a reliable network connection, then make sure that your VPN is turned off in your general iPhone settings. A VPN can, in some cases, cause network-related problems.
iPhone Settings > General > VPN & Device Management
Enable Mobile Data for Mail
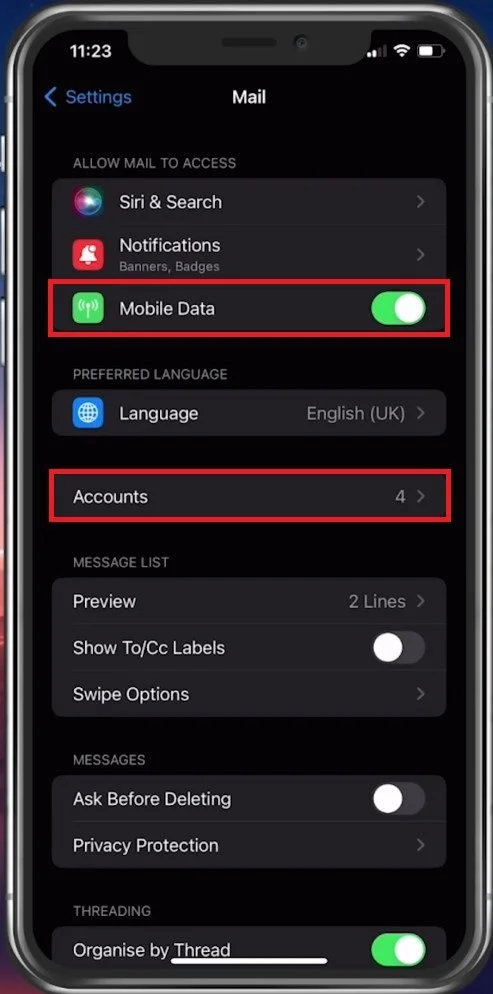
Navigate to your Mail settings. Here, make sure that the Mobile Data option is enabled. In addition, make sure that low power mode is disabled in your Control Centre as this will disable automatic email fetching.
iPhone Settings > Mail > Mobile Data
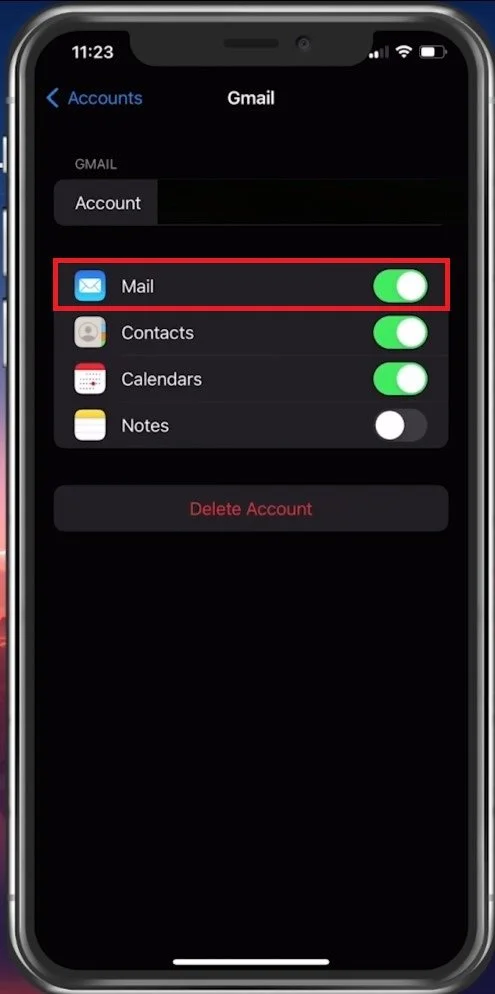
Under Accounts, you can preview your currently logged-in email accounts on your device. When selecting a Gmail account for example, you’ll have the option to enable emails to be received for this account.
Enable Mail for your email account
Enable Automatic Email Fetching
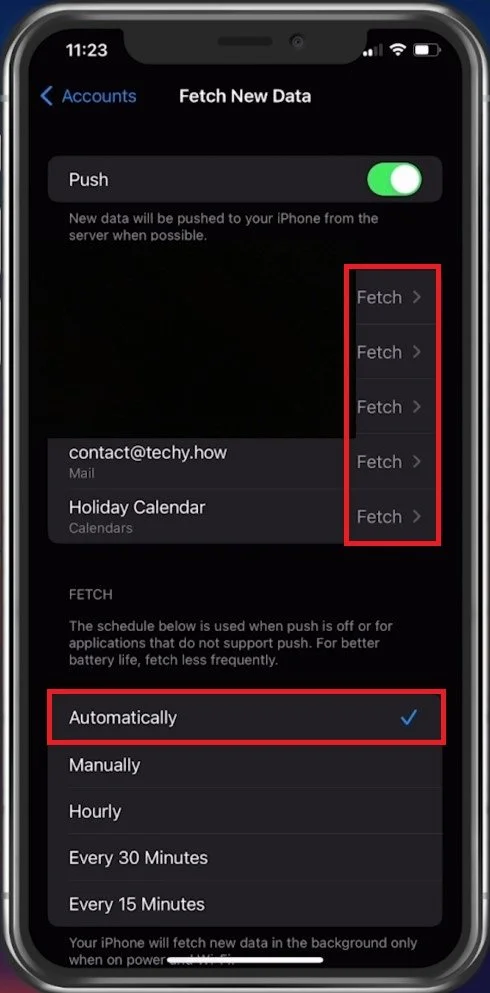
Under Fetch New Data, ensure that Fetch is used as your data schedule. This will make sure that your emails will arrive as soon as possible. Set the Fetch Schedule to Automatically below.
Mail Account > Fetch New Data > Automatically
Ensure iPhone Storage for Mail
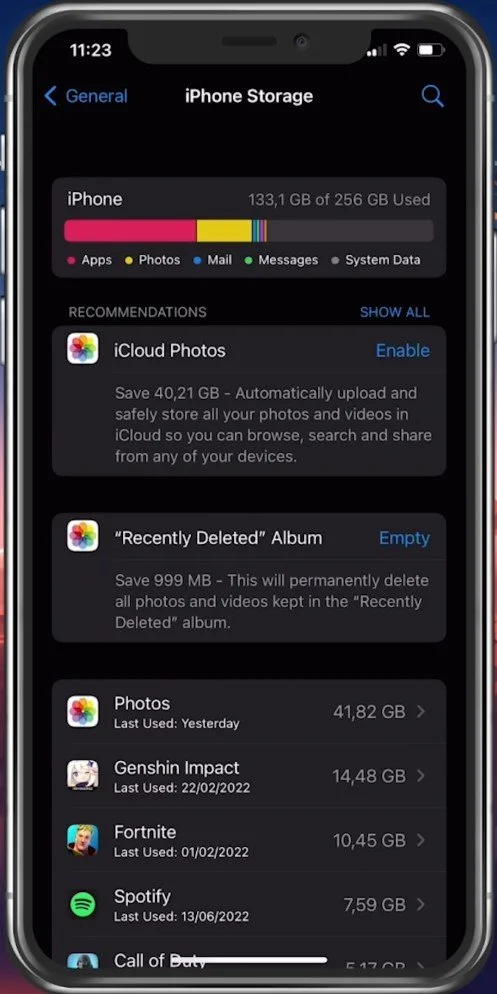
Ensure that your device has some available storage for additional mail to be loaded. In your General device settings, tap on iPhone Storage. It will take a second or two to load your storage information. If you have little to no storage left, I suggest offloading some unused apps or following some of the storage recommendations, such as removing watched movies on your device.
iPhone Settings > General > iPhone Storage
Offload the Mail App
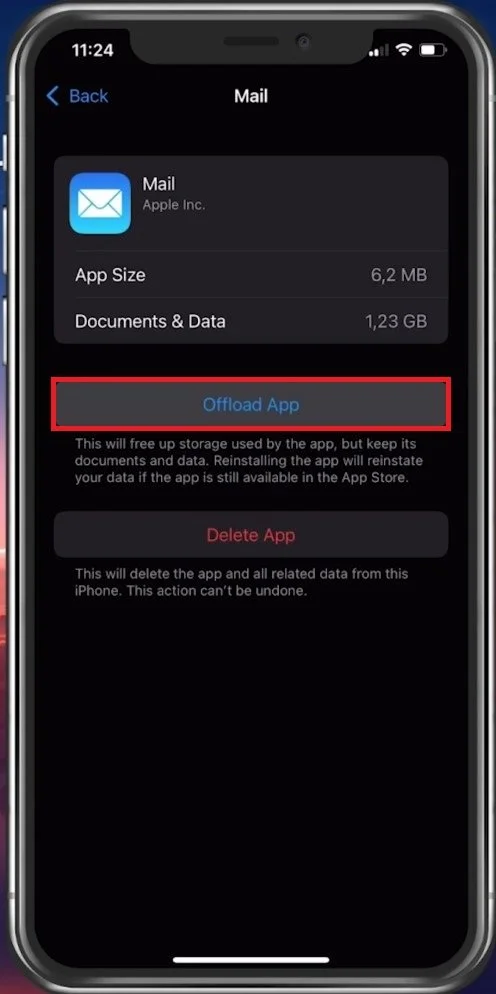
Look up Mailand tap on Offload App. This will clear the applications cache. This will reinstate your data and will make sure that any software related glitch or network related problem will be avoided the next time you launch the app. Your sign in data will be preserved, as well as your inbox.
iPhone Storage > Mail > Offload App
Check iCloud Storage
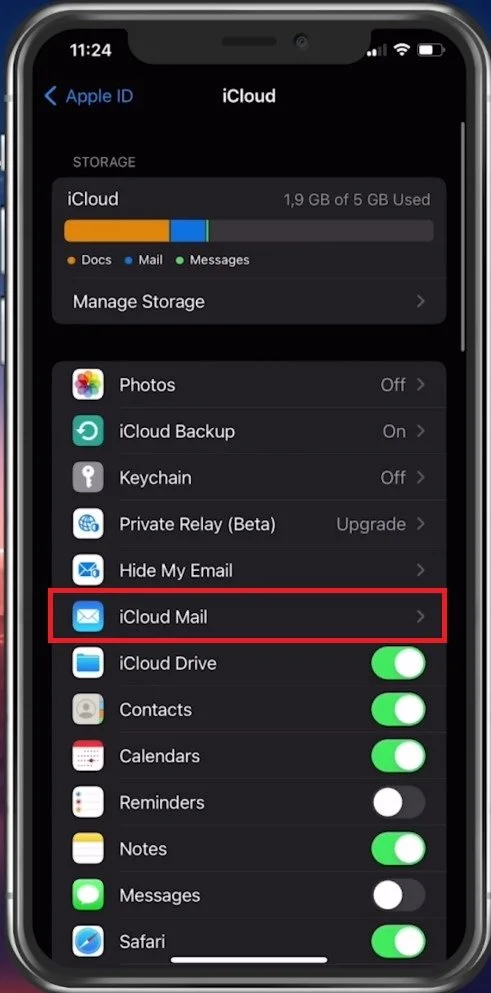
If you’re still experiencing problems with your mail app, a similar problem can occur with your iCloud storage space. Back in your main settings, tap on your iCloud account name. From here, tap on iCloud.
iPhone Settings > Apple ID > iCloud
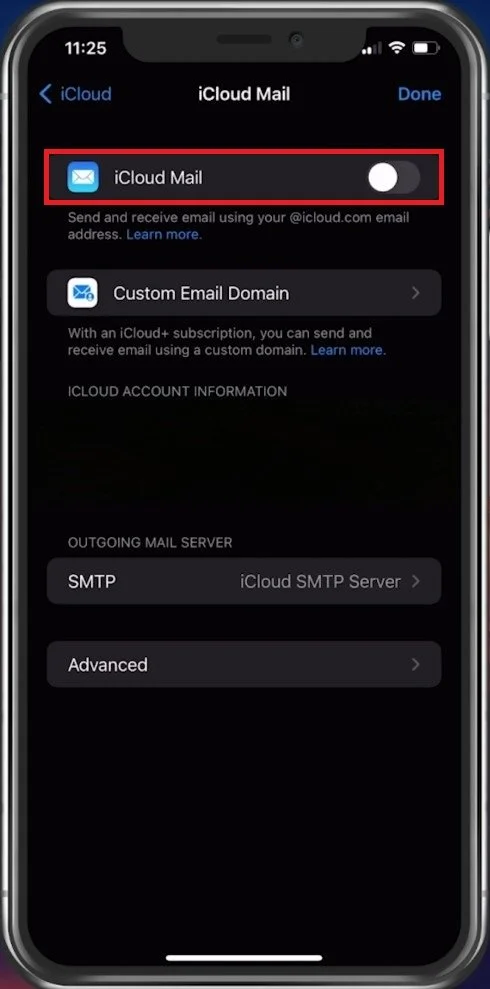
Tap on iCloud Mail and make sure to toggle this option off. In case your emails are being received now, then the issue is related to your iCloud sign-in data or iCloud storage.
Enable iCloud Mail in iCloud settings
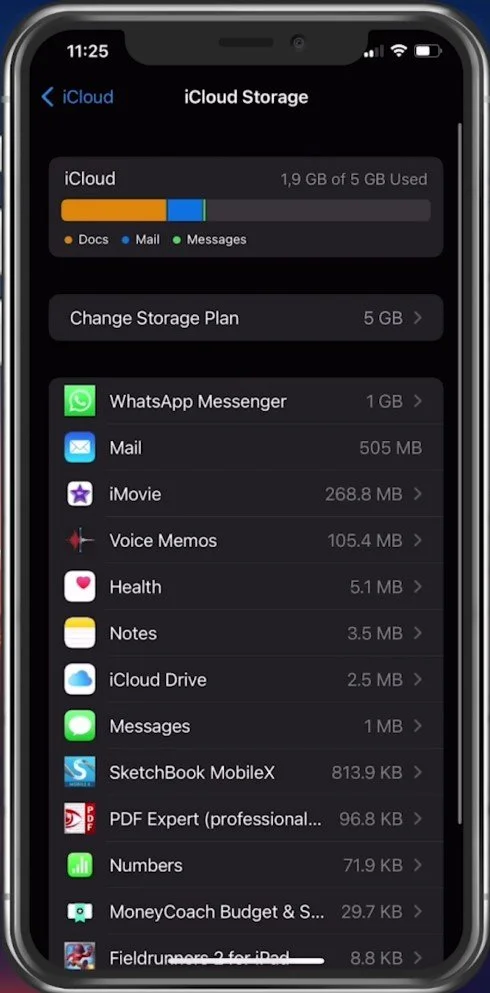
You can preview your available storage, and when tapping on Manage Storage, you can delete some unwanted data to make room for incoming emails.
iCloud Storage > Manage Storage
Update & Restart iPhone
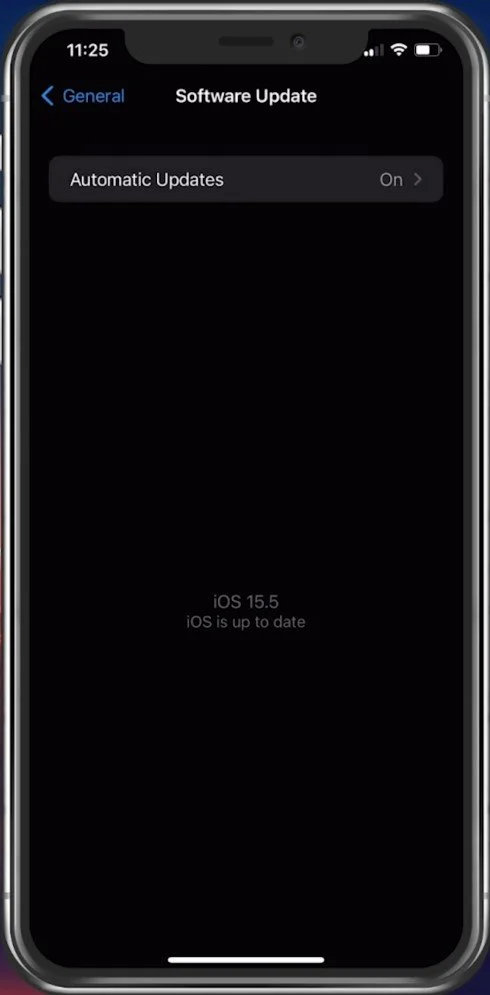
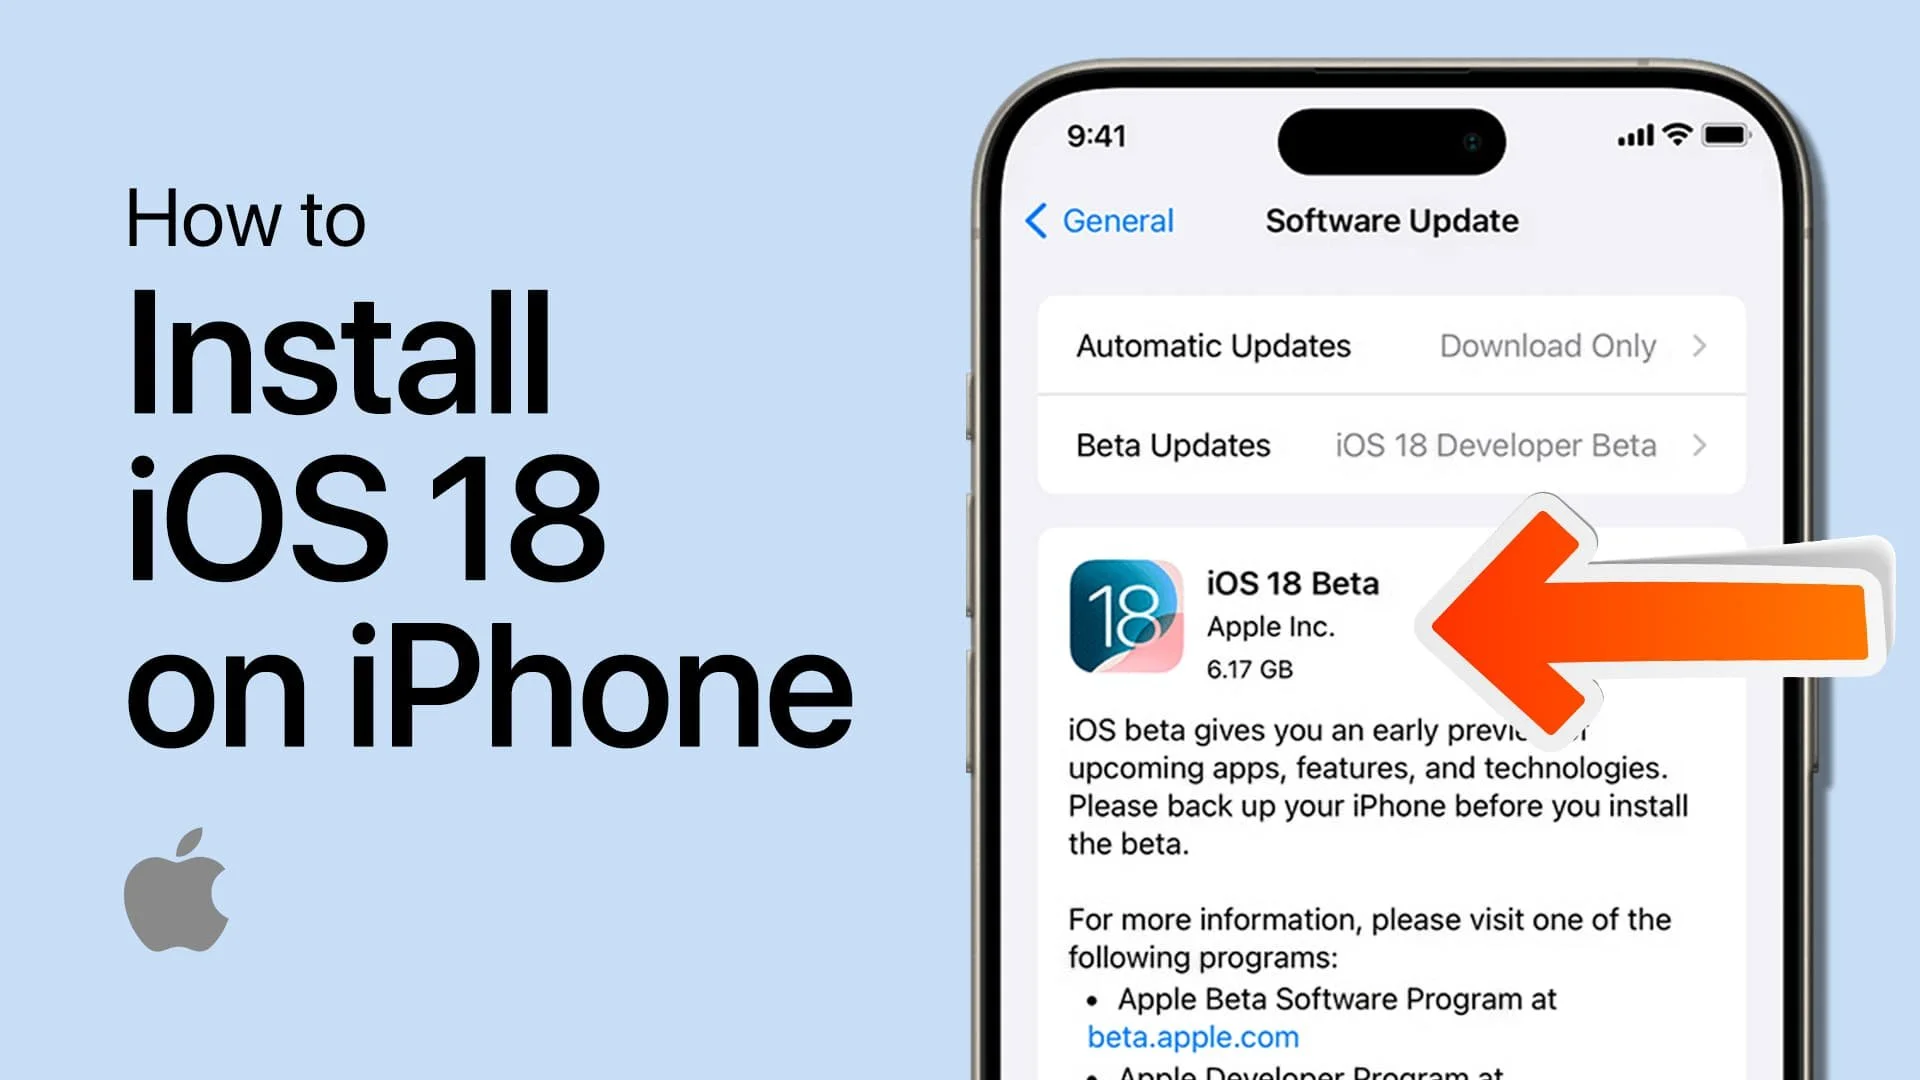
Before reinstalling the mail app on your device, it’s suggested to update your device to the latest iOS version. In your general settings, tap on Software Update. Download and install the latest update before restarting your device. Restarting your device will additionally restart all processes that can resolve the problem.
iPhone Settings > General > Software Update
Reinstall Mail App
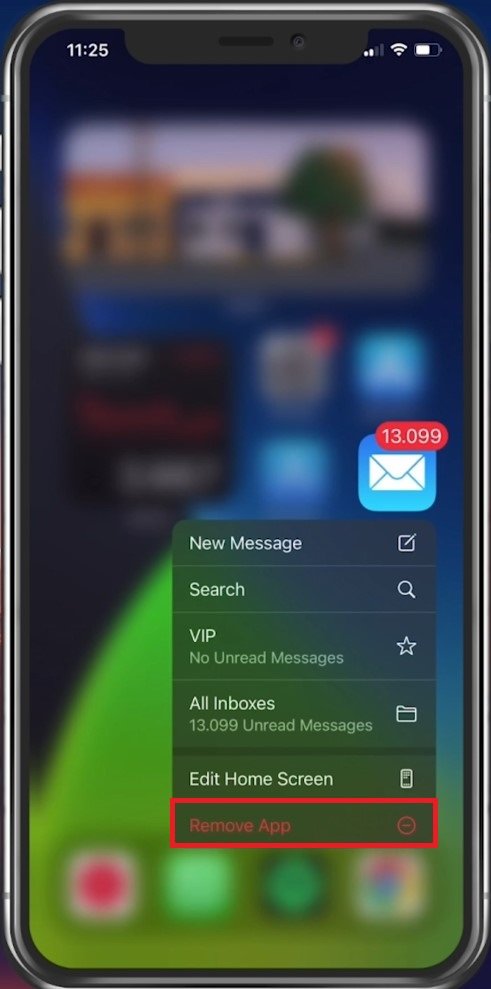
As a last resort, you can try to reinstall the mail application on your iPhone. Tap and hold the mail app icon pressed on your home screen and select Remove App.
Remove Mail App
You can then proceed to look the app up in your App Store application to redownload it to your device.
Redownload the Mail app in the App Store
-
There can be various reasons why your Mail app is not working on your iPhone. It could be due to incorrect email settings, outdated software, or a problem with the app itself.
-
You can try restarting your device, checking your internet connection, updating your software, and resetting your email account settings to troubleshoot the Mail app on your iPhone.
-
If your Mail app is crashing on your iPhone, try force closing the app, restarting your device, or deleting and reinstalling the app to fix the issue.


