How To Play Sonic The Hedgehog Classic on PC & Mac

Sonic The Hedgehog is one of the most iconic video games in history, and it's no surprise that people still enjoy playing it today. The game was initially released in 1991 and has since become a classic, loved by gamers of all ages. The good news is, you can now play Sonic The Hedgehog on your PC or Mac using BlueStacks, a popular Android emulator. This article will show you how to set up BlueStacks and get started playing Sonic The Hedgehog on your computer.
Download & Install BlueStacks
To play Sonic The Hedgehog Classic on your PC, you must use an Android emulator, such as Bluestacks. Bluestacks is a popular choice to play mobile games on your PC, as it’s optimized for playing mobile games. This should take a second to complete, and you can follow the install wizard to install the application to your system.

Download BlueStacks Emulator
Download Sonic The Hedgehog Classic
Open your Play Store and log in with your Google account. Search for Sonic The Hedgehog Classic, and download the game to your BlueStacks emulator. This might take a few minutes to complete depending on your network connection.

Play Sonic The Hedgehog Classic on PC
BlueStacks Performance Settings
While downloading the game, you should look at your emulator settings. Click on this gear icon to access these settings. In the Performance tab, you should set these according to your PC’s performance. Allocate a High amount of CPU cores if you don’t have a lot of other applications running in the background. The same goes for your Memory allocation. For users with 4GB or less RAM, set this option to Low.

BlueStacks Performance Settings
Under Performance Mode, make sure to set this option to Balanced. This will reduce the memory and CPU usage if your PC lags or you otherwise encounter low performance. I prefer to enable the high FPS option and set the frame rate of the emulator according to my screen refresh rate.

BlueStacks Settings > Frame rate
Windows Display Settings
If unsure about your refresh rate, right-click your desktop and select Display Settings. From here, make sure that the correct display is selected, scroll down, and click on Advanced Display. This will allow you to preview your refresh rate and change it if you want. Also, if you want to troubleshoot performance issues, then make sure to enable the FPS counter option.
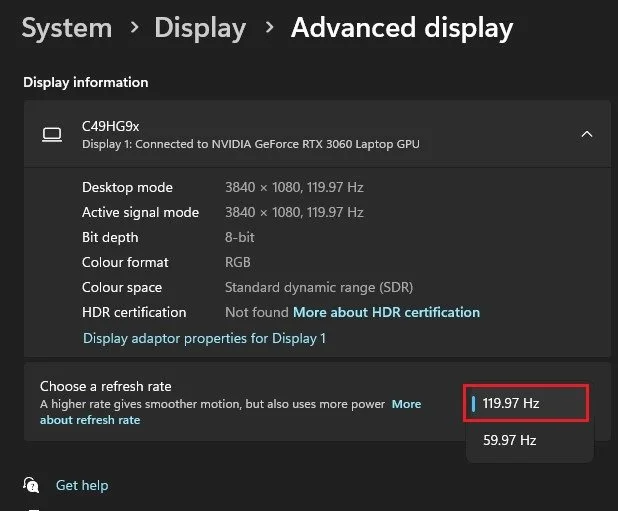
Windows Settings > Display > Advanced Display
BlueStacks Display Settings
In your Display settings, set the display orientation to landscape, and choose a proper resolution to play Sonic The Hedgehog Classic on your monitor. You can also adjust the size of this window by dragging its corners.
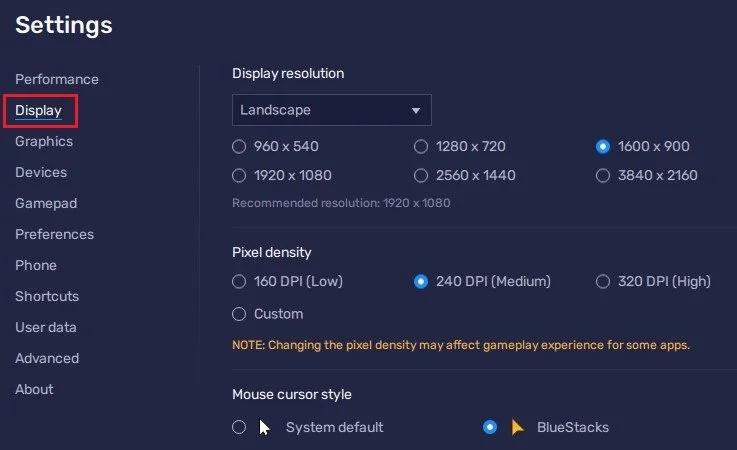
BlueStacks Settings > Display
Sonic The Hedgehog Classic Controls
To change your key mapping, navigate to your Controls Editor. You can then drag and change the location of individual controls, change the key and apply other settings to help improve your gaming experience.

Sonic The Hedgehog Classic Game Controls
Sonic The Hedgehog Classic In-Game Settings
Your in-game settings allow you to adjust the music and sound effects volume. I’d also suggest lowering the D-Pad Opacity when playing Sonic The Hedgehog on your PC or Mac.
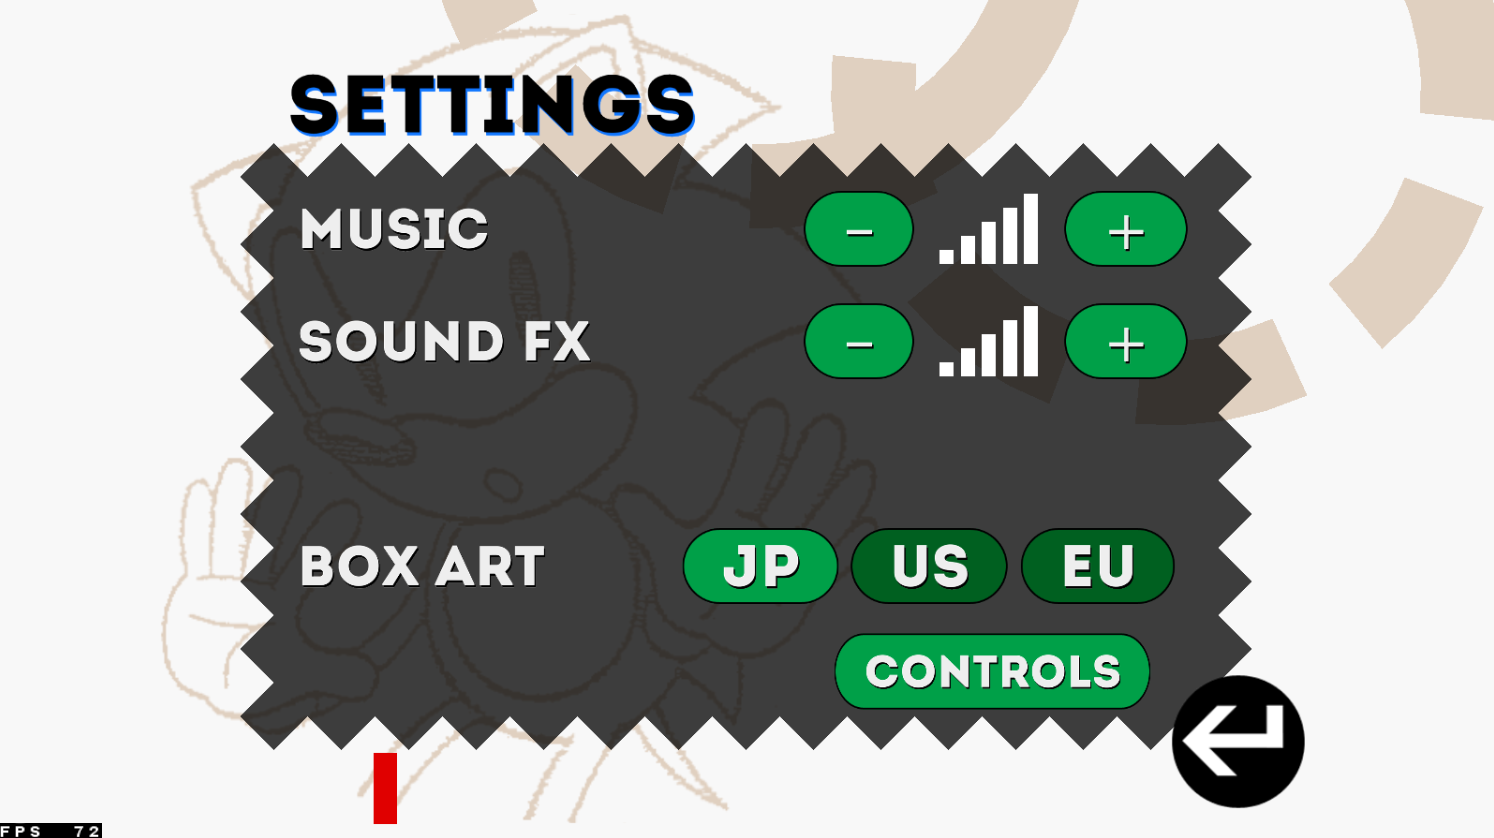
Sonic the Hedgehog Classic In-Game Settings
Play Sonic Classic on PC!
Once you've customized your controls, it's time to play Sonic The Hedgehog. The game's objective is to navigate Sonic through various levels and defeat the evil Dr. Eggman. Use the buttons and keys to jump, run, and spin dash your way to victory.

-
Yes, you can play Sonic The Hedgehog on a Mac using BlueStacks. The process is the same as for a PC; you can follow the steps outlined in this article.
-
No, Sonic The Hedgehog is not free to play on BlueStacks. You will need to purchase the game from the Google Play Store before you can play it on BlueStacks. You may also use the free app, which will show you in-game advertisements.
-
Yes, you can play a wide range of Android games on BlueStacks. Simply log in to the Google Play Store and download the games you want to play.