How To Turn Off Inverted Camera on iPhone
Introduction
Capturing the perfect shot with your iPhone has never been easier, but sometimes, certain settings can cause unwanted changes to your images. One such feature is the inverted camera, which flips your photos and can be quite puzzling. In this guide, we will provide you with the knowledge and tools to effortlessly disable the inverted camera on your iPhone. Say goodbye to flipped images and regain control over your iPhone's camera capabilities. Let's dive in and explore the smart way to turn off the inverted camera on your iPhone and capture picture-perfect moments every time.
Disable the “Mirror Front Camera” Option
To turn off the inverted front-camera feature on your iPhone, simply open the "Settings" app and select "Camera." Within the camera settings, you'll find the "Mirror Front Camera" option. Switch it off to stop the front-camera from inverting your photos. Now, your selfies and video calls will appear just as you intended, without any unexpected flip effects.
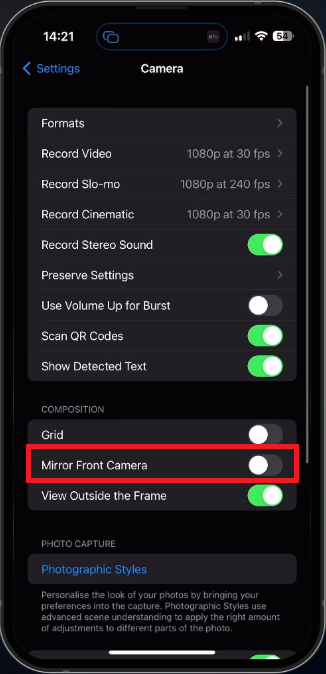
iPhone Settings > Camera
Helpful Camera Options
While exploring the Camera settings on your iPhone, you'll discover several features that can enhance your photography experience. Activate the grid option to assist with aligning and composing your shots, or use Lens Correction to fix distortion caused by the wide-angle lens on your device.
Reasons to Disable the Inverted Camera
Turning off the inverted front-camera can be beneficial in various situations. For instance, when taking selfies, the mirror effect can sometimes result in unnatural or awkward-looking images. Deactivating the inverted camera ensures the image appears as others will see it.
Furthermore, during video calls, the inverted front-camera might create confusion when attempting to show something to the person on the other end. Disabling the mirror effect offers a more accurate representation of your environment, making communication easier and more precise.
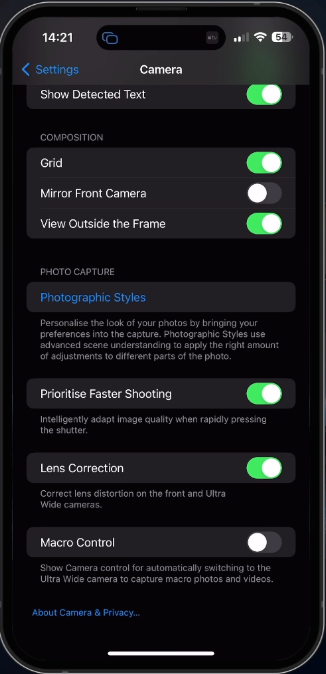
iPhone Settings > Camera > Lens Correction
Keep Your iPhone Software Up-to-Date
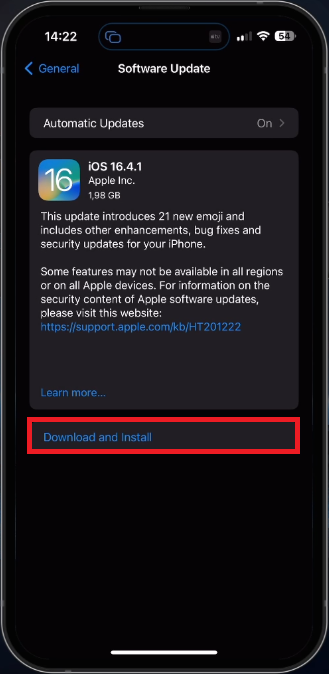
If the "Mirror Front Camera" option isn't visible in your Camera settings, ensure that you're using the most recent iOS version. To check for updates, head to your iPhone settings, access the "General" section, and select "Software Update".
If a new update is available, download and install it to enjoy the latest features and improvements, including access to the "Mirror Front Camera" setting.
-
If you don't see the "Mirror Front Camera" option, ensure that your iPhone is running the latest iOS version. Go to Settings > General > Software Update to check for any available updates.
-
No, disabling the inverted camera will not affect any photos you have already taken. It will only impact the appearance of future selfies or video calls.
-
The "Mirror Front Camera" setting applies to your iPhone's native camera app. Third-party apps may have their own settings to control the inversion of the front camera. Check the app's settings to see if they offer this feature.
-
Disabling the inverted camera during video calls provides a more accurate representation of your surroundings, avoiding confusion when you're showing something to the other person.
-
While in your Camera settings, you can enable the grid to improve photo composition, and use Lens Correction to correct distortion caused by your iPhone's wide-angle lens. Explore the settings to find other features that can enhance your photography experience.