How To Create a Discord User Verification System
Discord is a popular platform for online communication among gamers, communities, and businesses. Its robust features and easy-to-use interface make it a go-to choice for many users. However, with its open nature, Discord also faces the challenge of maintaining a safe and secure environment for its users. This is where user verification systems come in.
Creating a user verification system can help you ensure that only legitimate users have access to your Discord server. This can help you prevent spammers, bots, and trolls from disrupting your community. In this article, we will guide you through the process of creating a user verification system for your Discord server.
Enable Discord Developer Mode
Open up Discord and navigate to your User Settings by clicking the gear icon at the bottom of your window.
Discord > User Settings
Under Appearance, scroll down, and under Advanced, enable the Developer Mode option, which will allow you to copy user and message ID’s for example.
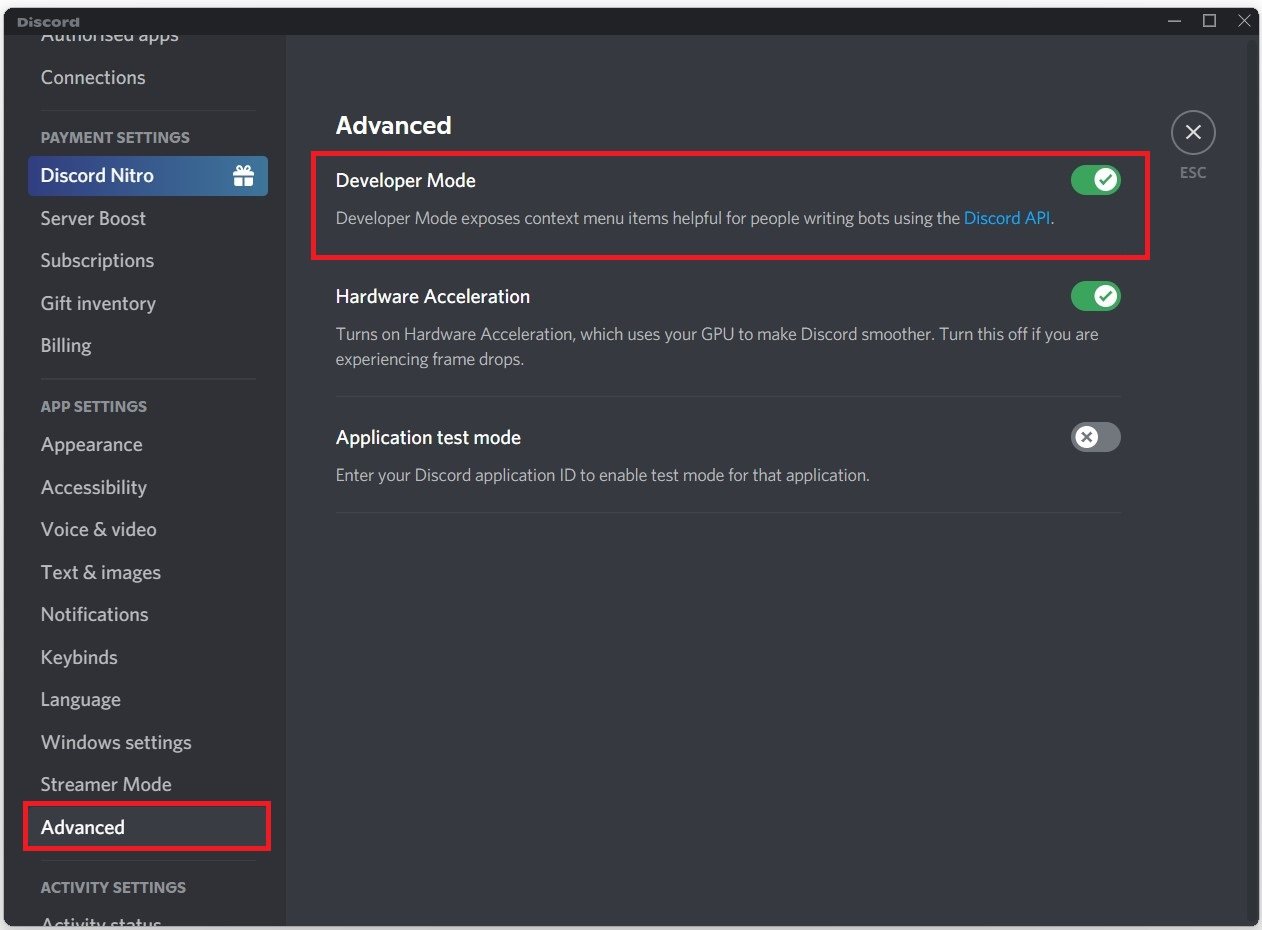
Discord Settings > Advanced > Developer Mode
Use Carl Bot to Create a Verification System
Visit the Carl.gg bot website or enter carl.gg in your favorite browser. After logging in with your Discord account, you will need to Authorize the bot to access your account, and after selecting the correct server, you will also need to give the bot access to your Discord server.

Allow Carl bot access to your Discord server
Assign Carl the Bot Role
Open up Discord again and navigate to your server settings.
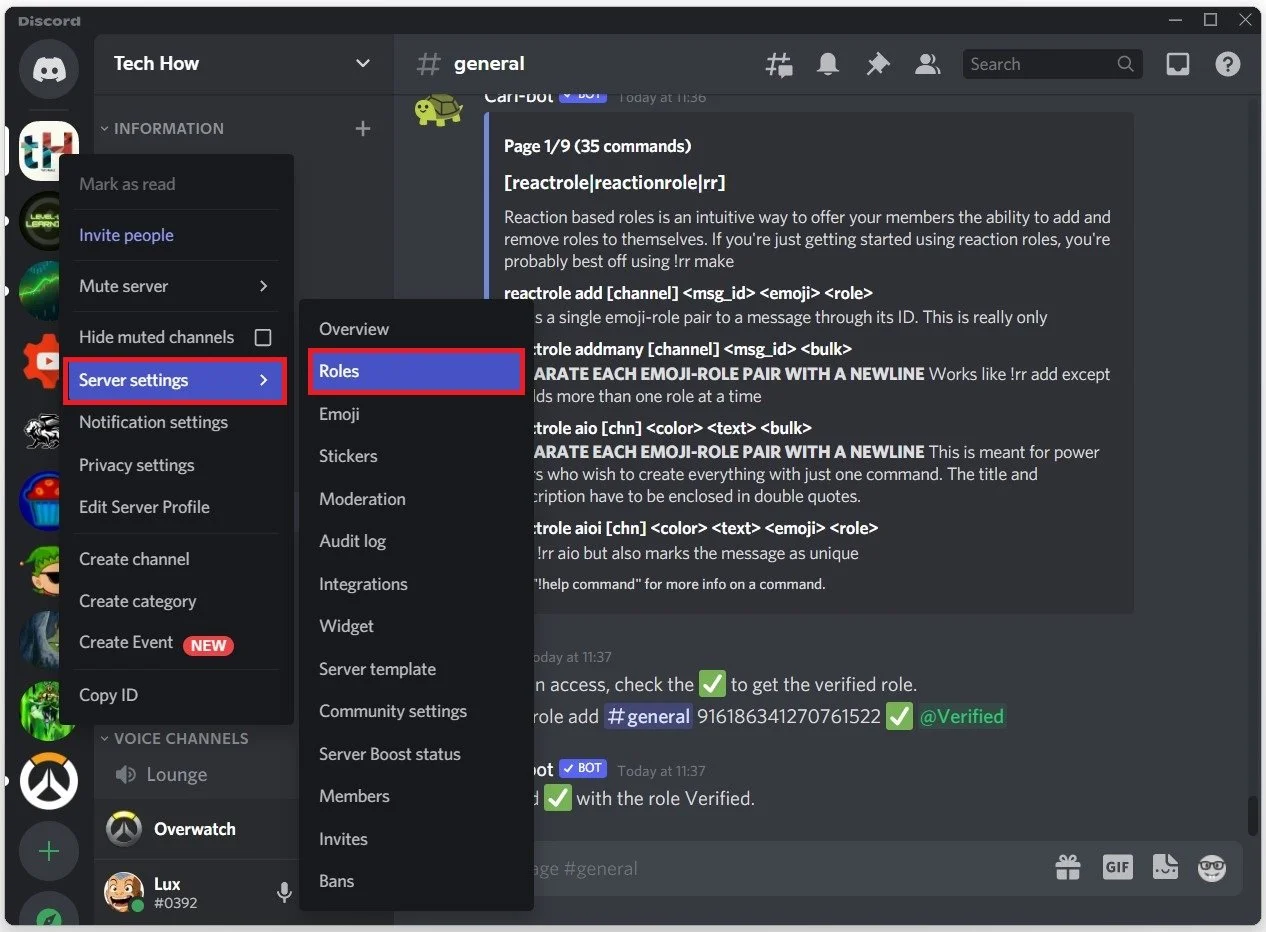
Discord Server Settings > Roles
In the Roles tab, select the @everyone role, and under Permissions, scroll down and disable the Read message history setting.
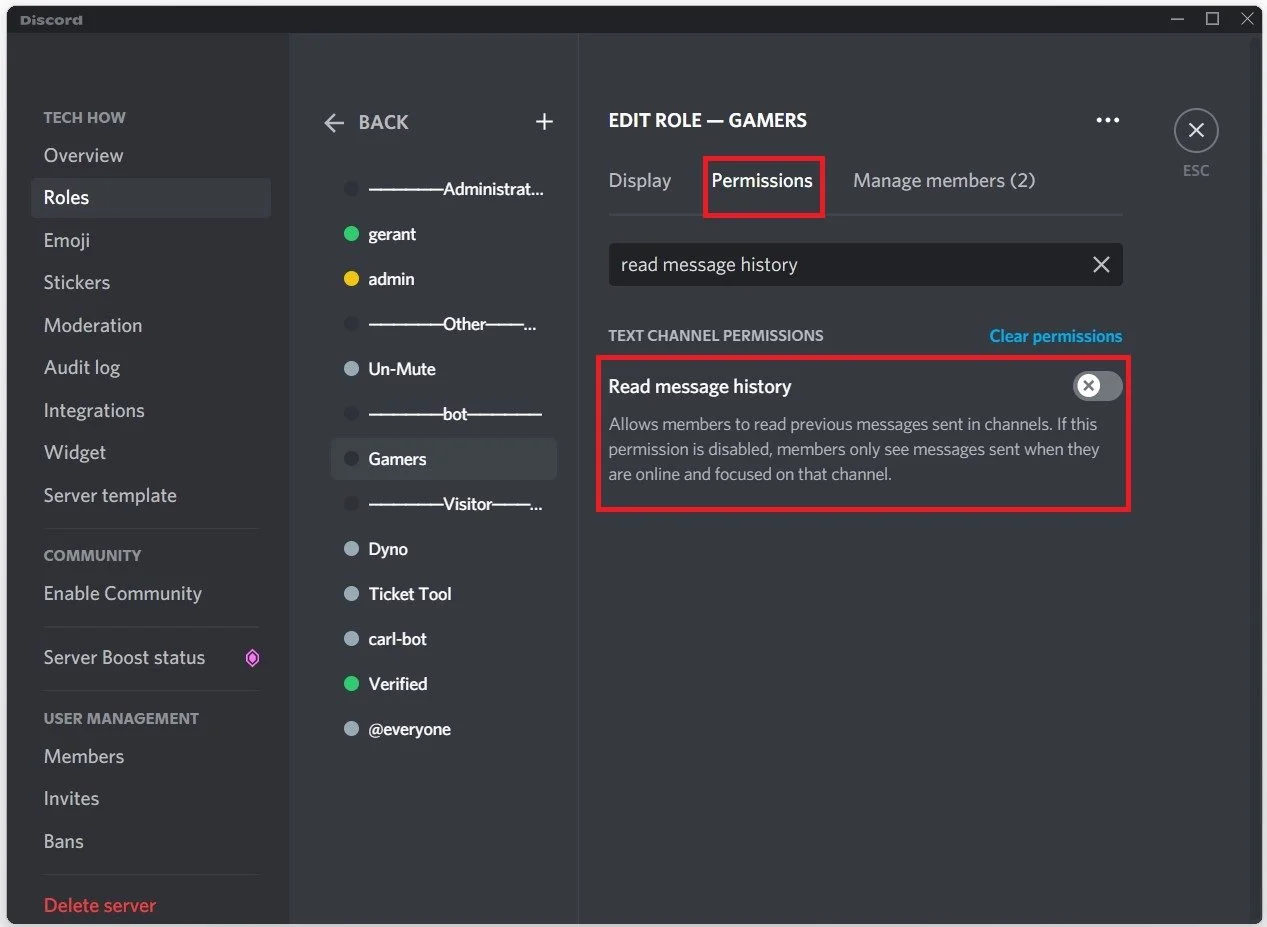
Discord Roles Settings > Permissions > Read Message History
You can then create a new role, and name it Verified, for example, and for this role,enable the Read message history setting.

Verification Process Command
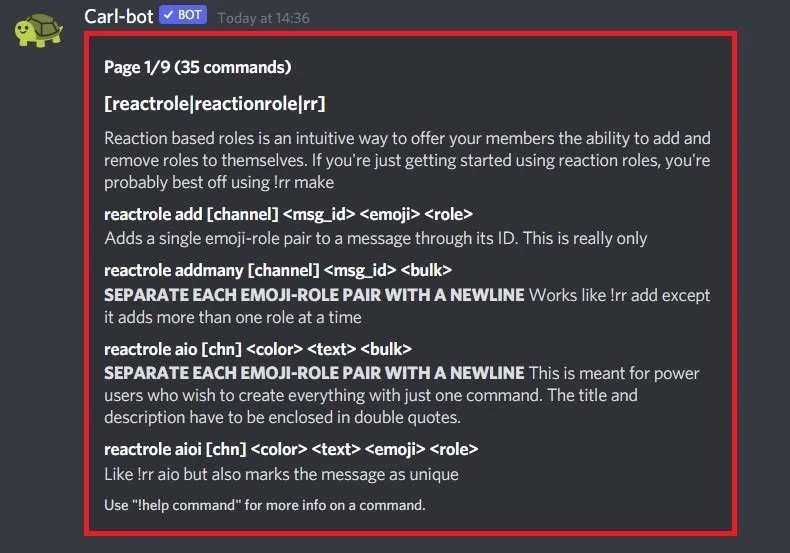
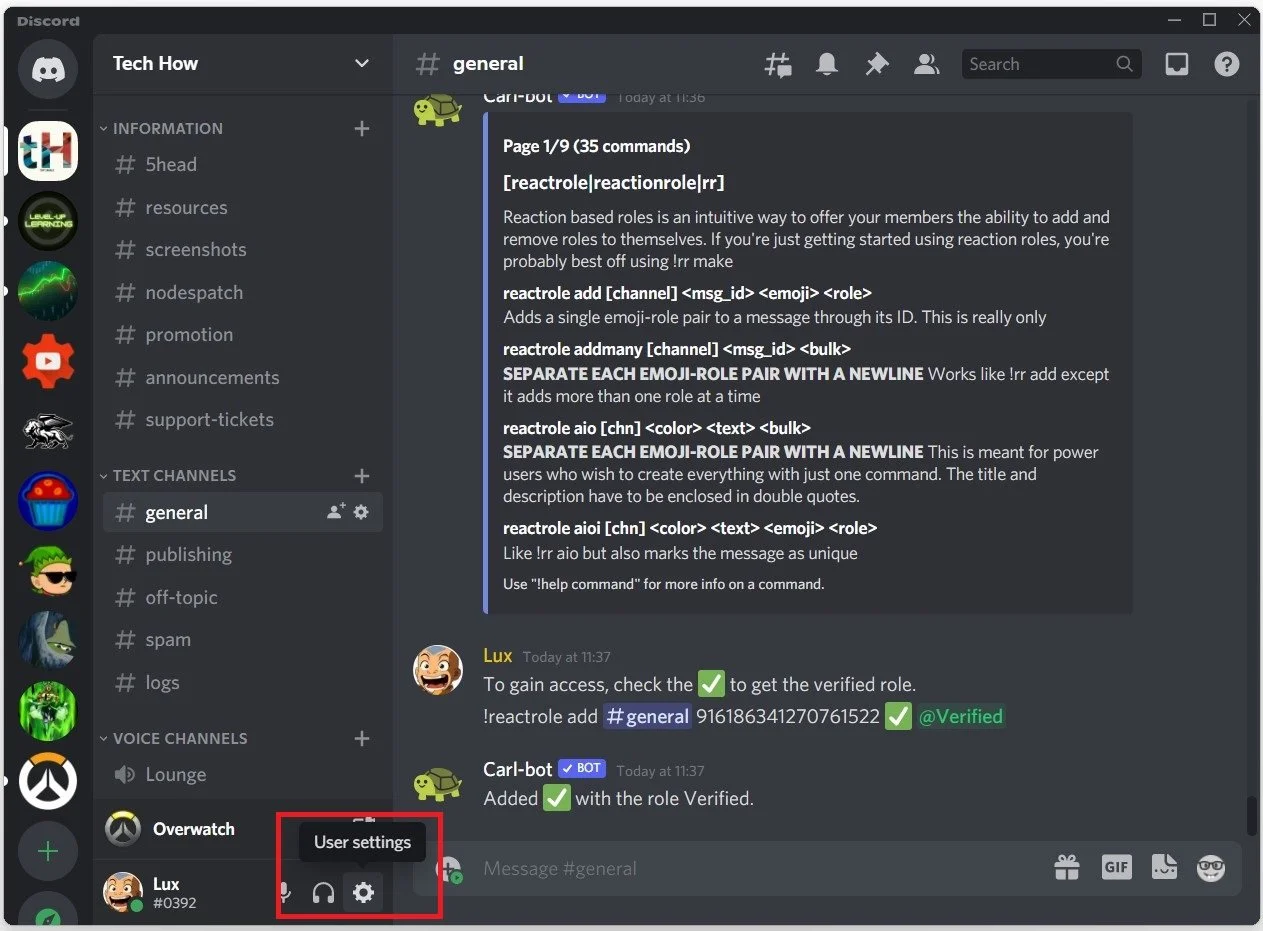
After saving your changes, navigate to your general text channel, and use the server prefix, in this example, an exclamation point and then rr.
!rr
This command will make sure that the Carl-bot will show you all of the commands you need for this verification process to work properly.
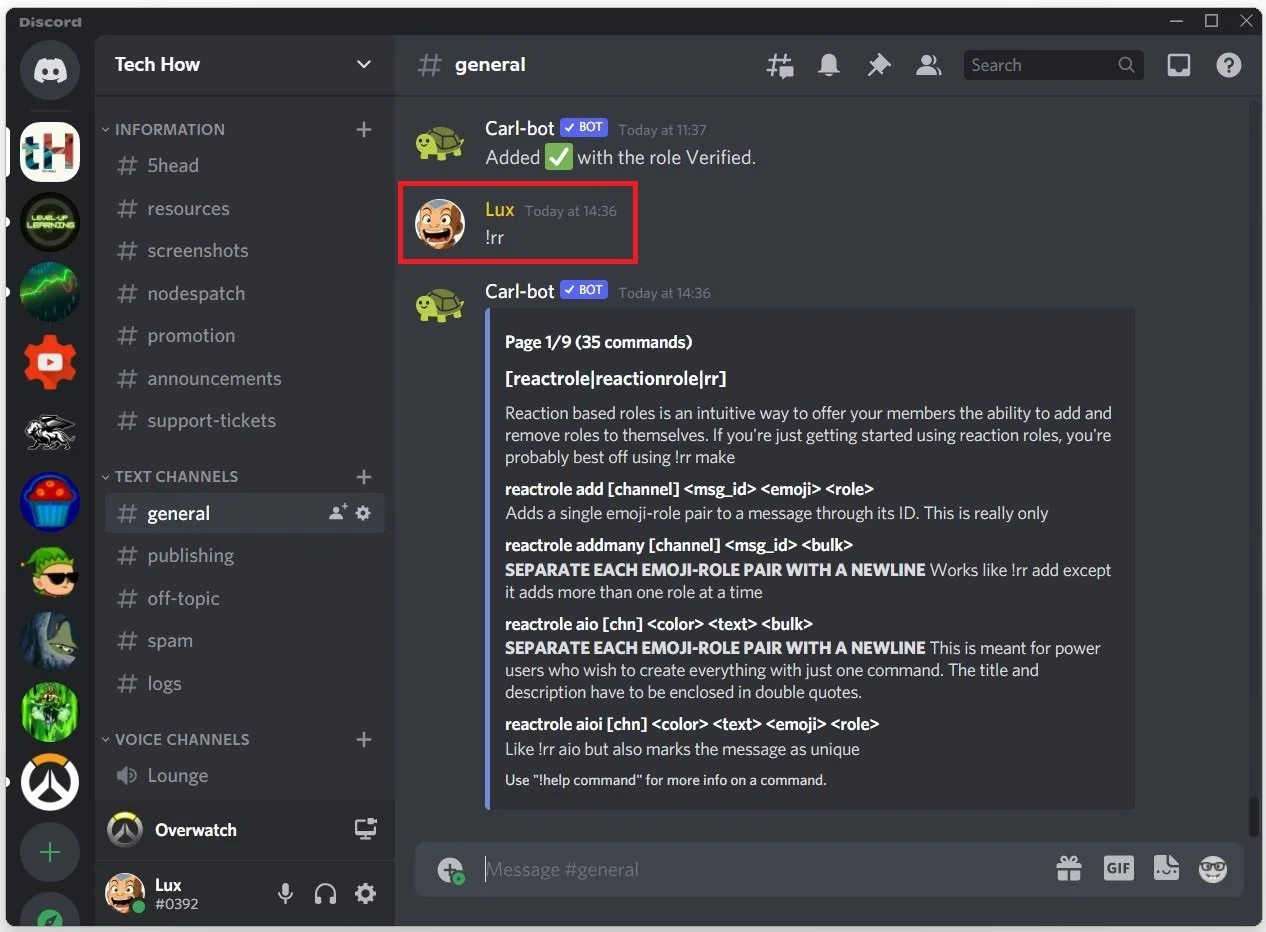
Use the !rr command to preview all of the Carl bot commands
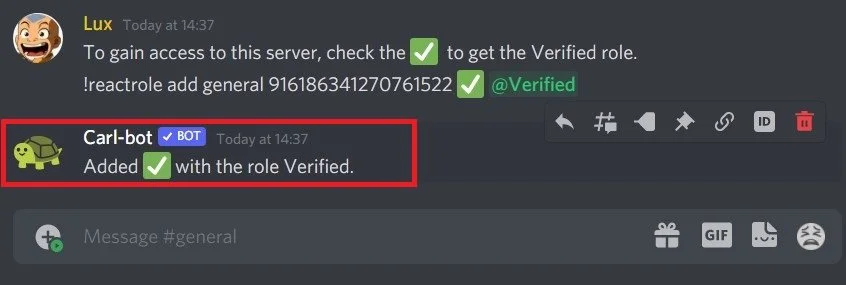
Write a message, such as:
“To gain access to this server, check the (checkmark) to get the Verified role.”
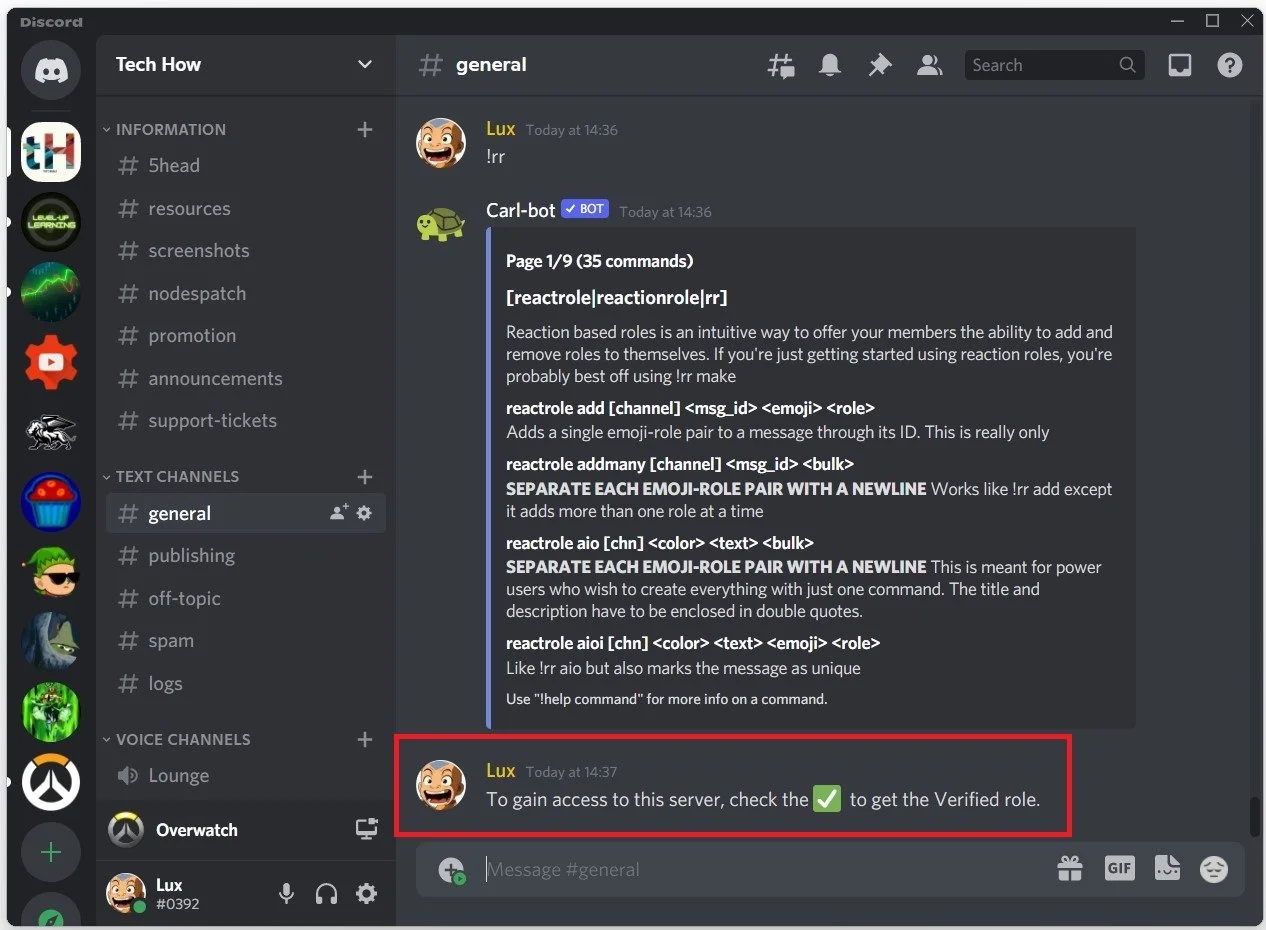
Next, use the command: !reactrole add, the channel is #general, then we need the message ID, which we can copy from the message above as we enabled the developer mode before.
!reactrole add #general 956186331277761522 (emoji) @Verified
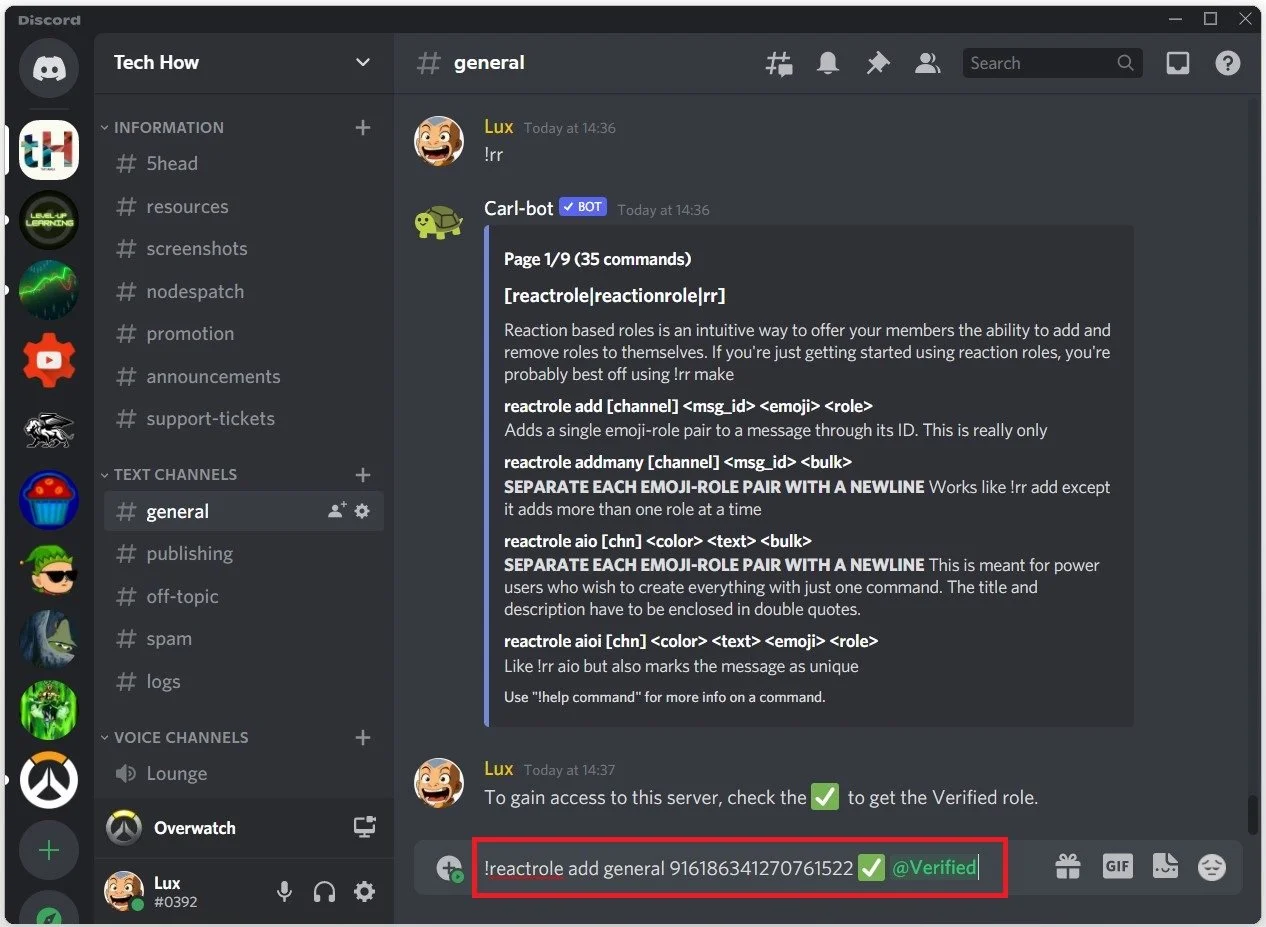
Paste the Message ID after your text, add the selected Emoji, and the role, @Verified. When hitting enter, you will see that the checkmark will be added to the Verified role members.
Use the verification command on a user on your Discord server
When clicking on the check icon, you will see that you will be added to the Verified role. Lastly, navigate back to your server settings, and under Roles, make sure that the Read Messages permission is enabled for the @everyone role. Otherwise, users will not be able to know how to get verified, as they will not see the bot’s message.