How To Download & Setup BlueStacks 5 on PC

Welcome to the world of seamless gaming! With the latest version of BlueStacks 5, you can now enjoy all your favorite mobile games on your PC with unparalleled performance and experience. Whether you're a hardcore gamer or just looking for an easier way to play your favorite games, this guide is here to help you through the process of downloading and setting up BlueStacks 5 on your PC. So sit back, grab a snack, and get ready to take your gaming experience to the next level!
Download BlueStacks
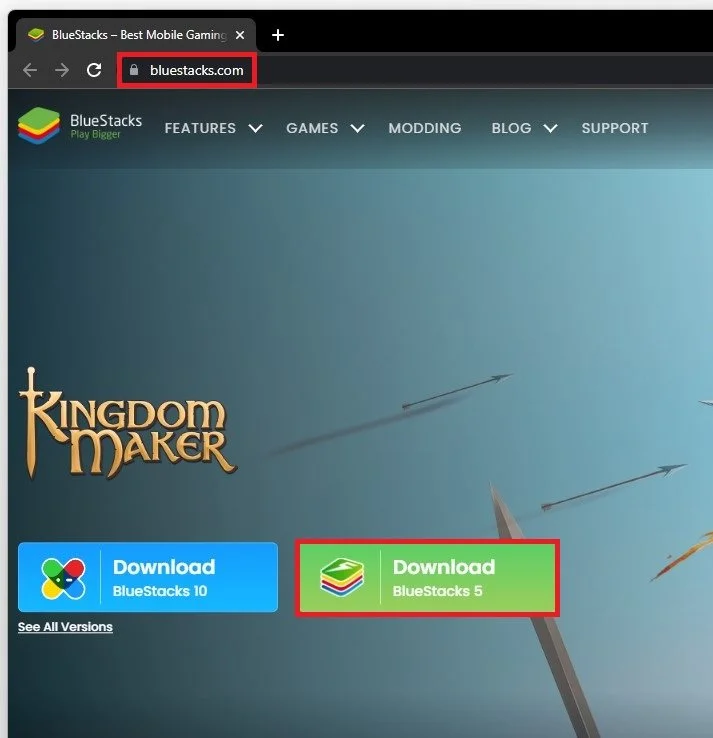
First of all, to download BlueStacks, navigate to Bluestacks.com. From here, select to download the BlueStacks 5 installer for Windows.
Download BlueStacks 5
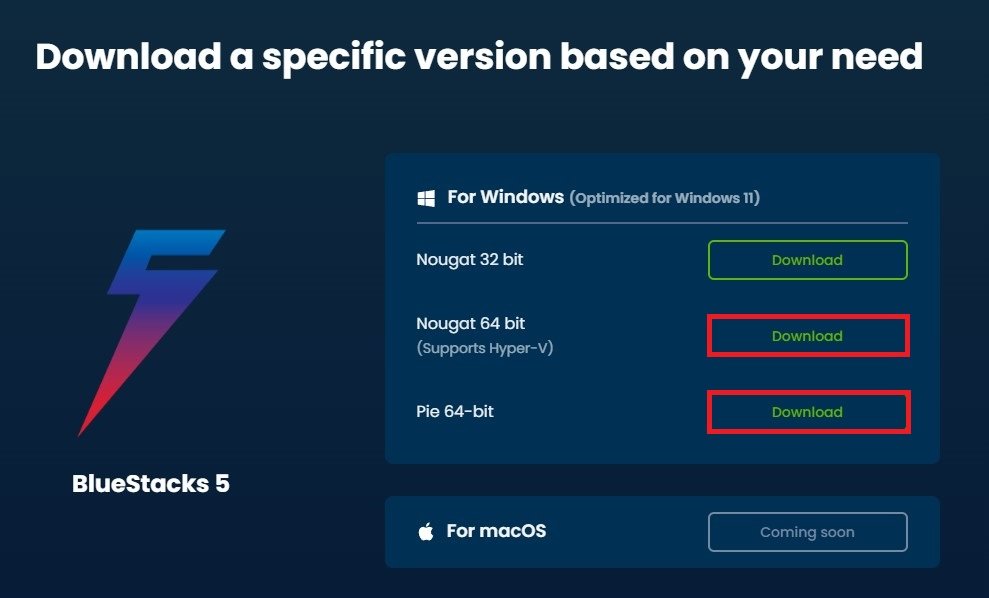
When using the emulator on a Windows 11 PC, select See All Versions. You can then proceed to download the Optimized for Windows 11 64-bit installer. The download will only take a second to complete, and you can double-click the installer file. Allow Bluestacks to make changes on your PC if you have admin permissions, and the installer will proceed to download and install the android emulator to your system.
Download BlueStacks 5 for Windows or Mac
Install BlueStacks
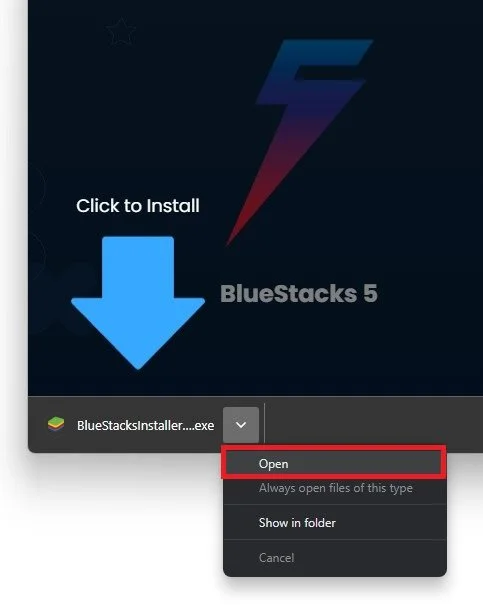
Depending on your download and write speeds, this can take anywhere from a minute to half an hour. You may have to disable your antivirus while installing BlueStacks if you encounter any installation issues. You also need at least 2 GB of free storage space on the drive you select to install BlueStacks.
Open BlueStacks Installer
Play Store Login
When the installation is complete, BlueStacks will open up automatically.
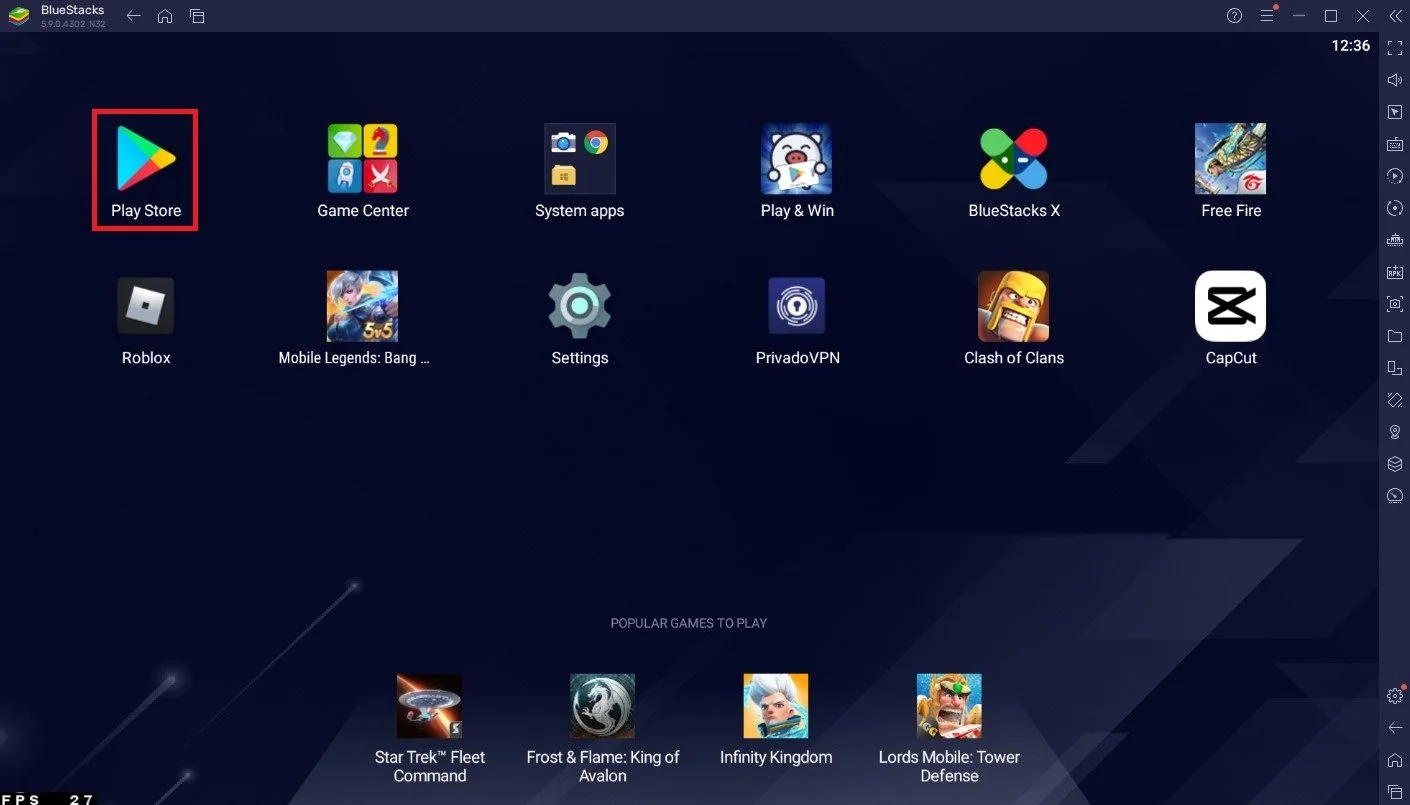
BlueStacks > Play Store
You can click on Play Store and log in with your Google account, preferably the same account you have used with previous Android devices. This will allow you to get access to past purchases and downloads. When this is done, proceed to install games or other apps.
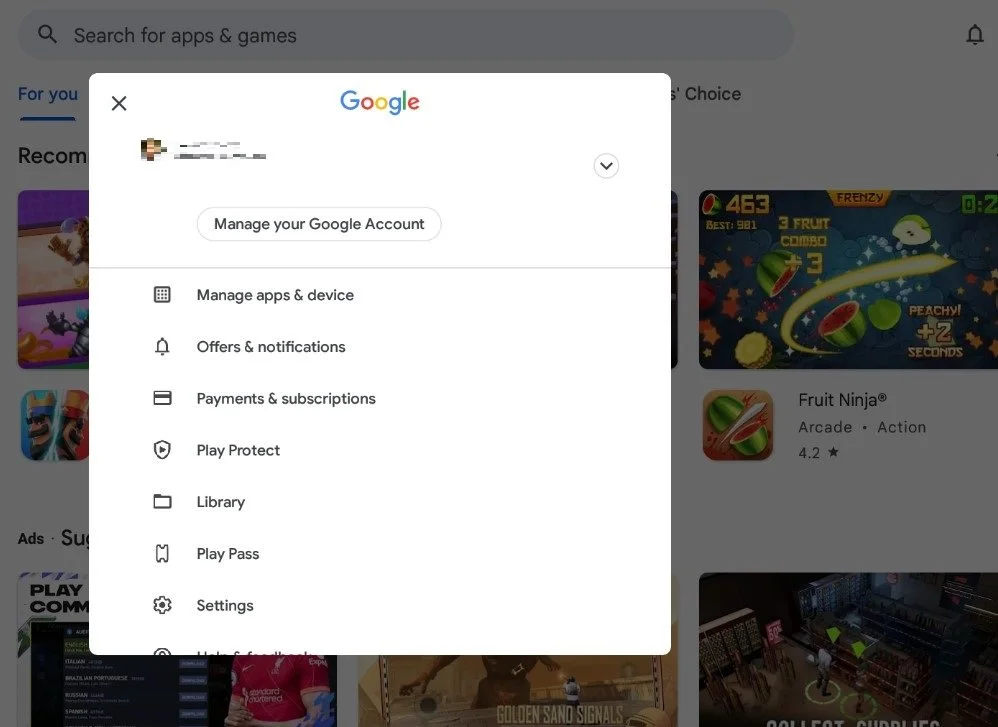
Sign In with Google account
BlueStacks Performance Settings
To get the most out of the BlueStacks emulator, I highly suggest that you apply a few settings to improve your emulator performance. Click on the gear icon on the bottom left of the BlueStacks window.
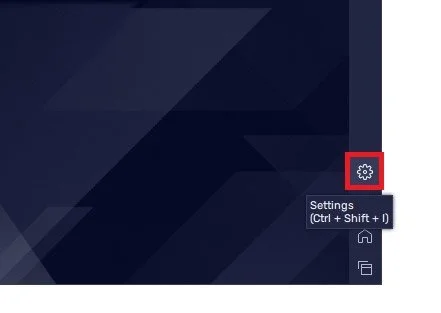
BlueStacks Settings
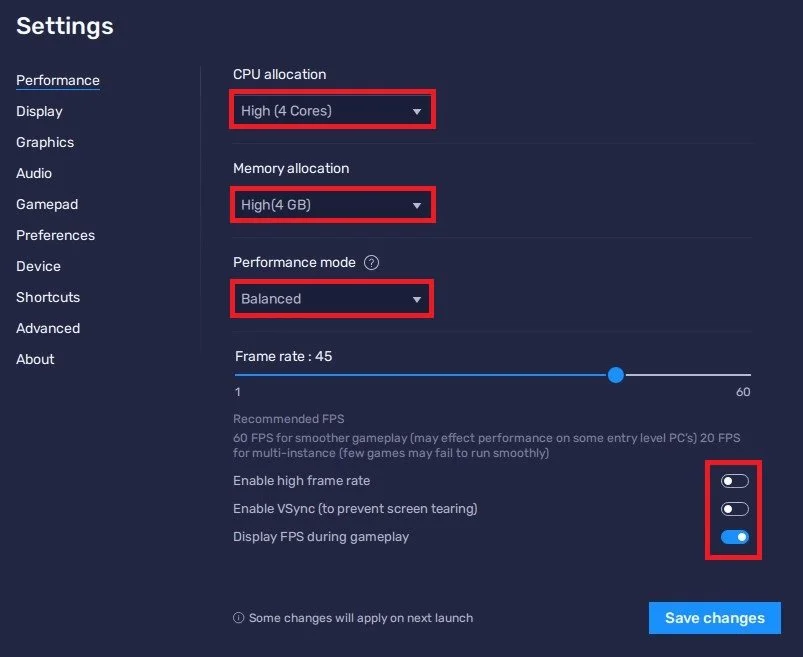
In the Performance section of your settings, increase the CPU allocation to all available cores from your processor. In a lot of cases, this will be 4 or 8 cores.
Below, allocate enough Memory or RAM for the application to utilize. If you plan on playing games on Bluestacks, then 2 GB would be great if you only have around 4 GB of available Memory on your PC. If you have 8 or 16 GB, allocate 4 GB for BlueStacks to use while it's running. You can also use a custom value, for example, when using a PC with only 2 GB of available RAM, you can set this to 1600 MB.
BlueStacks Performance Settings
Check RAM Availability
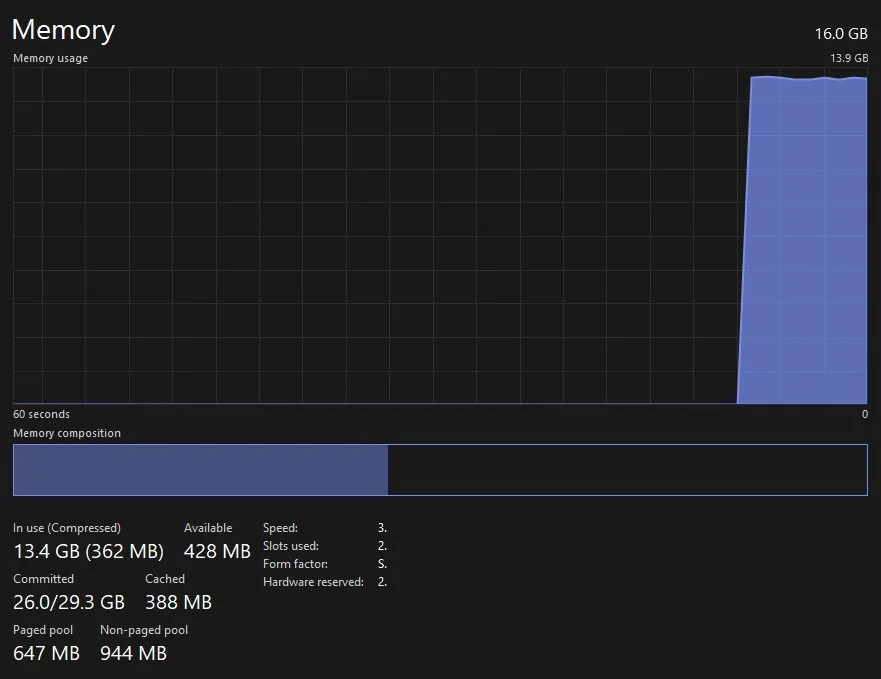
If you’re unsure how much RAM you can allocate for Bluestacks to use, open up your Task Manager.
In the Performance tab, ensure you’re in the Memory section to see how much RAM you’re currently using and how much you might have available. Don’t be discouraged when you see over half of your memory being used while Windows is idle. This is normal, as some of the Windows features are stored in your memory at all times but can be reduced when it’s needed by an application such as Bluestacks. In my case, I have access to 16 GB of physical memory, 6 of which I can efficiently allocate to Bluestacks as I don’t use other applications while Bluestacks is running.
Task Manager > Performance > Memory
Back in your Bluestacks settings, set your Performance mode option to Low Memory or Balanced Mode. This will depend on your PC’s specifications. Higher-end PCs should use “balanced mode.” It will optimize your memory or RAM usage as well as your performance. The low memory mode will conserve more memory usage by cutting out some visual effects, for example.
If you wish to use a custom frame rate or FPS above 60, then toggle the Enable high frame rate option. It will allow you to set your max frame rate to 240, but this is, in most cases, not needed. I like to set this to 144, but users struggling to get 60 FPS should cap their FPS to a value such as 45 or 30 to ensure that at least these frames are not missing and that the game is not lagging.
I prefer to disable the V-Sync option and enable the Display FPS during gameplay to troubleshoot potential performance issues. After saving your changes, you might be asked to restart the Bluestacks emulator, which will only take a few seconds.
BlueStacks Display Settings
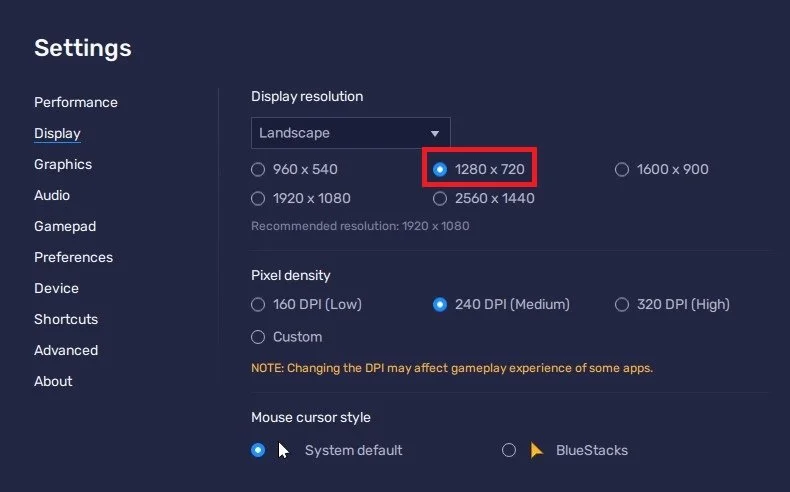
Use a resolution that is not too high in the Display section of your Bluestacks settings, such as 1280 x 720. This is, in many cases, still a good resolution for mobile games, especially in landscape mode.
BlueStacks Display Settings
BlueStacks Graphics Settings
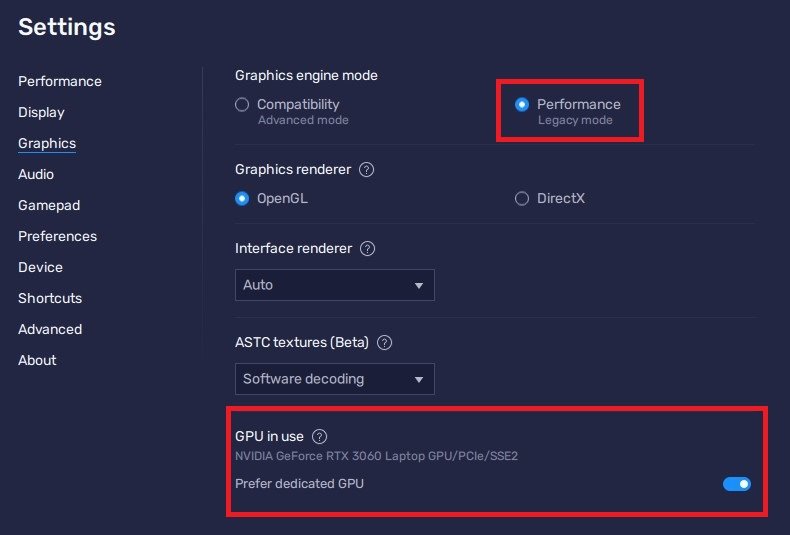
In your Graphics settings, set your graphics engine mode option to Performance. You can leave the other settings to their default values and ensure that the GPU in use option is enabled to use your graphics processor to help run the emulator on your PC.
BlueStacks Graphics Settings
Change BlueStacks Process Priority
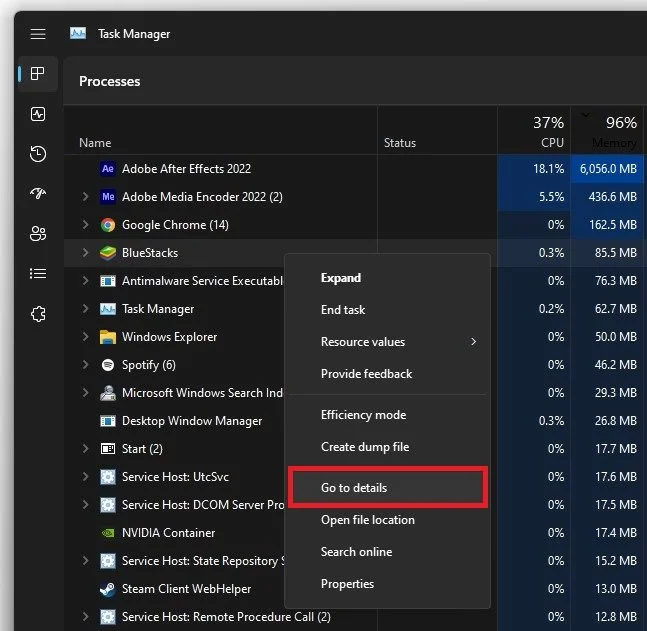
After applying your settings changes, there are a few more steps you should consider to improve your gaming performance on BlueStacks. While Bluestacks is running, open up your Task Manager. Here, right-click the BlueStacks process and select Go To Details.
Task Manager > Processes
In the Details section of your Task Manager, the HD-Player.exe process should be highlighted. Go ahead and right-click this process and set its priority to High. This will allow your PC to reserve more resources to run BlueStacks than other applications running in the background while you’re in-game.
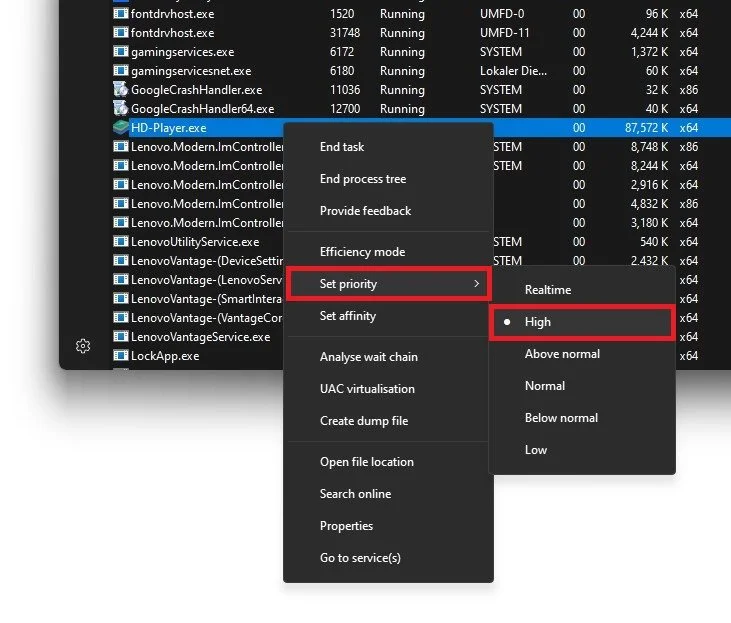
Change HD-Player Priority in Task Manager
End Resource Intensive Processes
Back in the Processes section of your Task Manager, you can, in addition, prevent some resource-intensive processes from running, but make sure to only end processes from running that you know won’t break your operating system. Especially applications such as Google Chrome, OBS, or Adobe applications will use most of your available memory and cause lag while using Bluestacks.
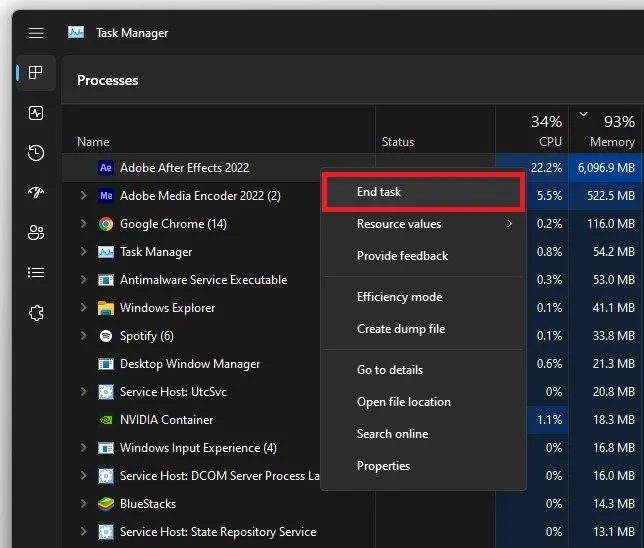
End Resource Intensive Tasks
Windows Update
Next, ensure that your graphics driver and operating system are up to date. Click on Windows Update at the bottom left of this window in your Windows settings. Download and install the latest update before restarting your PC. This can, in many cases, fix lag and FPS drops while using Bluestacks, depending on how often you keep your system up to date.
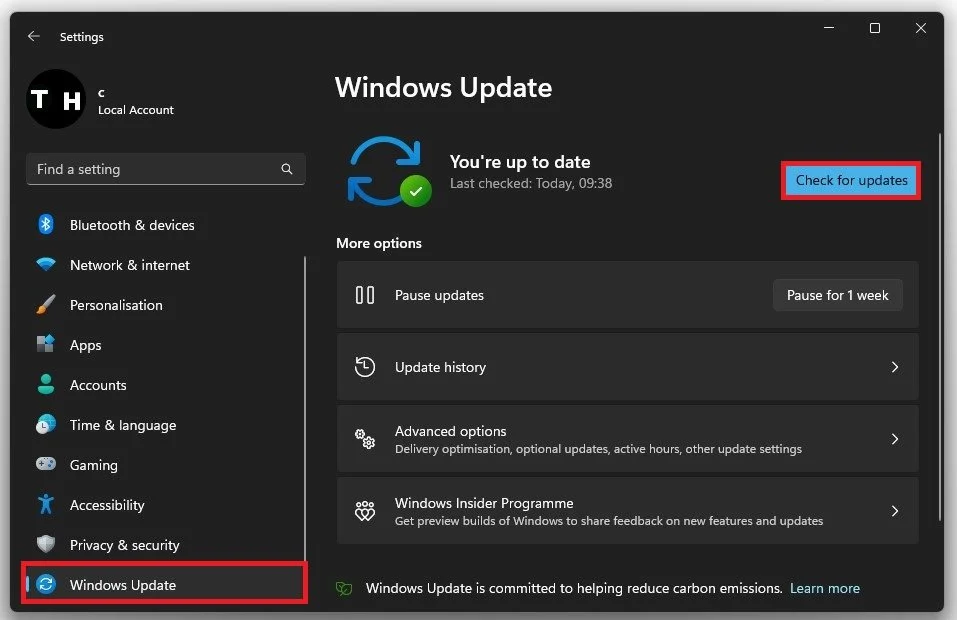
Windows Settings > Windows Update > Check for updates
Update Graphics Driver
After updating your Windows OS, ensure your graphics driver is up to date. When using an NVIDIA GPU, I suggest using the GeForce Experience application, and AMD users can use the AMD Radeon Software. You can download both applications for free in case you haven’t already.
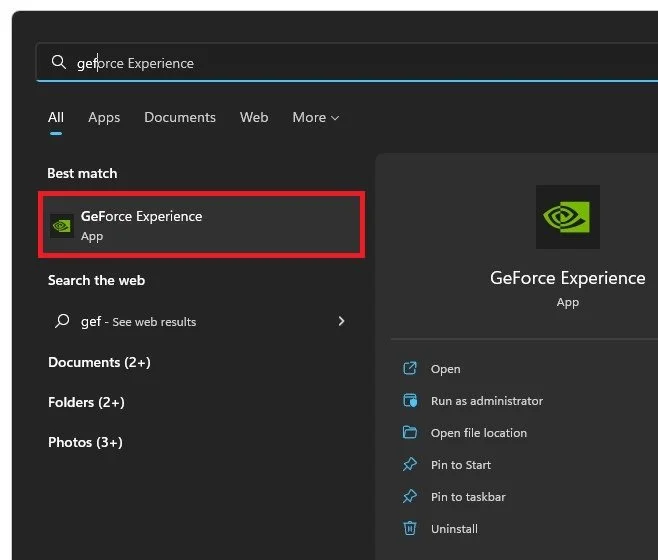
GeForce Experience Application
In your GeForce Experience application, head to the Drivers section and download and install the latest driver. This will help you run games on the Bluestacks emulator.
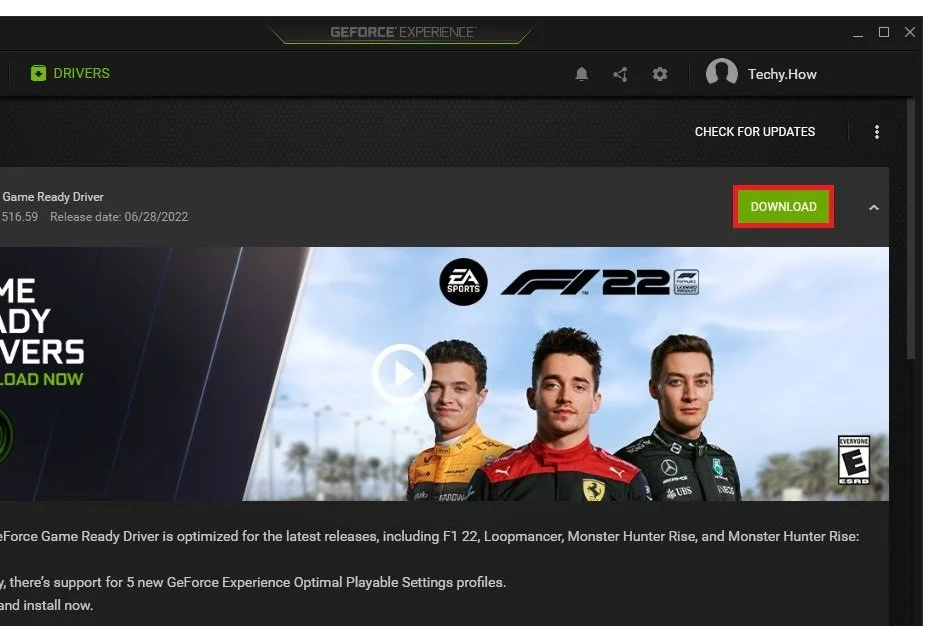
Download Graphics Driver
Change BlueStacks Graphics Preference
Lastly, you should set the graphics preference for Bluestacks to high performance. In your Windows settings, navigate to System > Display > Graphics.
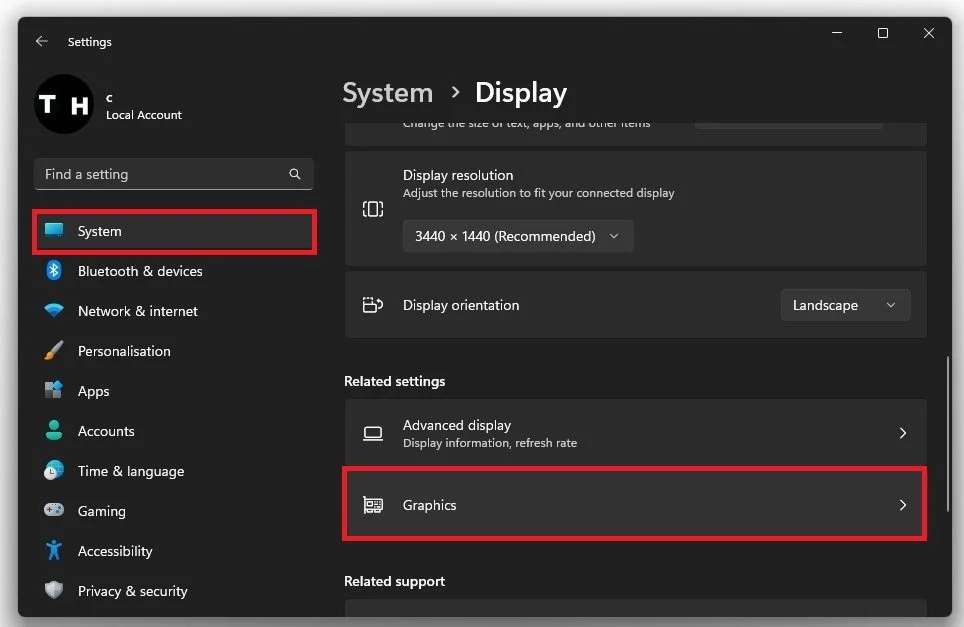
Windows Settings > System > Display > Graphics
In your graphics settings, go ahead and select to Browse to add Bluestacks to this list of apps.
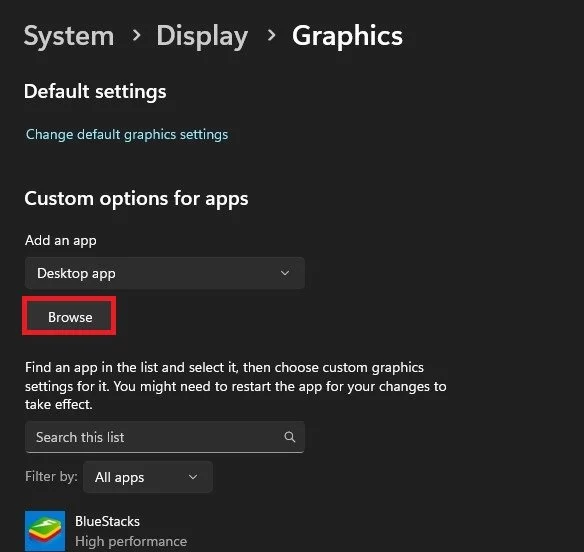
System Settings > Display > Graphics
In your file explorer, navigate to the drive on which you installed Bluestacks, Program Files, and BlueStacks, and in this folder, locate and add the HD-Player application.
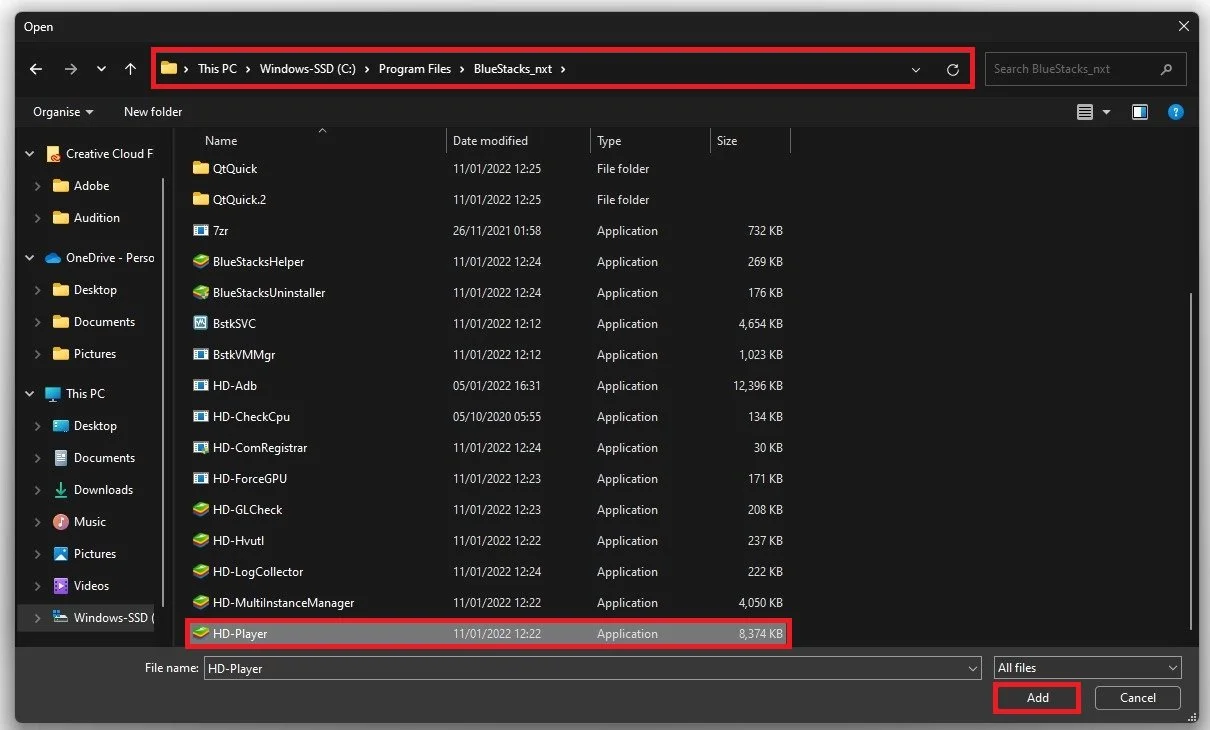
Program Files > BlueStacks > HD-Player
After adding the app, click on Options and set the Graphics Preference to High Performance. This will make sure that your graphics card gets utilized when needed compared to other processes which might also need your GPU to run.
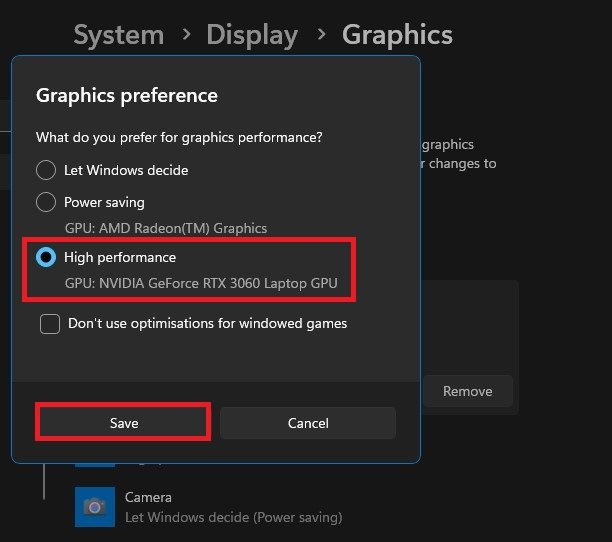
Change Graphics Perference
To further fix lag and improve your overall performance, lower your in-game settings while using the BlueStacks emulator.
-
BlueStacks 5 is an Android emulator that allows you to run Android games and apps on your PC. It's the latest version of the popular BlueStacks software, known for its smooth performance, fast loading times, and user-friendly interface.
-
Yes! BlueStacks 5 is a free software, available for download on their official website. You can use it for as long as you like, with no hidden costs or fees.
-
BlueStacks 5 requires a PC with at least 2GB of RAM and 4GB of storage space. You'll also need to have a graphics card with DirectX 9.0c or higher and a Windows 7 or later operating system.
-
Yes! BlueStacks 5 supports both keyboard and mouse input, as well as gamepad and joystick input, so you can choose the best way to play your games.