Chrome - How To Fix Slow Download Speed

Chrome is undoubtedly one of the most popular web browsers in the world, thanks to its excellent user interface and impressive speed. However, despite its superior performance, some users have reported experiencing slow download speeds while using the browser. Slow download speeds can be frustrating, especially when downloading necessary files or documents.
If you are one of the users experiencing this issue, you will be pleased to know that there are several ways to fix slow download speeds in Chrome. In this article, we will explore some of the most effective methods to improve your download speed in Chrome. Whether you are a novice or an experienced user, this guide will provide practical tips and tricks to optimize your browser performance.
Disable Unused Chrome Extensions
Open up your chrome browser and select the extension icon on the top right of this window. Select Manage your extensions.
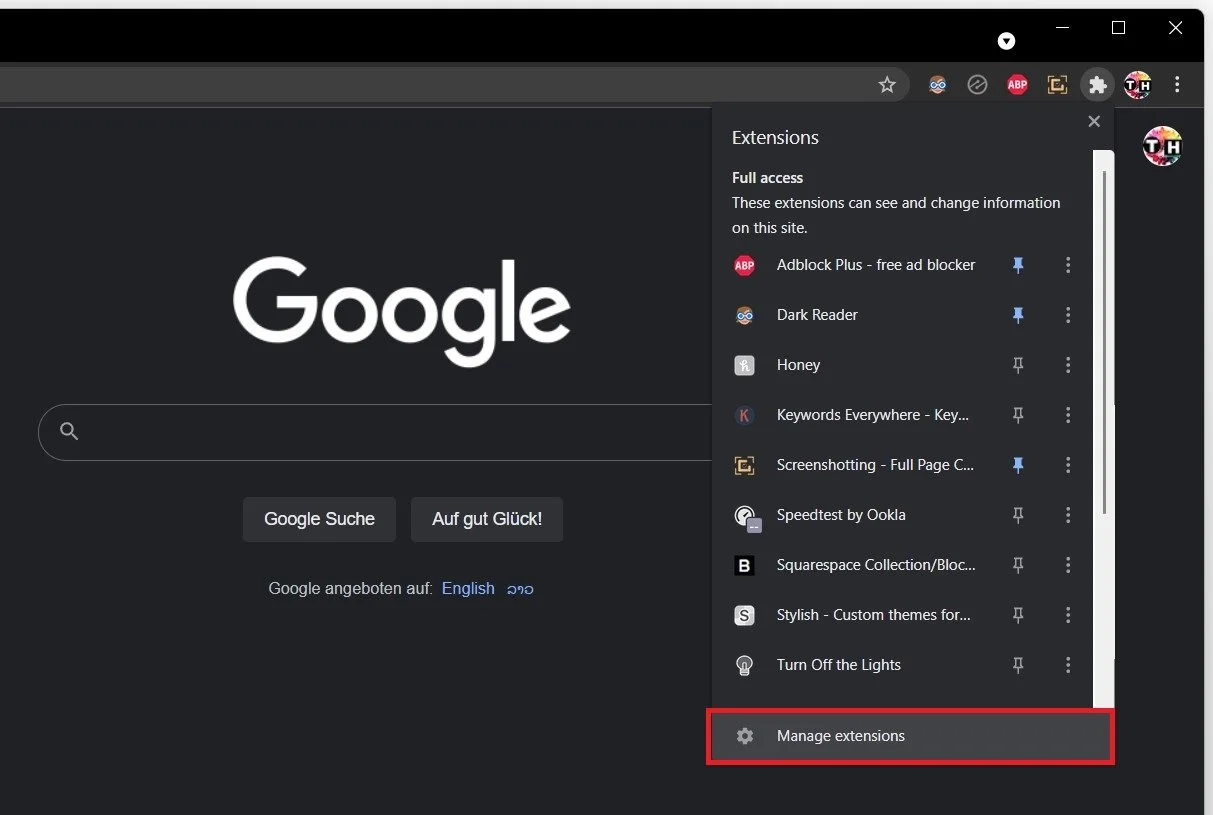
Google Chrome > Manage Extensions
This page will list all of the active and inactive browser extensions. Make sure to disable those which you don’t use regularly, as browser extensions can use up your bandwidth for downloading files using chrome.
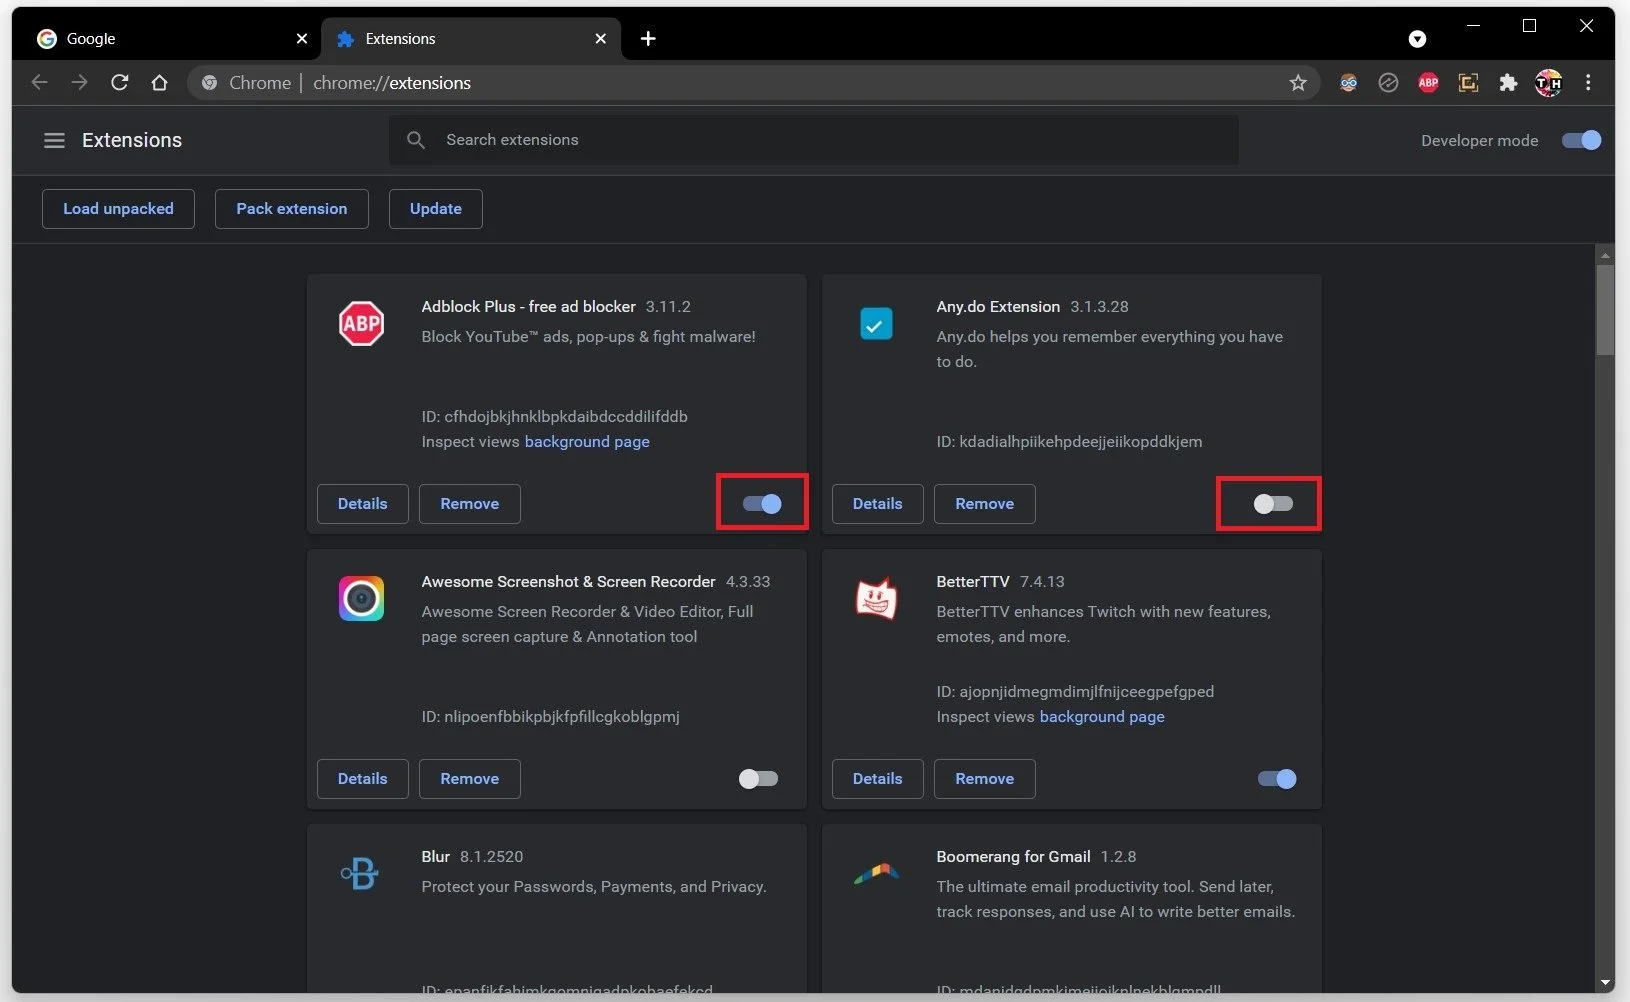
Disable most Google Chrome extensions, especially those with internet access
Disable Proxy & VPN
Disable any proxy servers or VPN services from running, which could worsen your connection.
LAN Settings
Open up your internet explorer. Click on the gear icon on the top right to access your settings and then select Internet Options. On this window, click on LAN Settings in the Connections tab, and ensure that the Automatically detect settings option is checked.

Internet Properties > Settings > Internet Options > LAN Settings
Network Connection Speed Test
If you are still experiencing slow download speeds, the issue might be related to your network connection. You should make sure that you’re using a reliable network connection. As the issue could be caused by a server outage or maintenance, you must troubleshoot where the issue is coming from. Click here to test your connection; everything you need will be listed below. Ensure your ping is below 100ms, as it could otherwise induce packet loss to your network connection. We suggest using an ethernet cable to ensure the best possible connection. If you have to use a WiFi connection, restart your router or modem if you haven't done this in a while, and reduce the number of devices connected to the same network.
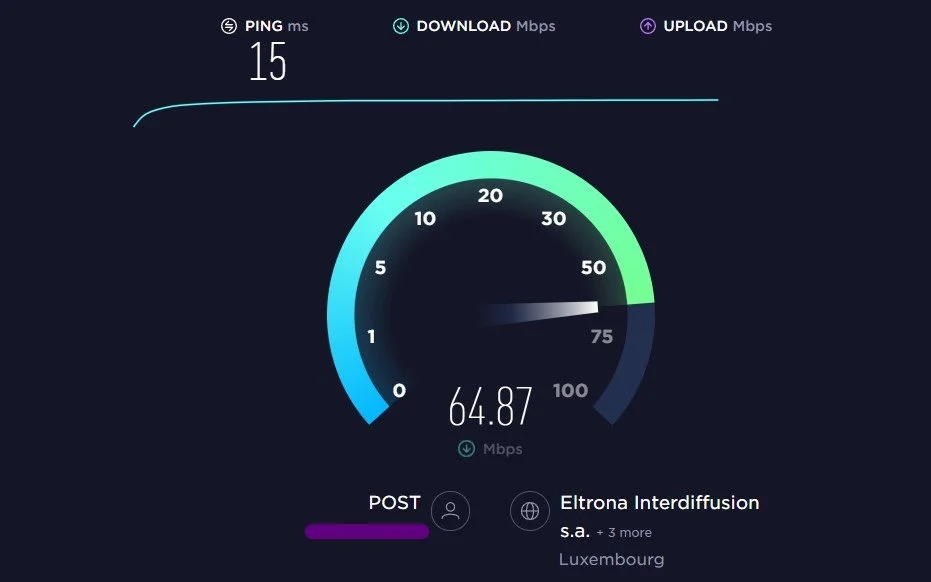
Test your average up- & download speed
Windows Command Prompt
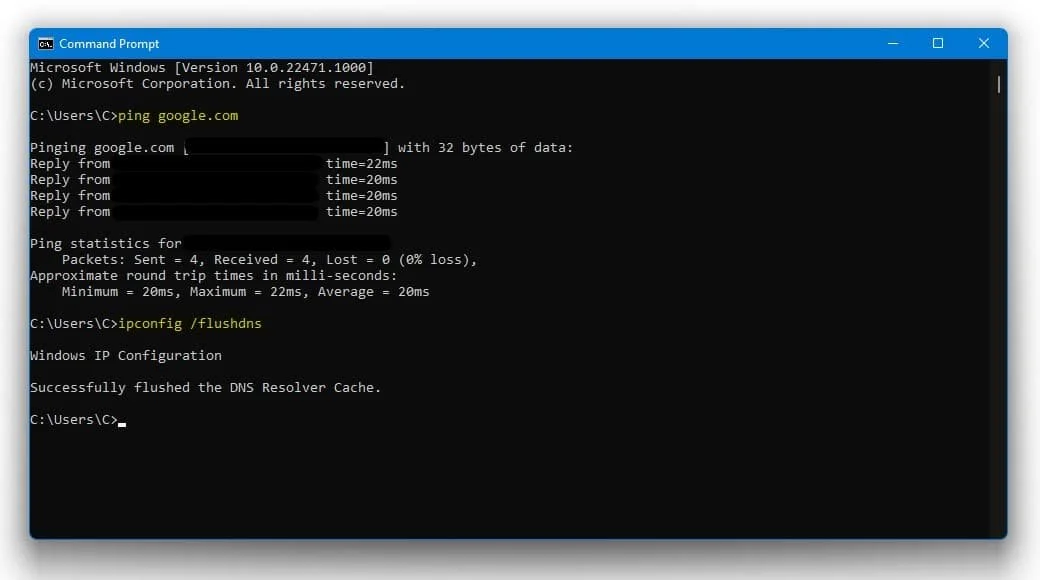
Open up your command prompt by searching for CMD and hitting enter. Use the following commands:
ping google.com
This command will check your latency and packet loss to Google's servers. If your ping is higher than 100ms, or if you encounter any packet loss, you should make a few changes to your connection, and follow the subsequent tweaks.
ipconfig /flushdns
This will flush and reset the content of your DNS resolver cache. Using this command will improve your latency issues.
Windows Command Prompt
End Network-Intensive Processes
Open up your task manager, and in the Performance tab, select Open Resource Monitor.
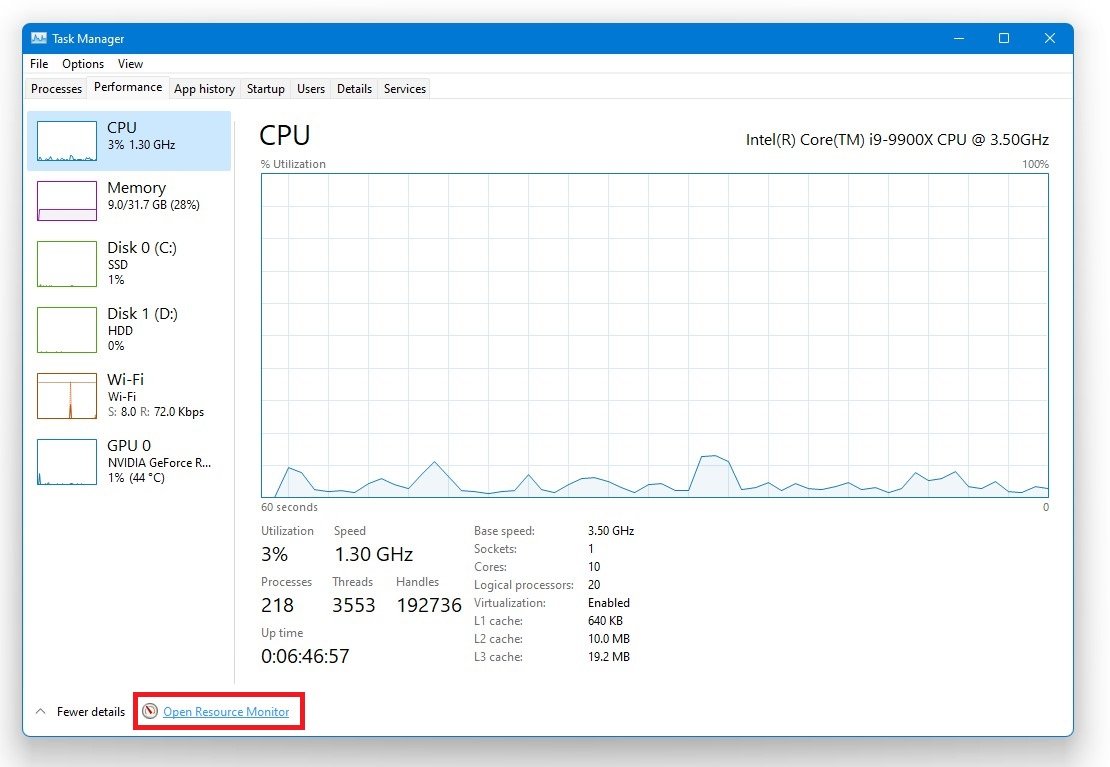
Task Manager > Performance > Resource Monitor
In the Network tab, open the Processes with network activity, and after a few seconds, you will see every process using your network connection. This might be your browser running in the background, Steam, or a download bottlenecking your connection. We suggest you only end the processes you know won't break your operating system. Below, you can also preview your network utilization in percent. Lastly, the issue could be linked to the site from which you’re trying to download files. In case it’s a high-traffic website, then we suggest trying to download at a later time.
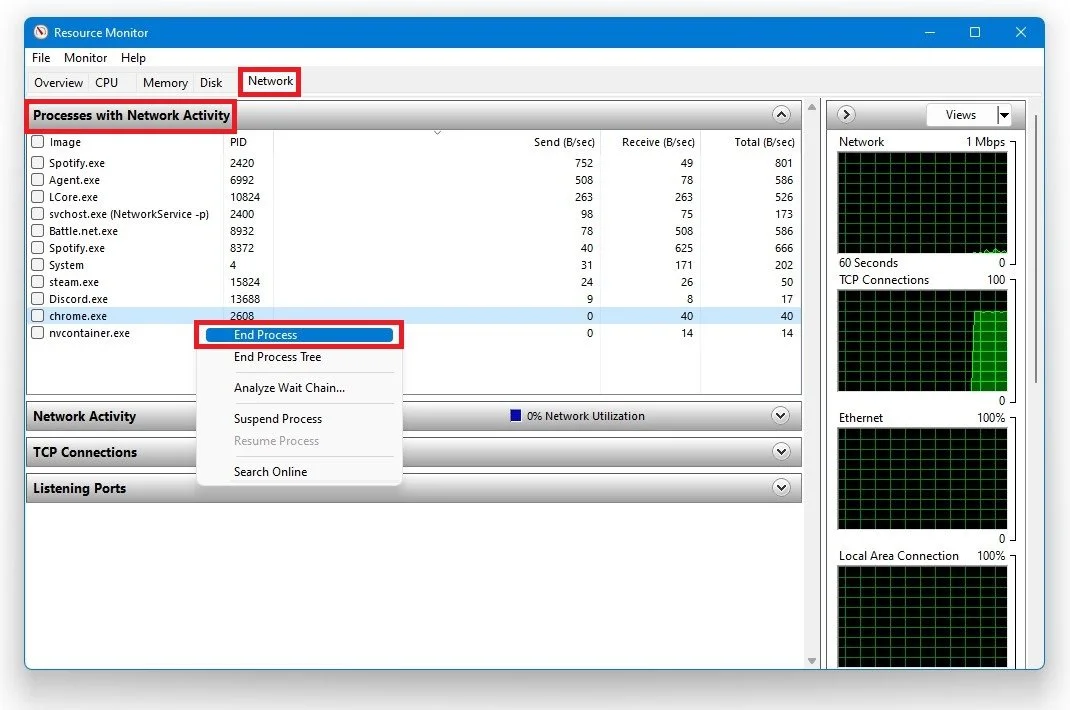
Resource Monitor > Network > Processes with Network Activity