

How To Fix Automatic Repair Loop in Windows - Complete Guide
Introduction
Dealing with the endless loop of "Preparing Automatic Repair" on Windows can disrupt your workflow and leave you searching for solutions. This guide aims to walk you through troubleshooting steps directly within Windows to escape this common but perplexing issue. Whether it's the daunting "Diagnosing your PC" or the "Automatic Repair: Your PC did not start correctly" error, understanding how to navigate to and utilize the Advanced options is your lifeline. By leveraging the built-in repair tools like Startup Repair and Command Prompt commands, you're equipped to tackle the problem head-on, potentially saving you from the frustration and downtime that comes with these Windows errors.
Access Advanced Options for Repair
When you're stuck in the "Preparing Automatic Repair" loop on a Windows PC, it can lead to a cycle of frustration. This loop often presents itself with messages such as "Diagnosing your PC," followed by a discouraging "Automatic Repair: Your PC did not start correctly." The key to breaking this cycle is navigating to the Advanced options. Follow these steps:
Restart Your PC:
Force restart your computer by holding down the power button until it turns off, then press the power button again to turn it back on.
Trigger Advanced Startup:
If the "Preparing Automatic Repair" screen appears again, allow it to run. You should see an "Advanced options" prompt. Select it.
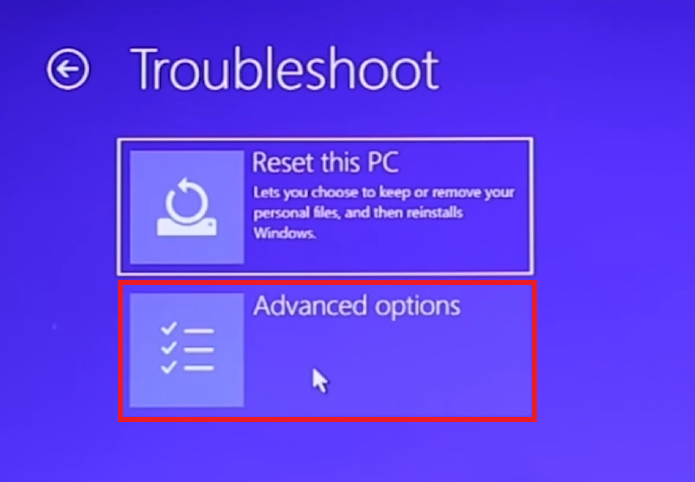
Troubleshoot > Advanced Options
Utilize Startup Repair
Within the Advanced options menu, your first line of defense is the "Troubleshoot" section, followed by another dive into "Advanced options." Here, the "Startup Repair" feature awaits your command. This tool is specifically designed to diagnose and mend startup files that are likely at the heart of your boot-up issues.
Navigate to Startup Repair:
Select "Troubleshoot."
Go to "Advanced options."
Choose "Startup Repair."
Run Startup Repair:
Follow the on-screen instructions to initiate the repair process.
This can take anywhere from 10 to 15 minutes.
If you're met with the same blue screen or a message indicating that "Startup Repair couldn't fix your PC," it's a signal to explore alternative solutions.

Utilize Command Prompt for System Repair
After your initial attempt with Startup Repair, if the problem remains, it's time to delve deeper with the Command Prompt. Access it by returning to the "Advanced options" menu, navigating through "Troubleshoot," and then "Advanced options" once more, where you'll select "Command Prompt." You may need to log in with your username and password.
Access Command Prompt:
Go to "Troubleshoot."
Select "Advanced options."
Click on "Command Prompt."
Execute the System File Checker:
In the Command Prompt window, type the command:
sfc /scannowand press Enter.This command triggers the System File Checker, a tool designed to scrutinize and mend corrupted files within the Windows operating system.
The scanning and repair process might last between 5 to 10 minutes.
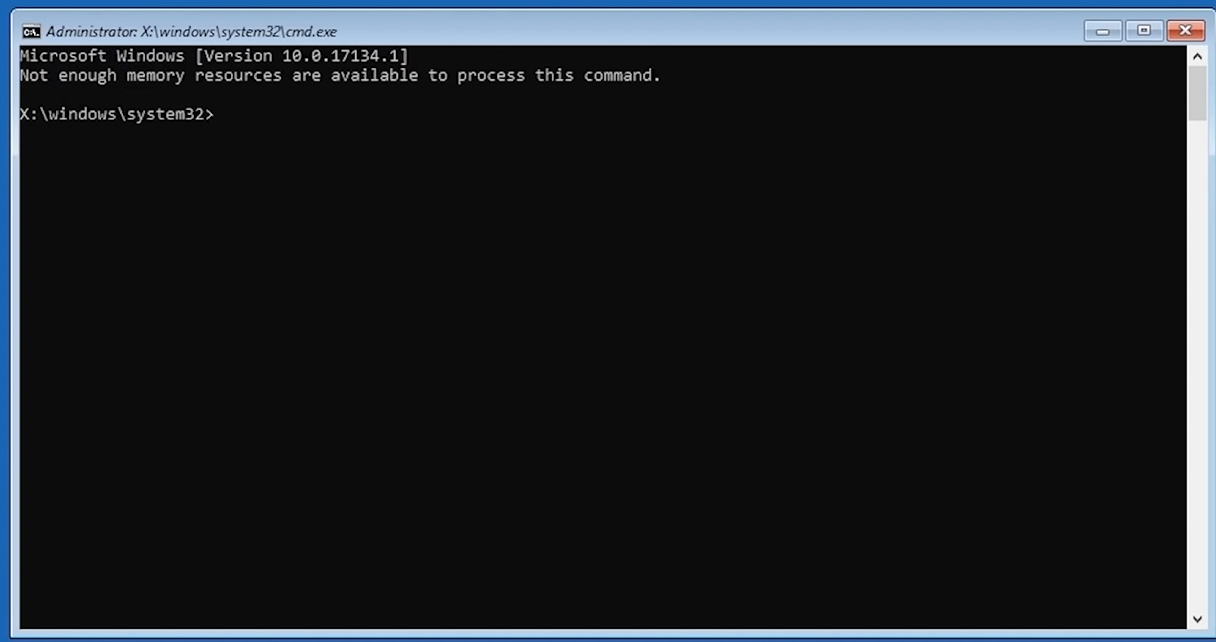
Administrator Command Prompt
Restart and Verify System Stability
After running the System File Checker, wrap up by typing exit in the Command Prompt and choosing "Continue" to reboot your PC. A successful restart, marked by the appearance of the Windows logo and a smooth system load, signifies the resolution of the Automatic Repair Loop error. This method stands as a direct and efficient approach to rectify common Windows boot issues, leveraging the built-in capabilities of the operating system.
By following these steps, you can effectively navigate and resolve the Automatic Repair Loop, ensuring your system is back up and running smoothly.
-
The Automatic Repair Loop is a Windows feature designed to diagnose and fix startup issues. However, sometimes it gets stuck in a loop, showing "Diagnosing your PC" or "Preparing Automatic Repair" without resolving the problem.
-
Restart your PC, and as it boots, look for prompts like pressing "F11" or "Del" to enter the BIOS or boot menu. From there, navigate to the "Advanced options" through the "Troubleshoot" menu.
-
Yes, "sfc /scannow" is a safe command provided by Windows to scan for and fix corrupted system files. It's a standard procedure recommended for troubleshooting various system issues.
-
The steps provided, including Startup Repair and using the System File Checker, do not affect your personal files. They target system files and settings to resolve boot issues.
-
If the issue persists after these attempts, consider restoring your system to an earlier point using System Restore or, as a last resort, resetting your Windows installation while keeping your files.


